Setting up Navmesh in Unity
If you’re building an AI character that needs to walk around your level without bumping into walls or falling off cliffs, you need a…
Setting up Navmesh in Unity
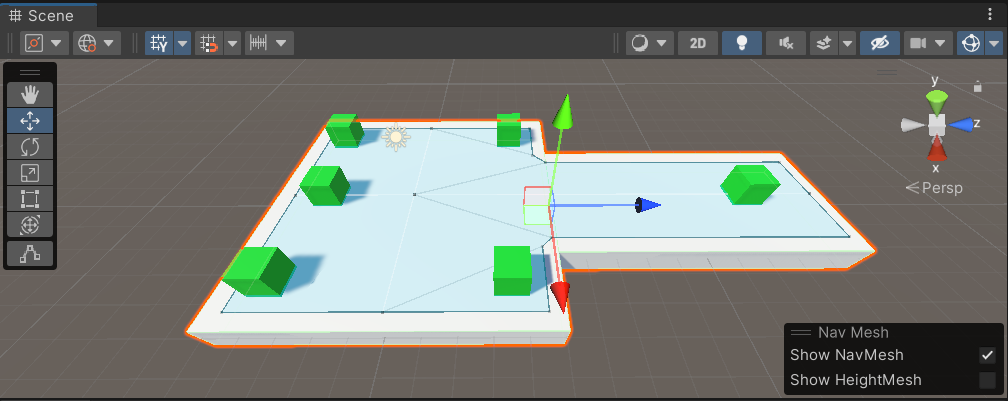
If you’re building an AI character that needs to walk around your level without bumping into walls or falling off cliffs, you need a NavMesh. It’s basically a map that tells your AI where it can and can’t go.
Here’s the thing — it’s not complicated. You don’t need to understand the math. You just need to follow a few steps and know what the settings actually do.
What’s a NavMesh Anyway?
Think of it like this: you mark the walkable surfaces in your level, Unity does some processing, and you get a blue mesh overlay that represents where your AI agents can move. That’s it.
The NavMesh doesn’t track individual pixels or exact geometry. It’s an approximation — stairs become flat surfaces; tight gaps get mapped as simplified spaces. This keeps file sizes small and runtime performance fast. It’s a tradeoff, and honestly, it works well in practice.
The Basic Setup (4 Steps)
1. Select Your Geometry
Open your scene. Grab the floor, walls, ramps — anything your character should be able to walk on. Also include obstacles (boxes, furniture, whatever blocks movement). Don’t select everything blindly; be intentional about what affects navigation.
2. Mark as Navigation Static
With objects selected, look at the Inspector. Top right, there’s a Static dropdown. Click it and check Navigation Static.
Alternatively, open the Navigation window (Window > AI > Navigation) and check the box there. Both do the same thing.
3. Adjust the Bake Settings
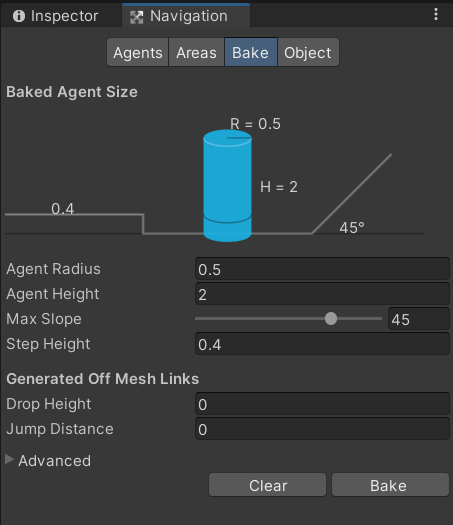
This is where most people get confused. Open the Navigation window and find the Bake tab. These settings matter:
- Agent Radius: How close can the AI’s center get to a wall? Use something realistic. A human is about 0.4 units wide (half-radius). Increase it if your agent needs more personal space.
- Agent Height: How tall is your agent? If it’s 2 units tall and your doorways are 1.8 units, the AI won’t fit. Make sure this matches your character.
- Max Slope: How steep can a ramp be before your agent refuses to walk it? 45 degrees is typical for humanoid characters. Steeper values let characters climb slopes.
- Step Height: How high can your agent step up? Set this based on stairs or small obstacles in your level. Too low and AI can’t climb anything. Too high and they’ll try impossible jumps.
Adjust these to match your specific level and character.
4. Bake
Click Bake. Unity processes everything and generates the NavMesh.
You’ll see a blue overlay appear on your scene geometry. That blue area is where your AI can walk. If it looks wrong, adjust the settings above and bake again.
A Useful Thing to Know
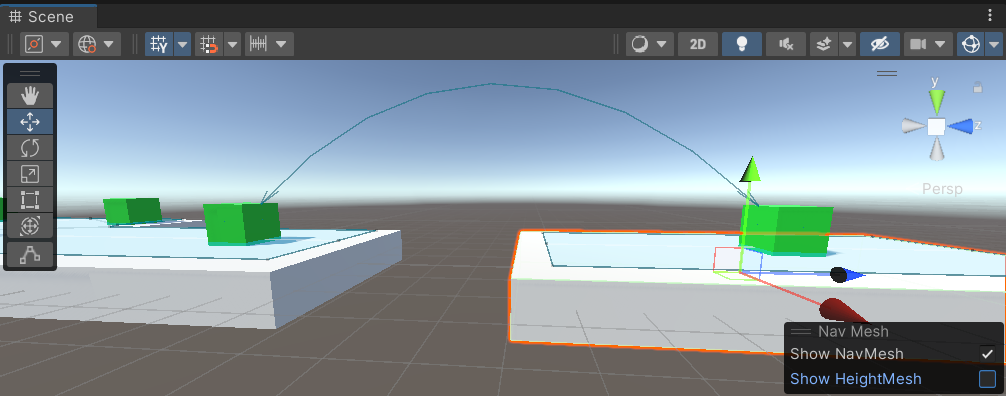
The NavMesh represents where the center of your agent can move, not where the agent itself physically stands. So even though the blue mesh looks smaller than your walkable surface, that’s correct. Think of your agent as a point moving on a shrunken surface — the radius around that point is the agent’s actual width.
This matters when you’re checking if an AI can fit through a gap. It will, because the mesh already accounts for the agent’s size.
Where Does It Get Saved?
After baking, Unity creates a NavMesh.asset file in a folder named after your scene.
Example: Scene is called “Level_01” → NavMesh lives at Assets > Level_01 > NavMesh.asset
Don’t move it around or delete it. Keep it with your scene.
Quick Tips
- Tight spaces? You might need to add a tiny bit of extra space in your geometry. The NavMesh is an approximation, so sometimes it can’t fit through gaps your eyes think are big enough.
- Testing? Add a NavMesh Agent component to a character and use
NavMeshAgent.SetDestination(). Watch it move. If it gets stuck, rebake. - Static menu alternative: Instead of the Navigation window, you can mark objects static through Inspector > Static > Navigation Static at the top. Faster if the window isn’t open.
That’s It
Seriously. Mark objects, adjust three numbers, click bake. Your AI now has a map to follow.
The NavMesh isn’t magic, but it’s one of those tools that feels like it is once you stop overthinking it.
메타데이터
- post_id
- dfeb5f7aeb8b
- slug
- setting-up-navmesh-in-unity-dfeb5f7aeb8b
- url
- https://medium.com/@250509/setting-up-navmesh-in-unity-dfeb5f7aeb8b
- canonical_url
- https://medium.com/@250509/setting-up-navmesh-in-unity-dfeb5f7aeb8b
- author_url
- https://medium.com/@250509
- status
- ok
- fetched_at
- 2026-06-22 19:40:15