Practical: Attaching and Using a New Disk on Windows Server on Azure
In this practical example, I will explain how to attach a new disk to a Windows Server in Azure, initialize it, and make it ready for use.
Practical: Attaching and Using a New Disk on Windows Server on Azure
In this practical example, I will explain how to attach a new disk to a Windows Server in Azure, initialize it, and make it ready for use.

First, since we are working on Azure, we attach a new managed disk to the virtual machine (example: elomdadisk).

attach disk
After attaching the disk, it appears in the operating system, but it is not usable yet.

before initialization
When we open Disk Management, Windows prompts us to initialize the disk because it is still uninitialized.

Wizard to Initialize New Disk

Appears as unallocated
Instead of completing everything from Disk Management, we will continue the process using Server Manager.
The first required step is to initialize the disk.
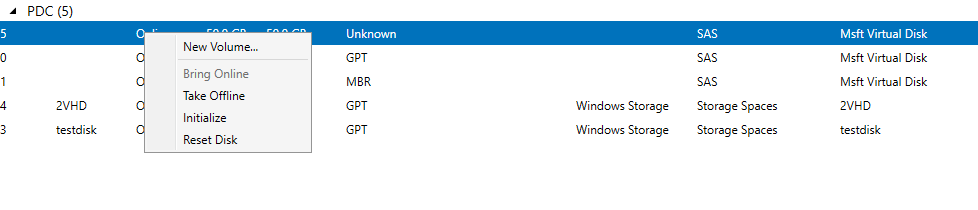
Initialize disk

Appers in GPT partioning Schema

appears as unallocated disk
Once the disk is initialized, we have two options:
- Create a Storage Pool (to merge more than one disk), or
- Create a simple volume directly on the disk.
We choose to create a Storage Pool

Greate a 50 G storage Pool

New storage pool
Notice: The physical disk will disappear from Disk Management. For example, the original 50 GB disk will no longer appear as a normal disk.

Next, we create a Virtual Disk from the Storage Pool.

create a virtual disk
In this example, we create a 20 GB virtual disk, which then appears as a new disk (for example, Disk 6) in Disk Management.

Virtual disk created
After that, we create a volume/partition on this virtual disk, such as a 15 GB partition.

create new volume
Once formatted, the volume becomes ready and can be used normally by the operating system.
At this point, the disk setup is complete and ready for use.


Appears in the Windows file system as the W partition.
In this article, we saw how to add a new disk to a Windows Server and make it ready to use. We attached the disk, initialized it, created a storage pool and a virtual disk, then made a volume and formatted it. After these simple steps, the disk became ready for storing data and can be used normally
메타데이터
- post_id
- e21b38995b14
- slug
- practical-attaching-and-using-a-new-disk-on-windows-server-on-azure-e21b38995b14
- url
- https://medium.com/@amallbadr38/practical-attaching-and-using-a-new-disk-on-windows-server-on-azure-e21b38995b14
- canonical_url
- https://medium.com/@amallbadr38/practical-attaching-and-using-a-new-disk-on-windows-server-on-azure-e21b38995b14
- author_url
- https://medium.com/@amallbadr38
- status
- ok
- fetched_at
- 2026-06-24 23:31:39


