Building a Rotating 3D Cube Renderer in C (From Scratch)
Modern graphics engines hide a huge amount of complexity behind APIs like OpenGL, Vulkan, or DirectX. But at the core, every 3D renderer…
Building a Rotating 3D Cube Renderer in C (From Scratch)
Modern graphics engines hide a huge amount of complexity behind APIs like OpenGL, Vulkan, or DirectX. But at the core, every 3D renderer still performs the same fundamental tasks:
- Transform 3D geometry
- Project it onto a 2D screen
- Convert mathematical lines and shapes into pixels
In this article we will build a minimal 3D software renderer in C that renders a rotating cube, entirely on the CPU.
No OpenGL. No graphics libraries. Just math, pixels, and a framebuffer.
Repository:
GitHub: Abdul-Rahman-Ibrahim/WireCube
What We Will Build
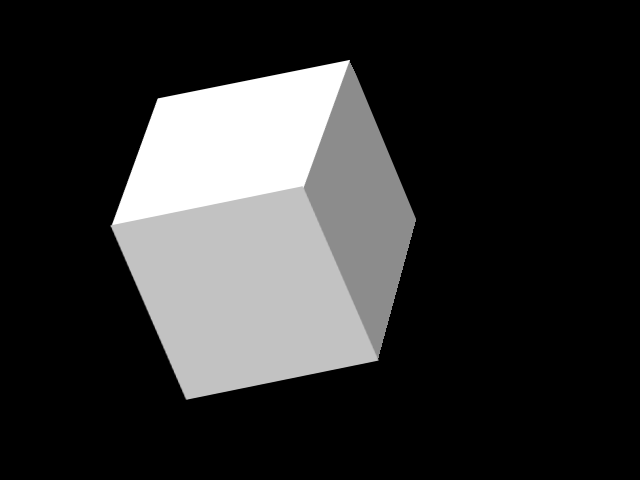
The program generates frames of a rotating cube and saves them as PPM images. These frames are then played sequentially to create an animation.
Conceptually the rendering pipeline looks like this:
3D Cube ↓ Rotation Transform ↓ Camera Transform ↓ Perspective Projection ↓ Screen Mapping ↓ Line Rasterization (Bresenham) ↓ Framebuffer ↓ Image Output
This entire pipeline is implemented in roughly 300 lines of C.
Step 1 — The Framebuffer
A framebuffer is simply a 2D grid of pixels.
Each pixel stores a color value.
In the program it is represented as:
framebuffer[HEIGHT][WIDTH][3]The third dimension represents the RGB color channels:
framebuffer[y][x][0]→ Redframebuffer[y][x][1]→ Greenframebuffer[y][x][2]→ Blue
For example:
framebuffer[100][200] = (255,0,0)This sets the pixel at coordinate (200,100) to red.
All rendering operations eventually modify pixels inside this buffer.
Step 2 — Plotting a Pixel
The most basic operation in graphics is placing a pixel on the screen.
Conceptually we use a function like:
plot(x, y, color)The function checks whether the coordinates are inside the screen boundaries and then writes the color to the framebuffer.
Conceptually it works like this:
if pixel inside screen
    framebuffer[y][x] = color
Every shape we render will eventually be broken down into many pixel writes.
Step 3 — Drawing Lines
Our cube consists only of edges, so we need a way to draw lines efficiently.
To do this we implement Bresenham’s line algorithm: Bresenham’s line algorithm — Wikipedia.
A naive approach to drawing a line would use the line equation:
y = mx + bHowever this approach requires floating point calculations and rounding, which was expensive on early computers.
Bresenham’s insight was that instead of computing the exact line equation, we can track an error term that tells us which pixel is closest to the ideal line.
The algorithm works roughly like this:
- Compute the horizontal and vertical distances between two points
- Step along the dominant direction
- Use an error accumulator to decide when to move vertically
The key idea is that the algorithm uses only integer arithmetic.
This made it extremely fast and it became one of the foundational algorithms in computer graphics.
Step 4 — Representing the Cube
The cube is defined by 8 vertices in 3D space.
Example coordinates:
( 1,  1,  1)
(-1,  1,  1)
( 1, -1,  1)
(-1, -1,  1)
( 1,  1, -1)
(-1,  1, -1)
( 1, -1, -1)
(-1, -1, -1)
Visually the cube looks like this:
      A------B
     /|     /|
    C------D |
    | E----|-F
    |/     |/
    G------H
Edges are defined as pairs of vertex indices.
For example:
{0,1}
{2,3}
{0,2}
...
Drawing the cube simply means drawing lines between these vertex pairs.
Step 5 — Rotating the Cube
To animate the cube we rotate it a little bit every frame.
In 3D graphics, rotation is performed using rotation matrices.
For example, rotating around the Z axis uses the following equations:
x' = x cosθ − y sinθ
y' = x sinθ + y cosθ
In the code we can rotate around multiple axes:
- XY plane
- XZ plane
- YZ plane
Each frame increases the angle slightly:
theta += 2°This produces the smooth rotation seen in the animation.
Step 6 — Camera Transformation
Before projecting the cube onto the screen we can choose to transform coordinates relative to the camera.
This is done by subtracting the camera position from each vertex:
v.x = v.x - camera.x
v.y = v.y - camera.y
v.z = v.z - camera.z
This effectively moves the world relative to the camera viewpoint.
Step 7 — Perspective Projection
Humans perceive depth because distant objects appear smaller. To simulate this we apply perspective projection.
The idea is simple:
x_screen = x / z
y_screen = y / z
Points that are farther away (large z) shrink toward the center of the image.
This produces the familiar 3D perspective effect.
Step 8 — Mapping to Screen Coordinates
After projection the coordinates lie in a normalized range:
[-1 , 1]We must convert them into actual pixel coordinates.
For example:
screen_x = (x + 1) * 0.5 * WIDTH
screen_y = (1 - (y + 1) * 0.5) * HEIGHT
This maps normalized coordinates to real screen positions.
Step 9 — Rendering the Edges
Now everything comes together.
For each edge of the cube we call something like:
createLine(
    vertexA.x,
    vertexA.y,
    vertexB.x,
    vertexB.y
)
Internally this calls:
plotLine()Which repeatedly calls:
plot()Until the entire line has been rasterized into pixels.
Step 10 — Writing the Image
Once the framebuffer is filled we save it as a PPM image.
PPM is a very simple image format:
P3
WIDTH HEIGHT
255
R G B R G B R G B ...
Because it is plain text, we can generate it directly from C without any image libraries.
Each frame becomes a file like:
frames/cube000.ppm
frames/cube001.ppm
frames/cube002.ppm
Step 11 — Creating Animation
After generating the frames we can play them sequentially.
Using ffplay from FFmpeg:
ffplay -framerate 6 frames/cube%03d.ppmThis creates the rotating cube animation.
Why This Is Interesting
Even though modern GPUs render billions of pixels per second, the core ideas remain the same:
- geometry transformation
- projection
- rasterization
- framebuffer output
By implementing a renderer yourself you gain intuition about how graphics pipelines actually work.
Many classic game engines in the 1990s used very similar techniques before GPU acceleration became common.
Possible Improvements
This renderer is intentionally minimal, but there are many ways to extend it:
- face filling
- hidden surface removal
- z-buffering
- shading
- lighting
- anti-aliased lines
- loading real 3D models
At that point you’d essentially be building a tiny software rendering engine.
GitHub: Abdul-Rahman-Ibrahim/WireCube
메타데이터
- post_id
- e2b889a89c2b
- slug
- building-a-rotating-3d-cube-renderer-in-c-from-scratch-e2b889a89c2b
- url
- https://medium.com/@abdulrahmanibrahim.ish/building-a-rotating-3d-cube-renderer-in-c-from-scratch-e2b889a89c2b
- canonical_url
- https://medium.com/@abdulrahmanibrahim.ish/building-a-rotating-3d-cube-renderer-in-c-from-scratch-e2b889a89c2b
- author_url
- https://medium.com/@abdulrahmanibrahim.ish
- status
- ok
- fetched_at
- 2026-06-15 20:49:13




