Building REST API in Spring Boot with H2 Database
Learn how to create, store, and retrieve data in a lightweight in-memory database using Spring Boot, JPA, and H2.
Building REST API in Spring Boot with H2 Database
Learn how to create, store, and retrieve data in a lightweight in-memory database using Spring Boot, JPA, and H2.
Developers often need a quick and simple API setup to test CRUD operations before moving to a production-level database. In this tutorial, we’ll walk through how to build a Spring Boot REST API for managing products using an H2 in-memory database.
We’ll create a ProductController, a ProductService, a ProductRepository, and a data initialization class that preloads our database with sample data at startup.
Step 1: The Product Entity
We’ll start with the Product class that represents the data structure.
@Entity
public class Product {
    @Id
    @GeneratedValue(strategy = GenerationType.IDENTITY)
    private Long id;
    private String name;
    private int quantity;

    public Product(String laptop, int quantity) {
        this.name = laptop;
        this.quantity = quantity;
    }

    public Product() { }

    public String getName() {
        return name;
    }

    public void setName(String name) {
        this.name = name;
    }

    public int getQuantity() {
        return quantity;
    }

    public void setQuantity(int quantity) {
        this.quantity = quantity;
    }
}
This class defines the id, name, and quantity fields, which we’ll use throughout the project.
Step 2: The Product Repository
The ProductRepository interface allows us to interact with the database easily using Spring Data JPA.
public interface ProductRepository extends JpaRepository<Product, Long> {
}
This gives us built-in CRUD methods such as findAll(), save(), and deleteById() with zero boilerplate code.
Step 3: The Product Service
Next, we’ll create a service layer to encapsulate business logic between the controller and repository.
@Service
public class ProductService {
    @Autowired
    private ProductRepository productRepository;

    public List<Product> getAllProducts() {
        return productRepository.findAll();
    }

    public Product addProduct(Product product) {
        return productRepository.save(product);
    }
}
Step 4: The Product Controller
Here’s the ProductController that exposes HTTP endpoints to the client.
@RestController
@RequestMapping("/products")
public class ProductController {

    @Autowired
    private ProductService productService;

    @GetMapping
    public List<Product> getAllProducts() {
        return productService.getAllProducts();
    }

    @PostMapping
    public Product createProduct(@RequestBody Product product) {
        return productService.addProduct(product);
    }
}
This controller lets users retrieve all products via a GET request and add a new product through a POST request.
Step 5: Data Initialization with @PostConstruct
We can preload data into the H2 database using a startup initialization class. The @Profile annotation makes sure it only runs in specific environments (e.g., dev).
@Component
@Profile("dev")
public class DevInitializer {

    @Autowired
    private ProductRepository productRepository;

    @PostConstruct
    public void init() {
        productRepository.save(new Product("Laptop", 1000));
        productRepository.save(new Product("Smartphone", 7000));
        productRepository.save(new Product("Digital Camera", 1400));
        productRepository.save(new Product("Drone", 2200));
        productRepository.save(new Product("Headset", 100));
    }
}
Once the application starts with the dev profile, you’ll have sample data to test your API instantly.
Step 6: Testing with H2 Console
Spring Boot includes an embedded H2 console for visual database inspection.
Enable it in your application.properties file:
spring.h2.console.enabled=true
spring.h2.console.path=/h2-console
spring.datasource.url=jdbc:h2:mem:testdb
spring.datasource.driverClassName=org.h2.Driver
spring.datasource.username=sa
spring.datasource.password=
spring.jpa.hibernate.ddl-auto=update
spring.profiles.active=dev
You can now open http://localhost:8080/h2-console and connect to the in-memory database.
In order to access that in memory database, open localhost:8080/h2-console you will see following screen.
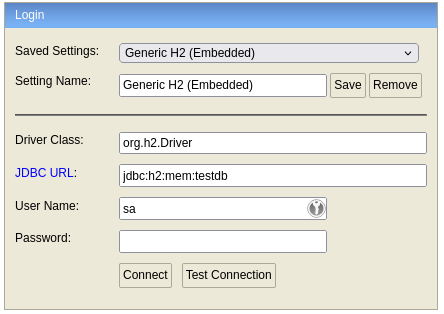
H2 in-memory database login screen
After successful connection, you will see something like this.
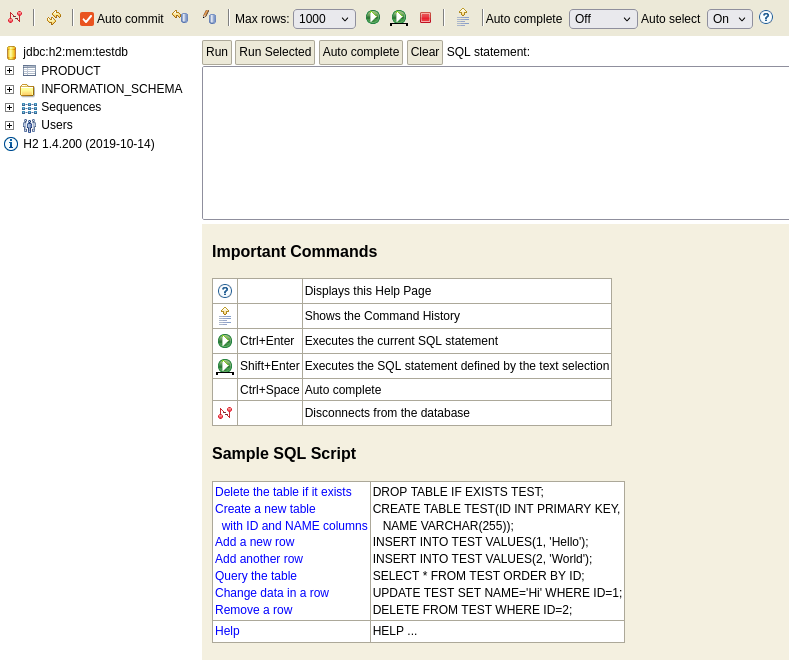
overview of available tables and schemas in h2 in-memory database
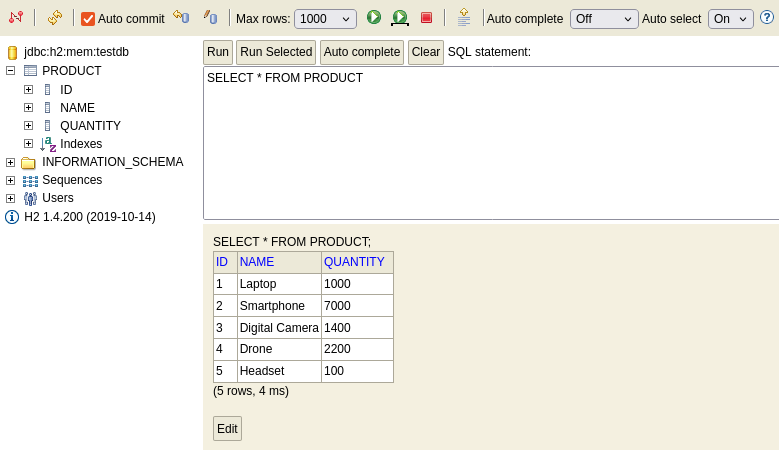
data stored in product table in h2 in-memory database
And if we click on Product, we will see all stored data in the console. And off course, we can use our controller endpoint localhost:8080/products to see all available data that is preloaded.
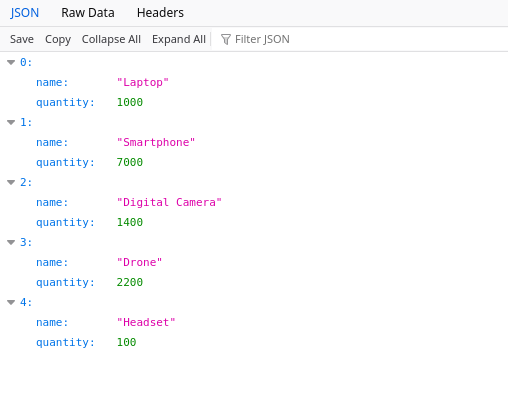
Json output of preloaded data from a rest api endpoint using spring data jpa.
SEO Keywords
- Spring Boot REST API
- H2 Database example
- Spring Data JPA tutorial
- ProductController Spring Boot
- Spring Boot DevInitializer
Conclusion
By following these steps, you’ve built a simple yet powerful Spring Boot REST API that connects with an H2 in-memory database. You can now perform CRUD operations, test endpoints easily, and preload sample data for development. This setup serves as a foundation for more complex applications involving service layers, real databases, and advanced endpoints.
메타데이터
- post_id
- e2fc65aabbae
- slug
- building-rest-api-in-spring-boot-with-h2-database-e2fc65aabbae
- url
- https://medium.com/@mgm06bm/building-rest-api-in-spring-boot-with-h2-database-e2fc65aabbae
- canonical_url
- https://medium.com/@mgm06bm/building-rest-api-in-spring-boot-with-h2-database-e2fc65aabbae
- author_url
- https://medium.com/@mgm06bm
- status
- ok
- fetched_at
- 2026-07-14 07:02:06