Linux Server Hardening — Real World Introduction
A days ago, during a routine security review, an organization discovered that one of its Linux servers had been accessible from the…
Linux Server Hardening — Real World Introduction
A days ago, during a routine security review, an organization discovered that one of its Linux servers had been accessible from the internet for months with password-based SSH authentication enabled. The server was running critical applications and appeared to be functioning normally. However, after reviewing authentication logs, administrators found thousands of failed login attempts originating from different IP addresses around the world. Fortunately, the attackers had not gained access, but the incident highlighted a common reality: production servers are constantly being scanned and targeted, whether an organization realizes it or not.
In another case, a former employee’s account remained active long after leaving the company. The account was no longer being used, but because it had not been disabled, it still provided a valid path into the system. Situations like these are far more common than sophisticated zero-day attacks and often stem from simple oversights in system administration.
Linux servers power critical infrastructure across organizations, hosting applications, databases, monitoring platforms, container workloads, and business services. While a fresh Linux installation provides a stable operating system, it does not automatically implement all the security controls required for a production environment. Default settings, unused accounts, weak authentication mechanisms, excessive privileges, and insecure file permissions can all increase the attack surface of a server.
Linux hardening is the process of reducing these risks by implementing security controls that strengthen authentication, restrict access, enforce accountability, and protect sensitive system resources. The goal is not to make a server impossible to compromise, but to make unauthorized access significantly more difficult while ensuring the system remains manageable for administrators.
In this guide, we will walk through practical Linux hardening techniques that can be implemented on enterprise Linux servers. The focus is on controls commonly used in real-world environments, including password policies, account security, SSH hardening, privilege management, file permission reviews, and privileged executable auditing. All examples are performed using command-line tools and can be applied directly on Linux servers without relying on graphical interfaces.
Imagine you have just deployed a Linux server for a company application.
The application is working perfectly. Users can access it. The database is running. Everything appears healthy.
A week later, an employee leaves the organization.
Three months later, an attacker obtains that employee’s old password from a data breach on another website. The employee had reused the same password everywhere.
The attacker tries the leaked username and password against your Linux server.
The login succeeds.
The attacker now has access to a legitimate account on a production server.
No software vulnerability was exploited. No firewall was bypassed. No malware was used.
The attacker simply logged in using a valid account whose password should have been changed long ago.
This is exactly why server hardening exists.
Server hardening is the process of reducing the attack surface of a server by removing unnecessary risks, enforcing security controls, and limiting opportunities for attackers.
Think of a Linux server like a house.
A newly installed Linux server is similar to a newly built house:
- Doors are installed.
- Windows are installed.
- Electricity works.
- Water works.
The house is functional.
But would you move your family into that house without:
- Installing locks?
- Restricting who gets keys?
- Adding security cameras?
- Setting rules for visitors?
Probably not.
A Linux server is no different.
A freshly installed Linux server is designed to work, not necessarily to be secure.
Hardening is the process of adding those security controls.
Some common hardening activities include:
- Enforcing password policies
- Expiring passwords periodically
- Locking inactive accounts
- Restricting administrative access
- Securing SSH access
- Auditing user activity
- Monitoring critical file changes
- Enforcing least privilege

In this blog series, we will start with one of the most fundamental hardening controls:
Password Aging and Password Expiration Policies
This control ensures that user passwords cannot remain unchanged forever and helps reduce the risk of compromised credentials being used indefinitely.
1. Enforcing Password Expiration Policies
One of the most common weaknesses found during Linux server assessments is the absence of password expiration controls.
When a password never expires, a compromised credential can remain valid indefinitely. An attacker who obtains the password today may still be able to access the server months or even years later.
As part of the hardening process, the first step is to identify interactive users on the server and review their current password aging configuration.
Step 1.1: Identify Interactive Users
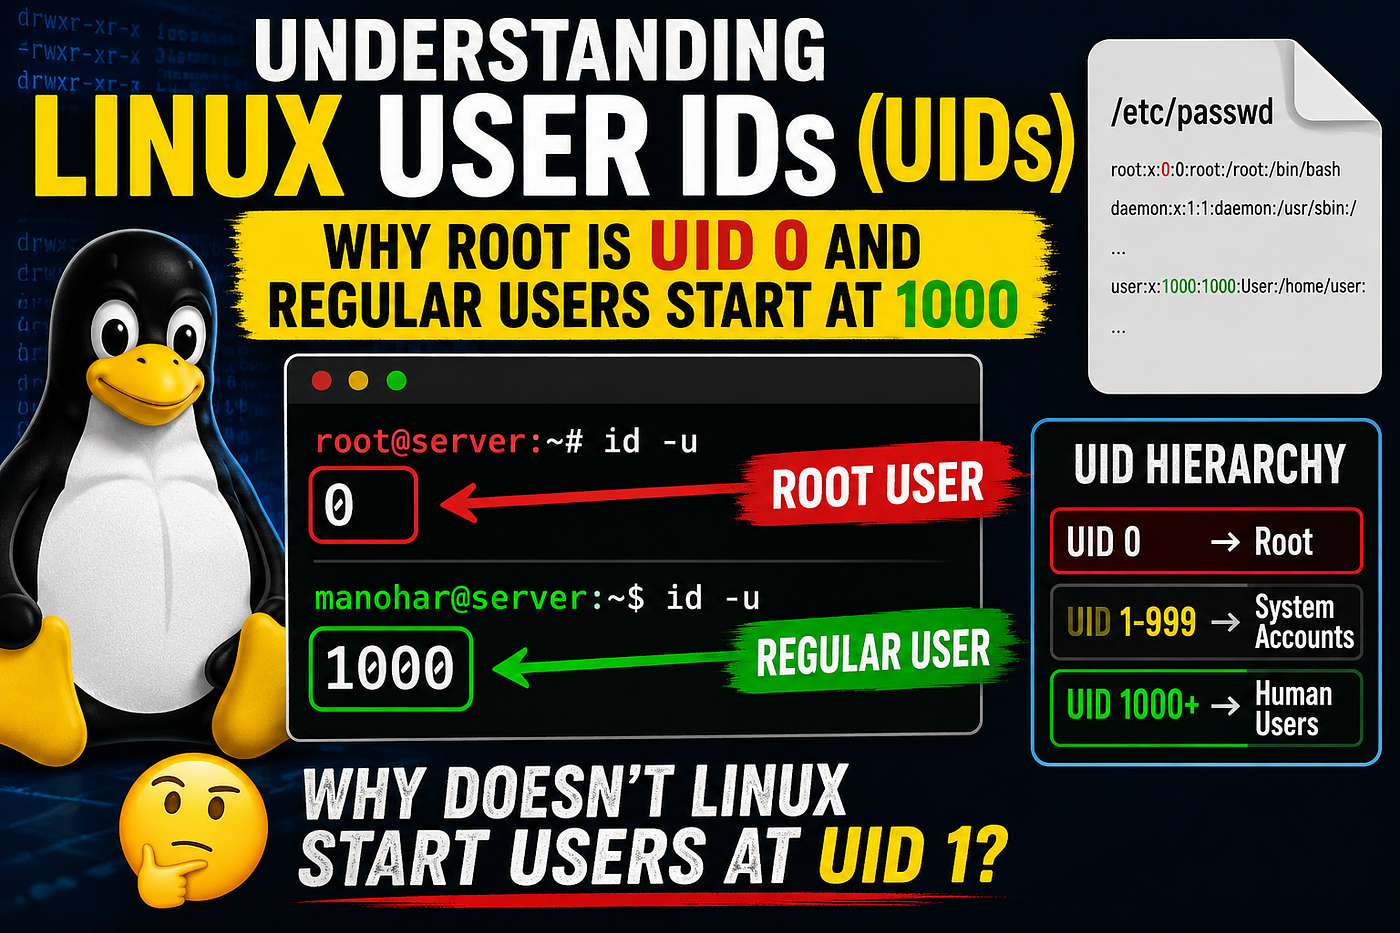
The following command lists users that can potentially log in to the system:
awk -F: '$3 >= 1000 && $7 !~ /(nologin|false)/ {print $1}' /etc/passwdOutput from our server:
centosThe server contains a single interactive user account named centos.
Step 1.2: Review Existing Password Aging Settings
To inspect the password aging configuration for all interactive users:
for u in $(awk -F: '$3 >= 1000 && $7 !~ /(nologin|false)/ {print $1}' /etc/passwd)
do
    echo "===== $u ====="
    chage -l "$u"
done
Output:
===== centos =====
Last password change                                    : never
Password expires                                        : never
Password inactive                                       : never
Account expires                                         : never
Minimum number of days between password change          : 0
Maximum number of days between password change          : 99999
Number of days of warning before password expires       : 7
Based on the assessment findings, the current configuration allows passwords to remain valid indefinitely. To align the server with enterprise security practices, the following password aging policy will be implemented:
Analysis of the Findings
The account is currently configured with a maximum password age of 99999 days.
This effectively means the password never expires.
99999 days ≈ 273 yearsAdditional observations:
- Password expiration is disabled.
- Account inactivity controls are not configured.
- The account itself never expires.
- Users can change passwords repeatedly because the minimum age is set to 0.
From a hardening perspective, this is a weak configuration because a stolen password could remain valid indefinitely.
Step 1.3: Define the Password Aging Policy
For this server, the following policy will be implemented:
| Setting                                | Value   |
| -------------------------------------- | ------- |
| Minimum Password Age                   | 1 Day   |
| Maximum Password Age                   | 90 Days |
| Warning Period Before Password Expiry  | 7 Days  |
| Account Inactive After Password Expiry | 30 Days |
This policy forces periodic password rotation while providing users sufficient warning before expiration.
Step 1.4: Apply the Policy
Configure the existing account:
chage -m 1 -M 90 -W 7 -I 30 centosExplanation:
-m 1   User must wait at least 1 day before changing password again
-M 90  Password expires after 90 days
-W 7   User receives warnings 7 days before expiration
-I 30  Account becomes inactive 30 days after password expiration
Step 1.5: Verify the Configuration
Run:
chage -l centosExpected output:
Minimum number of days between password change          : 1
Maximum number of days between password change          : 90
Number of days of warning before password expires       : 7
Password inactive                                       : 30 days after password expiration
Security Benefit
Before hardening:
Password validity = UnlimitedAfter hardening:
Password validity = 90 days
Warning period = 7 days
Inactive account lockout = 30 days
This reduces the window during which a compromised password can be abused and aligns the server with common enterprise security practices.
2. Enforcing Strong Password Policies with libpwquality
Password expiration policies reduce the lifetime of a password, but they do not guarantee that the password itself is strong.
Consider the following passwords:
Password123
Welcome123
Summer2026
Admin@123
All of these passwords may satisfy basic password requirements, yet they are predictable and commonly targeted in password attacks.
To reduce the risk of brute-force attacks, dictionary attacks, and password guessing, Linux provides password quality enforcement through the libpwquality package.
How Password Complexity Enforcement Works
When a user attempts to create or change a password, Linux evaluates the password against a defined set of rules.
If the password does not meet the requirements, the change is rejected.
Common checks include:
| Check                       | Purpose                          |
| --------------------------- | -------------------------------- |
| Minimum Length              | Prevent short passwords          |
| Uppercase Characters        | Increase complexity              |
| Lowercase Characters        | Increase complexity              |
| Numbers                     | Increase complexity              |
| Special Characters          | Increase complexity              |
| Character Repetition Limits | Prevent patterns like `aaaa1111` |
| Dictionary Checks           | Prevent common passwords         |
Step 2.1: Verify Whether libpwquality Is Installed
On RHEL, Rocky Linux, AlmaLinux, and CentOS:
rpm -qa | grep pwqualityIf no output is returned, install the package.
Step 2.2: Install Password Quality Package
dnf install -y libpwqualityVerify installation:
rpm -qi libpwqualityExpected output:
Name        : libpwquality
Version     : x.x.x
Step 2.3: Review Current Password Quality Configuration
Display the current configuration:
cat /etc/security/pwquality.confA default installation often contains minimal or commented settings.
Step 2.4: Configure Password Complexity Requirements
Create the following policy:
cat > /etc/security/pwquality.conf << EOF
minlen = 12
minclass = 4
dcredit = -1
ucredit = -1
lcredit = -1
ocredit = -1
maxrepeat = 3
retry = 3
EOF
Common Password Complexity Checks
| Check                       | Purpose                          |
| --------------------------- | -------------------------------- |
| Minimum Length              | Prevent short passwords          |
| Uppercase Characters        | Increase complexity              |
| Lowercase Characters        | Increase complexity              |
| Numbers                     | Increase complexity              |
| Special Characters          | Increase complexity              |
| Character Repetition Limits | Prevent patterns like `aaaa1111` |
| Dictionary Checks           | Prevent common passwords         |
Password Examples
Accepted Passwords
Linux@2026Admin
Secure#Server99
Hardening@RHEL9
Rejected Passwords
password
welcome123
Password123
AdminAdmin
aaaaBBBB1111
Reasons:
| Password Attempt | Status     | Reason                                 |
| ---------------- | ---------- | -------------------------------------- |
| `password`       | ❌ Rejected | Common dictionary word                 |
| `welcome123`     | ❌ Rejected | Does not meet complexity requirements  |
| `Password123`    | ❌ Rejected | Missing special character              |
| `AdminAdmin`     | ❌ Rejected | Missing number and special character   |
| `aaaaBBBB1111`   | ❌ Rejected | Contains excessive repeated characters |
Step 2.5: Verify PAM Integration
Password quality checks are enforced through PAM (Pluggable Authentication Modules).
Verify:
grep pwquality /etc/pam.d/system-authTypical output:
password requisite pam_pwquality.soIf this line exists, password quality enforcement is active.
Step 2.6: Test the Policy
Attempt to change the password:
passwd centosTry a weak password:
password123Expected response:
BAD PASSWORD: The password fails the dictionary checkTry a stronger password:
Linux@2026AdminExpected response:
passwd: all authentication tokens updated successfullyValidation Checklist
| Validation Item                 | Command                                 |
| ------------------------------- | --------------------------------------- |
| Package Installed               | `rpm -qa \| grep pwquality`             |
| Configuration Present           | `cat /etc/security/pwquality.conf`      |
| PAM Integration Active          | `grep pwquality /etc/pam.d/system-auth` |
| Password Change Test Successful | `passwd username`                       |
Security Benefit
Before hardening:
Users could choose weak passwords such as:
Password123
Welcome123
Admin123
After hardening:
Passwords must:
- Be at least 12 characters long
- Contain uppercase letters
- Contain lowercase letters
- Contain numbers
- Contain special characters
This significantly increases the effort required for brute-force and password-guessing attacks.
3. Configuring Account Lockout After Failed Login Attempts
Strong passwords are important, but they do not completely eliminate the risk of unauthorized access.
Attackers often use brute-force attacks, where thousands of password combinations are attempted until the correct password is discovered.
For example:
admin / Password1
admin / Password2
admin / Welcome123
admin / Summer2026
...
Without account lockout controls, an attacker can continue guessing passwords indefinitely.
To mitigate this risk, Linux provides account lockout functionality through PAM (Pluggable Authentication Modules) using the faillock mechanism.
When enabled, user accounts are temporarily locked after a specified number of failed authentication attempts.
Security Objective
The goal is to implement the following policy:
| Setting               | Value      |
| --------------------- | ---------- |
| Failed Login Attempts | 5          |
| Observation Window    | 15 Minutes |
| Lockout Duration      | 15 Minutes |
This means that if a user enters an incorrect password five times within fifteen minutes, the account will be locked for fifteen minutes.
Step 3.1: Verify PAM Is Installed
rpm -q pamExample output:
pam-1.x.x-x.el9.x86_64Step 3.2: Verify faillock Support
ls /usr/sbin/faillockExample output:
/usr/sbin/faillockStep 3.3: Enable Account Lockout Feature
On RHEL 8/9 and compatible distributions:
authselect enable-feature with-faillock
authselect apply-changes
Verify:
authselect currentExpected output should contain:
with-faillockStep 3.4: Configure Lockout Policy
Create the lockout configuration:
cat > /etc/security/faillock.conf << EOF
deny = 5
fail_interval = 900
unlock_time = 900
EOF
Understanding the Configuration
| Parameter       | Value | Meaning                                                               |
| --------------- | ----- | --------------------------------------------------------------------- |
| deny          | 5     | Lock the account after 5 consecutive failed login attempts            |
| fail_interval | 900   | Count failed login attempts occurring within 900 seconds (15 minutes) |
| unlock_time   | 900   | Automatically unlock the account after 900 seconds (15 minutes)       |
Step 3.5: Verify Configuration
cat /etc/security/faillock.confExpected output:
deny = 5
fail_interval = 900
unlock_time = 900
Step 3.6: Test the Lockout Policy
Attempt to log in with an incorrect password five times.
After the fifth failure, the account should be locked.
Check failed login records:
faillockExample output:
centos:
When                Type  Source
2026-06-14 10:15:01 TTY   tty1
2026-06-14 10:15:10 TTY   tty1
2026-06-14 10:15:18 TTY   tty1
2026-06-14 10:15:25 TTY   tty1
2026-06-14 10:15:32 TTY   tty1
Unlock a User Manually
If required, an administrator can unlock the account immediately.
faillock --user centos --resetVerify:
faillock --user centosValidation Checklist
| Validation Item          | Command                           |
| ------------------------ | --------------------------------- |
| PAM Installed            | `rpm -q pam`                      |
| `faillock` Available     | `ls /usr/sbin/faillock`           |
| Feature Enabled          | `authselect current`              |
| Configuration Present    | `cat /etc/security/faillock.conf` |
| Failed Logins Recorded   | `faillock`                        |
| Manual Unlock Successful | `faillock --user centos --reset`  |
Security Benefit
Before hardening:
An attacker could attempt unlimited password guesses.After hardening:
The account is locked after five failed login attempts,
significantly reducing the effectiveness of brute-force attacks.
4. Forcing Password Change on Next Login
There are situations where an administrator may need to force a user to change their password immediately.
Common examples include:
- Initial account creation
- Temporary passwords issued by administrators
- Password reset requests
- Security incidents involving compromised credentials
- Employee onboarding
In these situations, allowing users to continue using a temporary password indefinitely creates unnecessary risk.
Linux provides a mechanism to force users to change their password during their next successful login.
Security Objective
The objective is to ensure that temporary or administrator-assigned passwords are replaced with user-selected passwords at the earliest opportunity.
Step 1: Review Current Password Aging Information
Before making changes, inspect the current password aging configuration.
chage -l centosExample output:
Last password change                                    : Jun 14, 2026
Password expires                                        : Sep 12, 2026
Password inactive                                       : Oct 12, 2026
Account expires                                         : never
Minimum number of days between password change          : 1
Maximum number of days between password change          : 90
Number of days of warning before password expires       : 7
Step 2: Force Password Change
Use the following command:
chage -d 0 centosThe value 0 tells Linux that the password was last changed on day zero, causing the password to be considered expired immediately.
Step 3: Verify the Configuration
chage -l centosExpected output:
Last password change : password must be changedor
Password expires : password must be changeddepending on the Linux distribution.
Step 4: Test User Login
When the user logs in:
WARNING: Your password has expired.
You must change your password now.
The user will be prompted to create a new password before gaining access to the system.
Validation Checklist
| Validation Item                             | Command             |
| ------------------------------------------- | ------------------- |
| View Current Password Status                | `chage -l centos`   |
| Force Password Change                       | `chage -d 0 centos` |
| Verify Expired Password State               | `chage -l centos`   |
| Confirm User Is Prompted to Change Password | User login test     |
Security Benefit
| Before Hardening                                          | After Hardening                                    |
| --------------------------------------------------------- | -------------------------------------------------- |
| Users may continue using temporary passwords indefinitely | Users must create a new password during next login |
| Administrator-assigned passwords remain active            | Temporary passwords become short-lived             |
| Increased risk of credential exposure                     | Reduced risk of long-term credential misuse        |
Forcing password changes is a simple but effective control that ensures temporary credentials do not remain active longer than necessary.
5. Locking Unused Accounts
Unused user accounts are often overlooked during server administration, yet they present a significant security risk.
Over time, servers accumulate accounts that are no longer required:
- Former employees
- Temporary contractors
- Application migration accounts
- Test accounts
- Vendor accounts
- Accounts created for troubleshooting
If these accounts remain active, they become potential entry points for attackers.
A common security principle is:
If an account is not required, it should not be able to log in.Security Objective
The goal is to identify unused accounts and prevent them from being used for authentication.
This reduces the attack surface of the server and limits opportunities for unauthorized access.
Step 1: Identify Interactive Users
List accounts that can potentially log in:
awk -F: '$3 >= 1000 && $7 !~ /(nologin|false)/ {print $1}' /etc/passwdExample output:
centos
manohar
Each account should be reviewed with the system owner before any action is taken.
Step 2: Determine Account Activity
Check account details:
chage -l usernameCheck last login:
lastlog -u centosExample:
[root@ceph0 ~]# lastlog -u centos
Username         Port     From                                       Latest
centos           pts/0    192.168.0.108                             Thu May 21 22:04:22 +0530 2026
manohar                                                             Never logged in
Accounts that have never logged in or are no longer required should be considered for locking.
Step 3: Lock the Account
To lock an account:
usermod -L usernameExample:
usermod -L manoharThe account still exists, but authentication using the password is no longer possible.
Step 4: Verify the Account Is Locked
Check account status:
passwd -S manoharExample output:
testuser LKMeaning:
| Status | Meaning         |
| ------ | --------------- |
| `PS`   | Password Set    |
| `LK`   | Account Locked  |
| `NP`   | No Password Set |
Step 5: Unlock an Account If Required
If access needs to be restored:
usermod -U usernameExample:
usermod -U testuserValidation Checklist
| Validation Item        | Command                                                                   |
| ---------------------- | ------------------------------------------------------------------------- |
| List Interactive Users | `awk -F: '$3 >= 1000 && $7 !~ /(nologin\|false)/ {print $1}' /etc/passwd` |
| Check Last Login       | `lastlog -u username`                                                     |
| Lock Account           | `usermod -L username`                                                     |
| Verify Locked Status   | `passwd -S username`                                                      |
| Unlock Account         | `usermod -U username`                                                     |
Security Benefit
| Before Hardening                               | After Hardening                        |
| ---------------------------------------------- | -------------------------------------- |
| Dormant accounts remain available for login    | Unused accounts cannot authenticate    |
| Forgotten accounts increase the attack surface | Only required users retain access      |
| Former employee accounts may remain active     | Access can be immediately restricted   |
| Attackers have more potential targets          | Reduced number of valid login accounts |
Locking unused accounts is one of the simplest hardening measures and often provides immediate security benefits with minimal operational impact.
6. Disabling Root SSH Login
One of the most common mistakes in Linux environments is allowing direct SSH access to the root account.
By default, attackers already know that every Linux system contains a user named root.
This means an attacker only needs to guess one thing:
The root passwordWhen root login is enabled, attackers can continuously attempt to authenticate as root using:
- Brute-force attacks
- Password spraying attacks
- Leaked credentials
- Automated scanning tools
For this reason, direct root SSH access should be disabled.
Administrators should instead:
- Log in using a normal user account.
- Elevate privileges using
sudo. - Perform administrative tasks with accountability and auditing.
Security Objective
The goal is to prevent direct SSH authentication to the root account while still allowing administrators to perform privileged operations through authorized user accounts.
Step 6.1: Check Current Root SSH Configuration
Run:
grep -i "^PermitRootLogin" /etc/ssh/sshd_configPossible output:
PermitRootLogin yesor
PermitRootLogin prohibit-passwordor
PermitRootLogin noUnderstanding PermitRootLogin Values
| Value               | Meaning                                                                                  |
| ------------------- | ---------------------------------------------------------------------------------------- |
| `yes`               | Root can log in using any configured authentication method (password or SSH key)         |
| `prohibit-password` | Root login is allowed only using SSH key authentication; password-based login is blocked |
| `no`                | Root login is completely disabled over SSH                                               |
Step 6.2: Disable Root SSH Login
Configure SSH to reject all root login attempts:
grep -q '^PermitRootLogin' /etc/ssh/sshd_config \
&& sed -i 's/^PermitRootLogin.*/PermitRootLogin no/' /etc/ssh/sshd_config \
|| echo 'PermitRootLogin no' >> /etc/ssh/sshd_config
Step 6.3: Validate SSH Configuration
Before restarting SSH, validate the configuration syntax:
sshd -tExpected result:
No outputNo output indicates the configuration is valid.
Step 6.4: Restart SSH Service
RHEL, Rocky Linux, AlmaLinux:
systemctl restart sshdVerify service status:
systemctl status sshdStep 6.5: Verify the Configuration
Run:
grep -i "^PermitRootLogin" /etc/ssh/sshd_configExpected output:
PermitRootLogin noStep 6.6: Test Root Login
Attempt SSH access as root:
ssh root@server-ipExpected result:
Permission deniedRoot should no longer be able to authenticate through SSH.
Validation Checklist
| Validation Item                  | Command                                           |
| -------------------------------- | ------------------------------------------------- |
| Check Current Root Login Setting | `grep -i "^PermitRootLogin" /etc/ssh/sshd_config` |
| Disable Root Login               | `sed` command used to set `PermitRootLogin no`    |
| Validate SSH Configuration       | `sshd -t`                                         |
| Restart SSH Service              | `systemctl restart sshd`                          |
| Verify Final Configuration       | `grep -i "^PermitRootLogin" /etc/ssh/sshd_config` |
| Test Root SSH Access             | `ssh root@server-ip`                              |
Security Benefit
| Before Hardening                                  | After Hardening                                       |
| ------------------------------------------------- | ----------------------------------------------------- |
| Attackers know the root username exists           | Direct root authentication is blocked                 |
| Root password can be targeted directly            | Attackers must compromise a normal user account first |
| Administrative activity is difficult to attribute | Actions can be traced to individual user accounts     |
| Increased risk of full system compromise          | Reduced attack surface for privileged access          |
Disabling direct root SSH access is one of the most widely recommended Linux hardening controls and is commonly found in enterprise security baselines and compliance standards.
7. Disabling SSH Password Authentication
Even after disabling direct root SSH access, attackers can still target other user accounts using password-based authentication.
A common attack looks like this:
User: centos
Password: Welcome123
User: centos
Password: Password@123
User: centos
Password: Summer2026
Automated tools can perform thousands of login attempts against exposed SSH servers.
Even strong passwords can eventually be compromised through:
- Password spraying attacks
- Credential stuffing
- Phishing attacks
- Password reuse across multiple services
- Data breaches
For this reason, many organizations disable SSH password authentication entirely and require SSH key-based authentication.
Security Objective
The goal is to eliminate password-based SSH logins and require users to authenticate using SSH key pairs.
This significantly reduces the effectiveness of brute-force and password guessing attacks.
Authentication Comparison
| Authentication Method   | Security Level | Vulnerable to Password Guessing |
| ----------------------- | -------------- | ------------------------------- |
| Password Authentication | Moderate       | Yes                             |
| SSH Key Authentication  | High           | No                              |
Step 1: Verify Current SSH Authentication Method
Check the current configuration:
grep -i "^PasswordAuthentication" /etc/ssh/sshd_configPossible output:
PasswordAuthentication yesor
PasswordAuthentication noStep 7.2: Verify SSH Keys Exist
Check for authorized keys:
ls -l ~/.ssh/authorized_keysExample output:
-rw------- 1 centos centos 398 Jun 14 10:00 authorized_keysVerify key contents:
cat ~/.ssh/authorized_keysExample:
ssh-ed25519 AAAAC3NzaC1lZDI1NTE5AAAAI...Step 7.3: Disable Password Authentication
Configure SSH:
grep -q '^PasswordAuthentication' /etc/ssh/sshd_config \
&& sed -i 's/^PasswordAuthentication.*/PasswordAuthentication no/' /etc/ssh/sshd_config \
|| echo 'PasswordAuthentication no' >> /etc/ssh/sshd_config
Step 7.4: Validate SSH Configuration
sshd -tExpected result:
No outputThis indicates the SSH configuration is valid.
Step 7.5: Restart SSH Service
systemctl restart sshdVerify:
systemctl status sshdStep 7.6: Verify Configuration
grep -i "^PasswordAuthentication" /etc/ssh/sshd_configExpected output:
PasswordAuthentication noStep 7.7: Test SSH Access
Open a new terminal and connect using SSH:
ssh centos@server-ipThe connection should succeed using the configured SSH key.
Password prompts should no longer be accepted.
Step 7.8: Limit Authentication Attempts
Attackers often perform repeated authentication attempts against exposed SSH services.
Limiting authentication attempts reduces the effectiveness of brute-force attacks.
Configure MaxAuthTries
grep -q '^MaxAuthTries' /etc/ssh/sshd_config \
&& sed -i 's/^MaxAuthTries.*/MaxAuthTries 3/' /etc/ssh/sshd_config \
|| echo 'MaxAuthTries 3' >> /etc/ssh/sshd_config
Verify Configuration
grep '^MaxAuthTries' /etc/ssh/sshd_configExpected output:
MaxAuthTries 3Understanding MaxAuthTries
ValueMeaning6Default value on many systems3Recommended hardening value1Very restrictiveUnlimitedNot recommended
Step 7.9: Configure Login Grace Period
The login grace period determines how long SSH waits for successful authentication before terminating the connection.
Configure LoginGraceTime
grep -q '^LoginGraceTime' /etc/ssh/sshd_config \
&& sed -i 's/^LoginGraceTime.*/LoginGraceTime 30/' /etc/ssh/sshd_config \
|| echo 'LoginGraceTime 30' >> /etc/ssh/sshd_config
Verify Configuration
grep '^LoginGraceTime' /etc/ssh/sshd_configExpected output:
LoginGraceTime 30Understanding LoginGraceTime
| Value | Meaning                                          |
| ----- | ------------------------------------------------ |
| `120` | Common default value on many Linux distributions |
| `60`  | Reduced authentication window                    |
| `30`  | Recommended hardening value                      |
| `0`   | No timeout (not recommended)                     |
Step 7.10: Disable Empty Passwords
Accounts with blank passwords should never be permitted to authenticate.
Configure PermitEmptyPasswords
grep -q '^PermitEmptyPasswords' /etc/ssh/sshd_config \
&& sed -i 's/^PermitEmptyPasswords.*/PermitEmptyPasswords no/' /etc/ssh/sshd_config \
|| echo 'PermitEmptyPasswords no' >> /etc/ssh/sshd_config
Verify Configuration
grep '^PermitEmptyPasswords' /etc/ssh/sshd_configExpected output:
PermitEmptyPasswords noUnderstanding PermitEmptyPasswords
| Value | Meaning                                        |
| ----- | ---------------------------------------------- |
| `yes` | Accounts with empty passwords may authenticate |
| `no`  | Empty passwords are rejected                   |
Step 7.11: Disable X11 Forwarding
Most Linux servers do not require graphical desktop forwarding.
Disabling X11 forwarding reduces the attack surface.
Configure X11Forwarding
grep -q '^X11Forwarding' /etc/ssh/sshd_config \
&& sed -i 's/^X11Forwarding.*/X11Forwarding no/' /etc/ssh/sshd_config \
|| echo 'X11Forwarding no' >> /etc/ssh/sshd_config
Verify Configuration
grep '^X11Forwarding' /etc/ssh/sshd_configExpected output:
X11Forwarding noUnderstanding X11Forwarding
| Value | Meaning                                        |
| ----- | ---------------------------------------------- |
| `yes` | Allows remote graphical application forwarding |
| `no`  | Disables graphical forwarding                  |
Step 7.12: Disable PermitUserEnvironment
This setting prevents users from influencing SSH sessions through custom environment variables.
Configure PermitUserEnvironment
grep -q '^PermitUserEnvironment' /etc/ssh/sshd_config \
&& sed -i 's/^PermitUserEnvironment.*/PermitUserEnvironment no/' /etc/ssh/sshd_config \
|| echo 'PermitUserEnvironment no' >> /etc/ssh/sshd_config
Verify Configuration
grep '^PermitUserEnvironment' /etc/ssh/sshd_configExpected output:
PermitUserEnvironment noUnderstanding PermitUserEnvironment
| Value | Meaning                                             |
| ----- | --------------------------------------------------- |
| `yes` | Users can define SSH environment variables          |
| `no`  | User-defined SSH environment variables are disabled |
Step 7.13: Restrict SSH Access to Approved Users
Limit SSH access to specific administrative accounts.
Configure AllowUsers
grep -q '^AllowUsers' /etc/ssh/sshd_config \
&& sed -i 's/^AllowUsers.*/AllowUsers centos/' /etc/ssh/sshd_config \
|| echo 'AllowUsers centos' >> /etc/ssh/sshd_config
Verify Configuration
grep '^AllowUsers' /etc/ssh/sshd_configExpected output:
AllowUsers centosUnderstanding AllowUsers
| Configuration             | Meaning                                          |
| ------------------------- | ------------------------------------------------ |
| `AllowUsers centos`       | Only `centos` can log in through SSH             |
| `AllowUsers centos admin` | Only `centos` and `admin` can log in through SSH |
| Not Configured            | Any valid user account may attempt SSH login     |
Step 7.14: Final SSH Configuration Validation
Validate SSH configuration:
sshd -tRestart SSH:
systemctl restart sshdVerify effective configuration:
sshd -T | egrep 'passwordauthentication|maxauthtries|logingracetime|permitemptypasswords|x11forwarding|permituserenvironment'SSH Hardening Summary
| Setting                  | Recommended Value   |
| ------------------------ | ------------------- |
| `PermitRootLogin`        | `no`                |
| `PasswordAuthentication` | `no`                |
| `MaxAuthTries`           | `3`                 |
| `LoginGraceTime`         | `30`                |
| `PermitEmptyPasswords`   | `no`                |
| `X11Forwarding`          | `no`                |
| `PermitUserEnvironment`  | `no`                |
| `AllowUsers`             | Approved users only |
| `Banner`                 | `/etc/issue.net`    |
This completes the SSH hardening section rather than covering only password authentication.
Validation Checklist
| Validation Item                     | Command                                                  |
| ----------------------------------- | -------------------------------------------------------- |
| Check Current Authentication Method | `grep -i "^PasswordAuthentication" /etc/ssh/sshd_config` |
| Verify Authorized Keys Exist        | `ls -l ~/.ssh/authorized_keys`                           |
| Disable Password Authentication     | `sed` command used to set `PasswordAuthentication no`    |
| Verify `MaxAuthTries`               | `grep '^MaxAuthTries' /etc/ssh/sshd_config`              |
| Verify `LoginGraceTime`             | `grep '^LoginGraceTime' /etc/ssh/sshd_config`            |
| Verify `PermitEmptyPasswords`       | `grep '^PermitEmptyPasswords' /etc/ssh/sshd_config`      |
| Verify `X11Forwarding`              | `grep '^X11Forwarding' /etc/ssh/sshd_config`             |
| Verify `PermitUserEnvironment`      | `grep '^PermitUserEnvironment' /etc/ssh/sshd_config`     |
| Verify `AllowUsers` Configuration   | `grep '^AllowUsers' /etc/ssh/sshd_config`                |
| Validate SSH Configuration          | `sshd -t`                                                |
| Restart SSH Service                 | `systemctl restart sshd`                                 |
| Verify Effective SSH Configuration  | `sshd -T`                                                |
| Test SSH Key Authentication         | `ssh user@server-ip`                                     |
Security Benefit
| Before Hardening                                 | After Hardening                                          |
| ------------------------------------------------ | -------------------------------------------------------- |
| Users authenticate with passwords                | Users authenticate with SSH keys                         |
| Password guessing attacks are possible           | Password guessing attacks are eliminated                 |
| Leaked passwords can be reused                   | SSH private key is required                              |
| Credential stuffing attacks may succeed          | Password reuse becomes irrelevant                        |
| Automated brute-force attacks remain effective   | Brute-force attacks against passwords become ineffective |
| Unlimited SSH login attempts may be possible     | Authentication attempts are restricted                   |
| Attackers have more time to authenticate         | Login window is limited                                  |
| Empty-password accounts may present risk         | Empty-password authentication is blocked                 |
| Unnecessary SSH features increase attack surface | Unused SSH functionality is disabled                     |
| Any valid account may attempt SSH login          | SSH access is restricted to approved users               |
By disabling SSH password authentication, organizations remove one of the most frequently targeted attack vectors on Linux servers and significantly strengthen remote access security.
8. Configuring Automatic Session Timeout
One of the most overlooked Linux hardening controls is session management.
Administrators frequently connect to servers using SSH and leave terminal sessions unattended.
Consider the following scenario:
An administrator logs into a production server and leaves their workstation without logging out.
SSH Session
      ↓
Administrator leaves desk
      ↓
Terminal remains active
      ↓
Anyone with access to the workstation can use the existing session
In this situation, an attacker does not need to know a password or possess an SSH key. They simply inherit the active session.
To reduce this risk, Linux can automatically terminate idle shell sessions after a specified period of inactivity.
Security Objective
The objective is to automatically log out inactive users after 15 minutes of inactivity.
| Setting          | Value                 |
| ---------------- | --------------------- |
| Session Timeout  | 900 Seconds           |
| Timeout Duration | 15 Minutes            |
| Scope            | All Interactive Users |
Step 8.1: Check Current Session Timeout
Verify whether a timeout is already configured:
echo $TMOUTPossible output:
900or
An empty value indicates that no timeout is configured.
Understanding TMOUT
Linux uses the TMOUT environment variable to control idle shell logout behavior.
| Value   | Meaning                                                  |
| ------- | -------------------------------------------------------- |
| `300`   | Logout after 5 minutes of inactivity                     |
| `600`   | Logout after 10 minutes of inactivity                    |
| `900`   | Logout after 15 minutes of inactivity                    |
| `1800`  | Logout after 30 minutes of inactivity                    |
| Not Set | No automatic logout; sessions remain active indefinitely |
Step 8.2: Configure Session Timeout
Create a profile script:
cat > /etc/profile.d/session-timeout.sh << EOF
TMOUT=900
readonly TMOUT
export TMOUT
EOF
Understanding the Configuration
| Configuration    | Purpose                                                |
| ---------------- | ------------------------------------------------------ |
| `TMOUT=900`      | Sets the session timeout to 15 minutes (900 seconds)   |
| `readonly TMOUT` | Prevents users from modifying or disabling the timeout |
| `export TMOUT`   | Makes the variable available to all login shells       |
Step 8.3: Apply Permissions
chmod 644 /etc/profile.d/session-timeout.shVerify:
ls -l /etc/profile.d/session-timeout.shStep 8.4: Verify the Configuration
Open a new login session and run:
echo $TMOUTExpected output:
900Validation Checklist
| Validation Item              | Command                                   |
| ---------------------------- | ----------------------------------------- |
| Check Existing Timeout       | `echo $TMOUT`                             |
| Create Timeout Configuration | `cat > /etc/profile.d/session-timeout.sh` |
| Verify File Permissions      | `ls -l /etc/profile.d/session-timeout.sh` |
| Verify Timeout Value         | `echo $TMOUT`                             |
| Confirm Automatic Logout     | Leave session idle for 15 minutes         |
Security Benefit
| Before Hardening                             | After Hardening                            |
| -------------------------------------------- | ------------------------------------------ |
| Idle SSH sessions remain active indefinitely | Idle sessions are automatically terminated |
| Unattended terminals can be misused          | Exposure window is limited                 |
| Users may forget to log out                  | Logout occurs automatically                |
| Increased risk of session hijacking          | Reduced risk of unauthorized session use   |
Session timeout is a simple hardening control that significantly reduces the risk associated with unattended administrative sessions.
9. Configuring Login Banners
Login banners are often overlooked during server hardening, yet they serve an important legal and security purpose.
A login banner displays a warning message before authentication and informs users that the system is restricted to authorized personnel.
While a banner does not prevent an attack, it establishes clear notice that the system is private and monitored.
Many organizations require login banners to support security policies, audits, and compliance requirements.
Login banner configuration does not require any additional package installation.
It uses components already present on a standard Linux installation:
| Component              | Purpose                                         |
| ---------------------- | ----------------------------------------------- |
| `/etc/issue`           | Local console login banner                      |
| `/etc/issue.net`       | SSH login banner                                |
| `sshd`                 | Displays the SSH banner                         |
| `/etc/ssh/sshd_config` | Enables the banner using the `Banner` directive |
You can verify OpenSSH is installed:
rpm -q openssh-serverVerify SSH service:
systemctl status sshdIn most RHEL, Rocky, AlmaLinux, CentOS, and cloud images, no additional package is needed for banner configuration.
Security Objective
The objective is to display an authorized-use warning to all users before they access the system.
| Setting     | Value                                                |
| ----------- | ---------------------------------------------------- |
| Banner Type | Pre-Authentication Banner                            |
| Scope       | Local and SSH Logins                                 |
| Purpose     | Inform users that access is restricted and monitored |
Step 9.1: Configure Local Login Banner
Create the local login banner:
cat > /etc/issue << EOF
******************************************************************
* Authorized access only.                                        *
* Unauthorized use of this system is prohibited.                 *
* All activities may be monitored and recorded.                  *
******************************************************************
EOF
Verify:
cat /etc/issueStep 9.2: Configure SSH Login Banner
Create the SSH banner:
cat > /etc/issue.net << EOF
******************************************************************
* Authorized access only.                                        *
* Unauthorized use of this system is prohibited.                 *
* All activities may be monitored and recorded.                  *
******************************************************************
EOF
Verify:
cat /etc/issue.netStep 9.3: Configure SSH to Display the Banner
grep -q '^Banner' /etc/ssh/sshd_config \
&& sed -i 's|^Banner.*|Banner /etc/issue.net|' /etc/ssh/sshd_config \
|| echo 'Banner /etc/issue.net' >> /etc/ssh/sshd_config
Step 9.4: Validate SSH Configuration
sshd -tExpected result:
No outputNo output indicates the configuration is valid.
Step 9.5: Restart SSH Service
systemctl restart sshdVerify:
systemctl status sshdStep 9.6: Verify Banner Configuration
grep '^Banner' /etc/ssh/sshd_configExpected output:
Banner /etc/issue.netStep 9.7: Test SSH Login
Connect to the server:
ssh user@server-ipExpected output before authentication:
******************************************************************
* Authorized access only.                                        *
* Unauthorized use of this system is prohibited.                 *
* All activities may be monitored and recorded.                  *
******************************************************************
Understanding Banner Files
| File                   | Purpose                                       |
| ---------------------- | --------------------------------------------- |
| `/etc/issue`           | Displayed before local console login          |
| `/etc/issue.net`       | Displayed before SSH authentication           |
| `/etc/ssh/sshd_config` | SSH configuration file used to enable banners |
Validation Checklist
| Validation Item             | Command                               |
| --------------------------- | ------------------------------------- |
| Verify Local Banner         | `cat /etc/issue`                      |
| Verify SSH Banner           | `cat /etc/issue.net`                  |
| Verify Banner Configuration | `grep '^Banner' /etc/ssh/sshd_config` |
| Validate SSH Configuration  | `sshd -t`                             |
| Restart SSH Service         | `systemctl restart sshd`              |
| Test Banner Display         | `ssh user@server-ip`                  |
Security Benefit
| Before Hardening                       | After Hardening                                     |
| -------------------------------------- | --------------------------------------------------- |
| No warning is displayed to users       | Users are informed that access is restricted        |
| Users may claim lack of notice         | System usage terms are clearly communicated         |
| No indication of monitoring            | Users are informed that activities may be monitored |
| Compliance requirements may not be met | Banner requirements are satisfied                   |
Although login banners do not directly block attacks, they provide legal notice, support compliance efforts, and reinforce organizational security policies.
10. Sudo Hardening
In Linux environments, administrators should avoid logging in directly as the root user.
Instead, users authenticate using their individual accounts and temporarily elevate privileges using sudo.
This approach provides accountability because administrative actions can be traced back to a specific user.
However, improperly configured sudo access can introduce significant security risks.
Examples include:
- Granting unrestricted root access to all users
- Allowing passwordless sudo access
- Providing unnecessary administrative privileges
- Lack of auditing and logging
For these reasons, sudo configuration should be reviewed and hardened.
Security Objective
The objective is to ensure that only authorized users can perform administrative actions and that those actions can be audited.
| Setting               | Value           |
| --------------------- | --------------- |
| Administrative Access | Restricted      |
| Authentication        | Required        |
| Logging               | Enabled         |
| Principle             | Least Privilege |
Step 10.1: Verify Sudo Is Installed
rpm -q sudoExample output:
sudo-1.x.x-x.el9.x86_64Step 10.2: Identify Users with Sudo Access
Check wheel group membership:
getent group wheelExample output:
wheel:x:10:centos,manoharView sudo privileges:
sudo -l -U centosStep 10.3: Review Passwordless Sudo Access
Search for NOPASSWD entries:
grep -R "NOPASSWD" /etc/sudoers /etc/sudoers.d/*Example finding:
centos ALL=(ALL) NOPASSWD: ALLThis allows a user to execute administrative commands without entering a password.
Step 10.4: Enable Sudo Logging
Create a dedicated log file:
grep -q '^Defaults logfile=' /etc/sudoers \
&& sed -i 's|^Defaults logfile=.*|Defaults logfile="/var/log/sudo.log"|' /etc/sudoers \
|| echo 'Defaults logfile="/var/log/sudo.log"' >> /etc/sudoers
Step 10.5: Verify Logging
Run a sudo command:
sudo whoamiCheck logs:
cat /var/log/sudo.logValidation Checklist
| Validation Item              | Command                                            |
| ---------------------------- | -------------------------------------------------- |
| Verify Sudo Installed        | `rpm -q sudo`                                      |
| Identify Sudo Users          | `getent group wheel`                               |
| Review User Privileges       | `sudo -l -U username`                              |
| Check Passwordless Access    | `grep -R "NOPASSWD" /etc/sudoers /etc/sudoers.d/*` |
| Verify Logging Configuration | `grep logfile /etc/sudoers`                        |
| Verify Sudo Logs             | `cat /var/log/sudo.log`                            |
Security Benefit
| Before Hardening                              | After Hardening                               |
| --------------------------------------------- | --------------------------------------------- |
| Excessive administrative privileges may exist | Access is reviewed and restricted             |
| Passwordless sudo may bypass authentication   | Administrative actions require authentication |
| Administrative actions may not be logged      | Sudo activity is auditable                    |
| Difficult to trace privileged actions         | User accountability is improved               |
Sudo hardening helps enforce the principle of least privilege and provides visibility into administrative activity on the server.
11. File Permission Hardening
File permissions are one of the most fundamental security controls in Linux.
Every file and directory on a Linux system has permissions that determine who can:
- Read the content
- Modify the content
- Execute the content
Improper permissions can expose sensitive information, allow unauthorized modifications, or create privilege escalation opportunities.
For example:
/etc/shadow contains password hashes.
/etc/ssh contains SSH configuration files.
/root contains administrative files.
If these files become accessible to unauthorized users, the security of the entire server may be compromised.
Security Objective
The objective is to identify and remediate insecure file and directory permissions.
| Setting                    | Value      |
| -------------------------- | ---------- |
| Sensitive Files            | Protected  |
| World-Writable Files       | Restricted |
| World-Writable Directories | Reviewed   |
| Critical System Files      | Secured    |
| Least Privilege | Enforced |- Understanding Linux Permissions
View permissions:
ls -l /etc/passwdExample output:
-rw-r--r-- 1 root root 2684 Jun 15 10:00 /etc/passwdPermission Breakdown
| Position | Meaning            |
| -------- | ------------------ |
| `-`      | Regular file       |
| `rw-`    | Owner permissions  |
| `r--`    | Group permissions  |
| `r--`    | Others permissions |
Permission Values
| Permission    | Value |
| ------------- | ----- |
| Read (`r`)    | 4     |
| Write (`w`)   | 2     |
| Execute (`x`) | 1     |
Common Numeric Permissions
| Permission | Meaning                                                       |
| ---------- | ------------------------------------------------------------- |
| `644`      | Owner can read/write; group and others can read               |
| `600`      | Only the owner can read/write                                 |
| `755`      | Owner has full access; group and others can read and execute  |
| `700`      | Only the owner has full access                                |
| `777`      | Everyone has full read, write, and execute access (high risk) |
Step 11.1: Review Critical System File Permissions
Check passwd:
ls -l /etc/passwdExpected:
-rw-r--r-- root rootCheck shadow:
ls -l /etc/shadowExpected:
-r-------- root rootCheck group:
ls -l /etc/groupExpected:
-rw-r--r-- root rootRecommended Permissions
| File           | Recommended Permission |
| -------------- | ---------------------- |
| `/etc/passwd`  | `644`                  |
| `/etc/group`   | `644`                  |
| `/etc/shadow`  | `400` or `600`         |
| `/etc/gshadow` | `400` or `600`         |
Step 11.2: Correct Critical File Permissions
chmod 644 /etc/passwd
chmod 644 /etc/group
chmod 600 /etc/shadow
chmod 600 /etc/gshadow
Verify:
ls -l /etc/passwd /etc/group /etc/shadow /etc/gshadowStep 11.3: Identify World-Writable Files
Files writable by everyone represent a significant risk.
Search:
find / -xdev -type f -perm -0002 2>/dev/nullExample output:
/tmp/testfile
/var/tmp/debug.log
Risk of World-Writable Files
| Risk                        | Impact                             |
| --------------------------- | ---------------------------------- |
| Unauthorized modification   | Data integrity issues              |
| Malicious content insertion | Potential system compromise        |
| Abuse by local users        | Privilege escalation opportunities |
Step 11.4: Remove World-Writable Permissions
Example:
chmod o-w /path/to/fileVerify:
ls -l /path/to/fileStep 11.5: Identify World-Writable Directories
Search:
find / -xdev -type d -perm -0002 2>/dev/nullExample:
/tmp
/var/tmp
Understanding World-Writable Directories
| Directory               | Expected           |
| ----------------------- | ------------------ |
| `/tmp`                  | Usually acceptable |
| `/var/tmp`              | Usually acceptable |
| Application Directories | Review carefully   |
Not all world-writable directories are security issues. Some are required by the operating system.
Step 11.6: Verify Sticky Bit Protection
For shared directories such as /tmp, verify the sticky bit:
ls -ld /tmpExpected:
drwxrwxrwtNotice the trailing t.
Sticky Bit Purpose
| Without Sticky Bit                         | With Sticky Bit                       |
| ------------------------------------------ | ------------------------------------- |
| Users can delete files belonging to others | Users can delete only their own files |
| Increased risk of abuse                    | Additional protection                 |
Step 11.7: Secure User SSH Directories
Check:
ls -ld ~/.ssh
ls -l ~/.ssh/authorized_keys
Recommended:
PathPermission~/.ssh700~/.ssh/authorized_keys600
Apply:
chmod 700 ~/.ssh
chmod 600 ~/.ssh/authorized_keys
Step 8: Review Home Directory Permissions
Check:
ls -ld /home/*Example:
drwx------ centos centosRecommended:
| Directory Type      | Permission                     |
| ------------------- | ------------------------------ |
| User Home Directory | `700`                          |
| Shared Directory    | Business Requirement Dependent |
Correct:
chmod 700 /home/usernameValidation Checklist
| Validation Item                      | Command                            |
| ------------------------------------ | ---------------------------------- |
| Review passwd Permissions            | `ls -l /etc/passwd`                |
| Review shadow Permissions            | `ls -l /etc/shadow`                |
| Find World-Writable Files            | `find / -xdev -type f -perm -0002` |
| Find World-Writable Directories      | `find / -xdev -type d -perm -0002` |
| Verify Sticky Bit                    | `ls -ld /tmp`                      |
| Verify SSH Directory Permissions     | `ls -ld ~/.ssh`                    |
| Verify `authorized_keys` Permissions | `ls -l ~/.ssh/authorized_keys`     |
| Verify Home Directory Permissions    | `ls -ld /home/*`                   |
Security Benefit
| Before Hardening                        | After Hardening                |
| --------------------------------------- | ------------------------------ |
| Sensitive files may be exposed          | Critical files are protected   |
| Unauthorized file modification possible | Access is restricted           |
| World-writable files increase risk      | Excessive permissions removed  |
| SSH keys may be improperly protected    | SSH credentials are secured    |
| Home directories may expose user data   | User data access is restricted |
File permission hardening is one of the highest-impact Linux security controls because nearly every service, application, and user account depends on correct file access controls.
Step 12. SUID and SGID Review
Linux uses special permissions called SUID (Set User ID) and SGID (Set Group ID) to allow users to execute specific programs with elevated privileges.
These permissions are required for certain system utilities. However, if misconfigured or assigned to unnecessary binaries, they can become a privilege escalation path for attackers.
For this reason, SUID and SGID files should be periodically reviewed as part of Linux server hardening.
Security Objective
The objective is to identify privileged executables, verify business requirements, and remove unnecessary SUID and SGID permissions.
| Setting                    | Value    |
| -------------------------- | -------- |
| SUID Files                 | Reviewed |
| SGID Files                 | Reviewed |
| Unnecessary Privilege Bits | Removed  |
| Least Privilege            | Enforced |
Understanding SUID and SGID
| Bit  | Name         | Purpose                                         |
| ---- | ------------ | ----------------------------------------------- |
| SUID | Set User ID  | Runs a program with the file owner's privileges |
| SGID | Set Group ID | Runs a program with the file group's privileges |
Example:
ls -l /usr/bin/passwdOutput:
-rwsr-xr-x. 1 root root 27832 Jun 14 10:00 /usr/bin/passwdThe letter s indicates the SUID bit is enabled.
-rwsr-xr-x
   ^
   SUID
This allows ordinary users to update password information stored in protected files such as /etc/shadow.
Common SUID Files
| File              | Purpose                          |
| ----------------- | -------------------------------- |
| `/usr/bin/passwd` | Change passwords                 |
| `/usr/bin/su`     | Switch users                     |
| `/usr/bin/sudo`   | Execute commands as another user |
| `/usr/bin/mount`  | Mount filesystems                |
| `/usr/bin/umount` | Unmount filesystems              |
Common SGID Files
| File              | Purpose                                |
| ----------------- | -------------------------------------- |
| `/usr/bin/wall`   | Send messages to logged-in users       |
| `/usr/bin/write`  | Send messages to another user terminal |
| `/usr/bin/locate` | Access the locate database             |
Security Risks
| Risk                      | Impact                     |
| ------------------------- | -------------------------- |
| Vulnerable SUID binary    | Local privilege escalation |
| Misconfigured permissions | Unauthorized access        |
| Custom scripts with SUID  | Full system compromise     |
| Forgotten SGID programs   | Unauthorized group access  |
Step 12.1: Identify SUID Files
Search the entire system:
find / -xdev -perm -4000 -type f 2>/dev/nullExample output:
/usr/bin/passwd
/usr/bin/sudo
/usr/bin/su
/usr/bin/mount
/usr/bin/umount
Step 12.2: Identify SGID Files
find / -xdev -perm -2000 -type f 2>/dev/nullExample output:
/usr/bin/wall
/usr/bin/write
/usr/bin/locate
Step 12.3: Count SUID Files
find / -xdev -perm -4000 -type f 2>/dev/null | wc -lExample output:
18Document the number of privileged binaries present on the server.
Step 12.4: Count SGID Files
find / -xdev -perm -2000 -type f 2>/dev/null | wc -lExample output:
9Step 12.5: Review Ownership and Permissions
Example:
ls -l /usr/bin/passwdOutput:
-rwsr-xr-x. 1 root root 27832 Jun 14 10:00 /usr/bin/passwdReview:
| Attribute            | Value    |
| -------------------- | -------- |
| Owner                | `root`   |
| Group                | `root`   |
| SUID Enabled         | Yes      |
| Business Requirement | Required |
Perform the same review for every identified SUID and SGID file.
Step 12.6: Investigate Custom Applications
Custom application directories deserve special attention.
Search:
find /opt -perm -4000 -o -perm -2000 2>/dev/nullExample output:
/opt/company/bin/admin-toolAny non-standard privileged executable should be reviewed with the application owner.
Step 12.7: Remove Unnecessary SUID Permission
Example:
chmod u-s /opt/company/bin/admin-toolVerify:
ls -l /opt/company/bin/admin-toolExpected:
-rwxr-xr-xStep 12.8: Remove Unnecessary SGID Permission
Example:
chmod g-s /opt/company/bin/report-toolVerify:
ls -l /opt/company/bin/report-toolExpected:
-rwxr-xr-xUnderstanding Permission Indicators
| Indicator | Meaning                                       |
| --------- | --------------------------------------------- |
| `s`       | SUID or SGID enabled                          |
| `S`       | SUID/SGID enabled without execute permission  |
| `t`       | Sticky bit enabled                            |
| `T`       | Sticky bit enabled without execute permission |
Validation Checklist
| Validation Item            | Command                                     |
| -------------------------- | ------------------------------------------- |
| Find SUID Files            | `find / -xdev -perm -4000 -type f`          |
| Find SGID Files            | `find / -xdev -perm -2000 -type f`          |
| Count SUID Files           | `find / -xdev -perm -4000 -type f \| wc -l` |
| Count SGID Files           | `find / -xdev -perm -2000 -type f \| wc -l` |
| Review Ownership           | `ls -l /usr/bin/passwd`                     |
| Review Custom Applications | `find /opt -perm -4000 -o -perm -2000`      |
| Remove SUID Bit            | `chmod u-s /path/to/file`                   |
| Remove SGID Bit            | `chmod g-s /path/to/file`                   |
| Verify Permission Changes  | `ls -l /path/to/file`                       |
Security Benefit
| Before Hardening                                  | After Hardening                        |
| ------------------------------------------------- | -------------------------------------- |
| Unreviewed privileged binaries may exist          | All privileged binaries are reviewed   |
| Custom applications may have excessive privileges | Unnecessary privilege bits are removed |
| Increased privilege escalation risk               | Reduced attack surface                 |
| Unauthorized privilege inheritance may occur      | Least privilege is enforced            |
Important Note
Do not remove SUID or SGID permissions from standard system binaries such as:
/usr/bin/passwd
/usr/bin/sudo
/usr/bin/su
These utilities require elevated privileges to function correctly. Always validate business and operating system requirements before removing privilege bits.
Conclusion
Linux hardening is not a single configuration change or a one-time activity. It is an ongoing process of reviewing system settings, reducing unnecessary access, and enforcing security best practices across the operating system.
Throughout this guide, we implemented controls to strengthen password policies, enforce account security, restrict SSH access, manage administrative privileges, secure file permissions, and review privileged executables. Individually, each control addresses a specific risk. Together, they create multiple layers of defense that significantly improve the overall security posture of a Linux server.
One important lesson from production environments is that security incidents are often caused by simple oversights rather than advanced attacks. An unused account left active, a weak password, unrestricted SSH access, or an unnecessary privileged binary can provide an attacker with an opportunity that could have been prevented through basic hardening practices.
Hardening should also be treated as a continuous activity. As systems evolve, new users are added, applications are deployed, and configurations change. Regular reviews, audits, and validation checks help ensure that security controls remain effective over time.
By implementing the controls covered in this guide, administrators can build a stronger foundation for securing Linux servers and reduce the likelihood of common security risks affecting production environments.
메타데이터
- post_id
- e4324a1cd937
- slug
- linux-server-hardening-real-world-introduction-e4324a1cd937
- url
- https://medium.com/@tradingcontentdrive/linux-server-hardening-real-world-introduction-e4324a1cd937
- canonical_url
- https://medium.com/@tradingcontentdrive/linux-server-hardening-real-world-introduction-e4324a1cd937
- author_url
- https://medium.com/@tradingcontentdrive
- status
- ok
- fetched_at
- 2026-07-10 01:40:30