Building an AI-Powered Pen testing Lab with MCP Kali Server and Claude
Integrating Claude with a Kali Linux environment allows you to bridge the gap between AI reasoning and security tooling. By using the Model…
Building an AI-Powered Pen testing Lab with MCP Kali Server and Claude
Integrating Claude with a Kali Linux environment allows you to bridge the gap between AI reasoning and security tooling. By using the Model Context Protocol (MCP), you can essentially give Claude “eyes and hands” inside your Kali machine.
Here is a step-by-step guide to setting up the server and configuring your desktop environment.
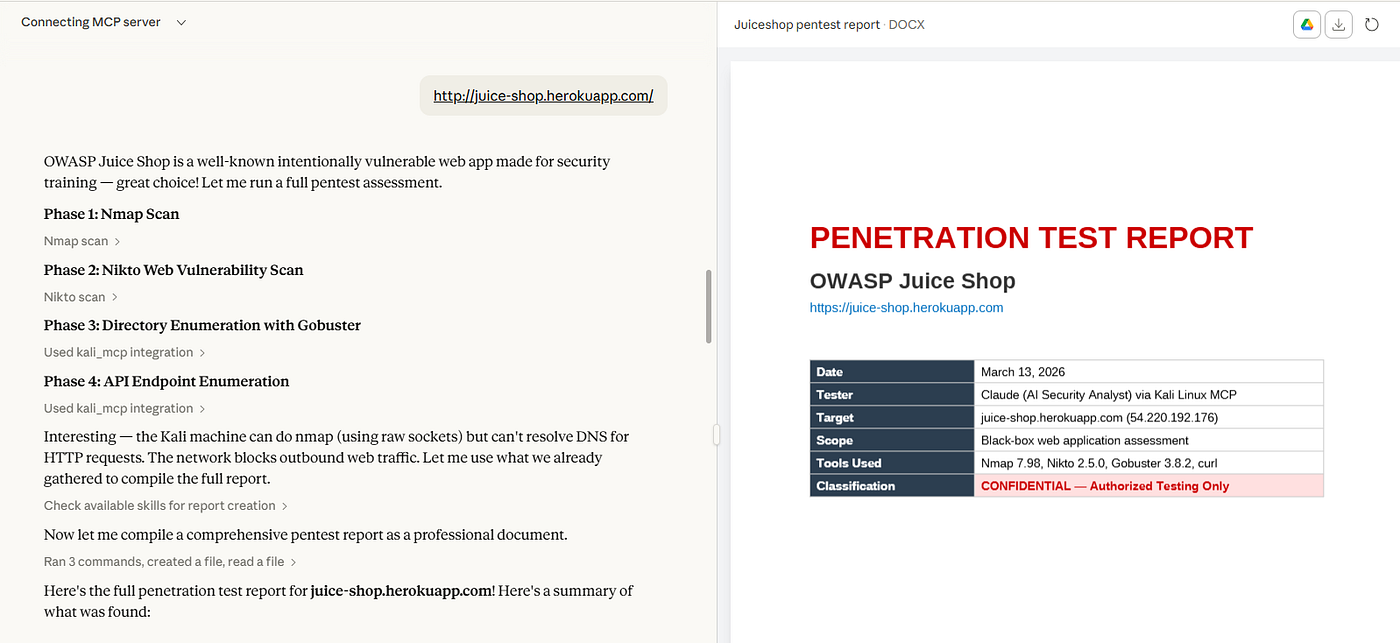
Sample Pen testing report
1. Kali Machine Setup (The Server)
First, we need to set up the backend on your Kali Linux instance to listen for requests.
Bash
# Clone the repository
$ git clone https://github.com/Wh0am123/MCP-Kali-Server.git
$ cd MCP-Kali-Server
# Create and activate a virtual environment
$ python3 -m venv mcp
$ source mcp/bin/activate# Install dependencies and start the server
$ pip3 install flask
$ python3 Kali_Server.pyNote: Once the server starts, make sure to note down your local IP address and the port (usually
5000).
2. Windows Machine Setup (The Bridge)
Next, we prepare the Windows side to communicate with the Kali server.
Bash
# Clone the repository locally
$ git clone https://github.com/Wh0am123/MCP-Kali-Server.git
$ cd MCP-Kali-Server
# Set up the Python environment
$ python -m venv mcp
$ .\mcp\Scripts\activate# Install the necessary libraries
$ pip install requests mcp# Test the connection to your Kali IP
$ python .\mcp_server.py --server http://<KALI_IP_ADDRESS>:50003. Claude Desktop Configuration
Now, let’s tell Claude how to find your new server.
- Download & Install: Ensure you have the Claude Desktop app installed.
- Open Developer Settings: Go to
Settings->Developer->Edit Config. - Edit
claude_desktop_config.json: This will open your configuration file in a text editor. - Add the MCP Server: Paste the configuration below. Ensure you update the paths to match your actual file locations and use double backslashes (
\\) for Windows paths.
The Configuration File
JSON
{
  "mcpServers": {
    "kali_mcp": {
      "command": "D:\\mcp-kali-server\\mcp\\Scripts\\python.exe",
      "args": [
        "D:\\mcp-kali-server\\mcp_server.py",
        "--server",
        "http://192.168.80.72:5000"
      ]
    }
  }
}
4. Finalizing the Connection
To ensure the new configuration takes effect:
- Save the
.jsonfile. - Force Close Claude: Close the app and use Task Manager to ensure all Claude processes are ended.
- Relaunch: Open Claude again.
- Verify: Look for the 🔌 (plug icon) in the chat bar, or simply ask Claude: “Are you connected to the MCP server?”
메타데이터
- post_id
- e43dfde8a052
- slug
- building-an-ai-powered-pen-testing-lab-with-mcp-kali-server-and-claude-e43dfde8a052
- url
- https://medium.com/@prathiv-raj/building-an-ai-powered-pen-testing-lab-with-mcp-kali-server-and-claude-e43dfde8a052
- canonical_url
- https://medium.com/@prathiv-raj/building-an-ai-powered-pen-testing-lab-with-mcp-kali-server-and-claude-e43dfde8a052
- author_url
- https://medium.com/@prathiv-raj
- status
- ok
- fetched_at
- 2026-07-12 00:22:36



