Building AI Agent Micropayment APIs with x402 on Berachain
Understanding x402 & Using $HONEY To Pay For An API Request
Building AI Agent Micropayment APIs with x402 on Berachain
Understanding x402 & Using $HONEY To Pay For An API Request
Building an x402 API That Accepts Berachain $HONEY Payments
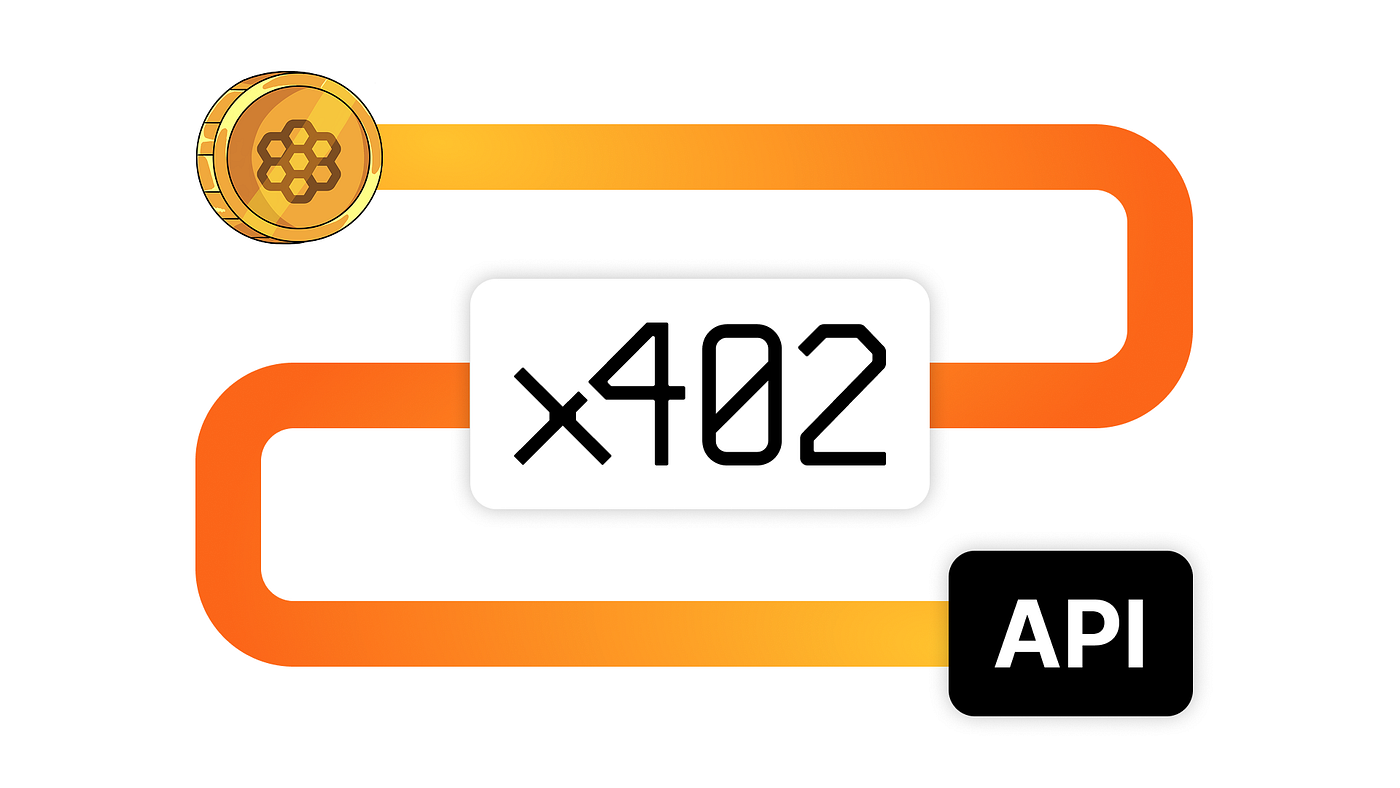
**x402** is a payments standard built on HTTP that brings a 402 Payment Required status code back to use. The core idea is straightforward: a user or a client makes a request for some data from a server and instead of returning the result right away it responds with a 402 status code and a set of payment instructions (token address, amount, recipient, etc). The client pays, attaches proof to a follow-up request, and the server verifies and responds with the actual payload. No subscriptions, no API keys, no billing dashboards. Just a token transfer and a retry.
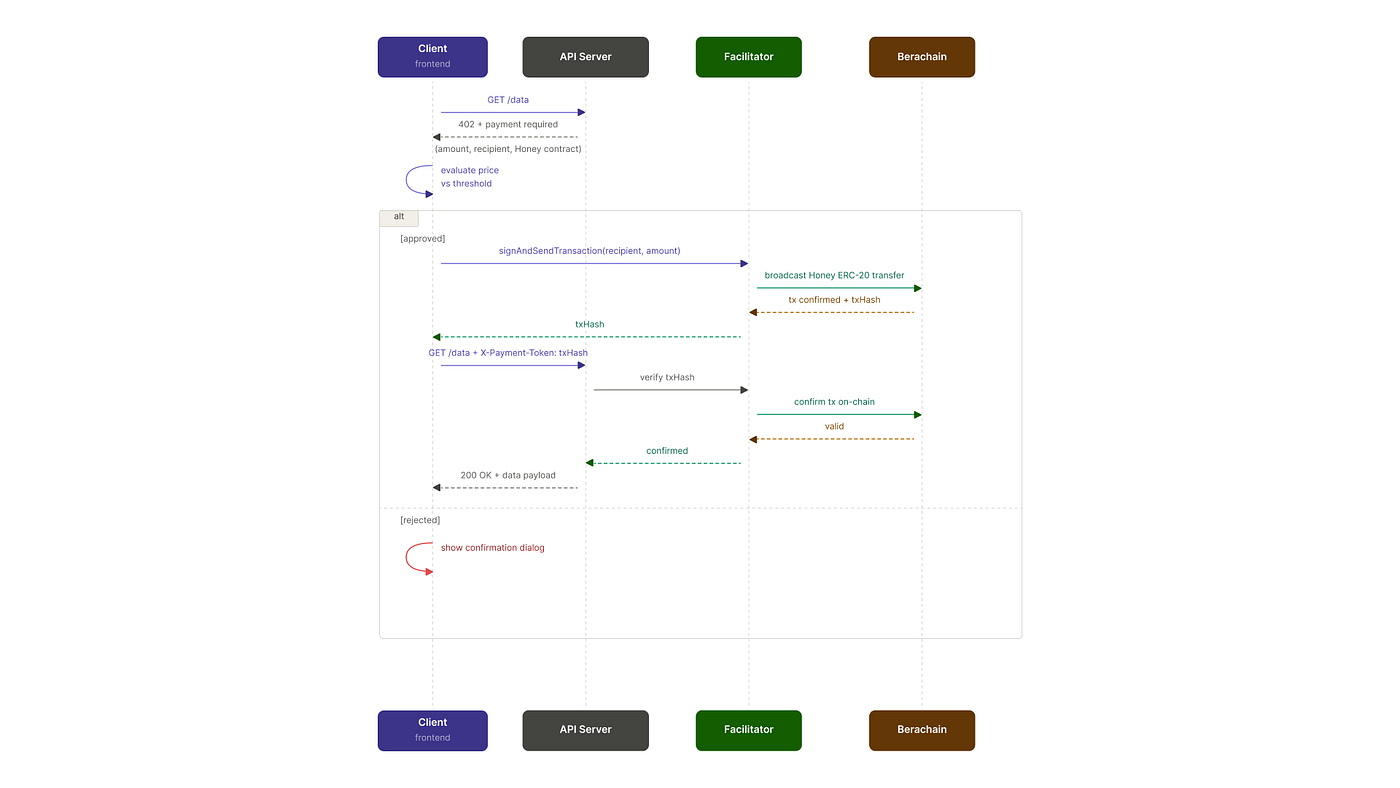
x402 Sequence Diagram
In this tutorial we’re using x402 to build a weather API that accepts Honey ($HONEY), Berachain’s native stablecoin, as the price of admission. Hit the endpoint without paying and you get a 402 with the Honey payment terms. Send the required amount to the server's wallet on Berachain and retry with your transaction hash, and the weather data comes back. The goal is to show how straightforward it is to build a resource that any HTTP client (or AI agent) can discover, pay for, and consume, using a stable on-chain token as the unit of exchange.
weather-x402 app
Prerequisites
Before starting, make sure you have the following:
- Bun installed (
curl -fsSL https://bun.sh/install | bash) - Basic familiarity with TypeScript
- Metamask wallet Chrome extension installed with Smart Accounts enabled and Bepolia network configured
- Testnet BERA (for gas) and testnet Honey (***https://bepolia.faucet.berachain.com***)
- Thirdweb account — We will set this up
- Cursor, Claude Code, or AI centric IDE
NOTE: Currently Honey and USDC have the functionality required for x402
Setting Up Thirdweb Facilitator
The most involved part of setup is obtaining the right API keys and server wallet needed for the x402 facilitator.
NOTE: We are using Bepolia Testnet (Chain ID 80069) because if you wanted to process transactions on Mainnet, you would need to set up a paid plan with Thirdweb.
Setting Up A Project
The first thing we’ll need to do is sign up to ***Thirdweb*** and create a new project.
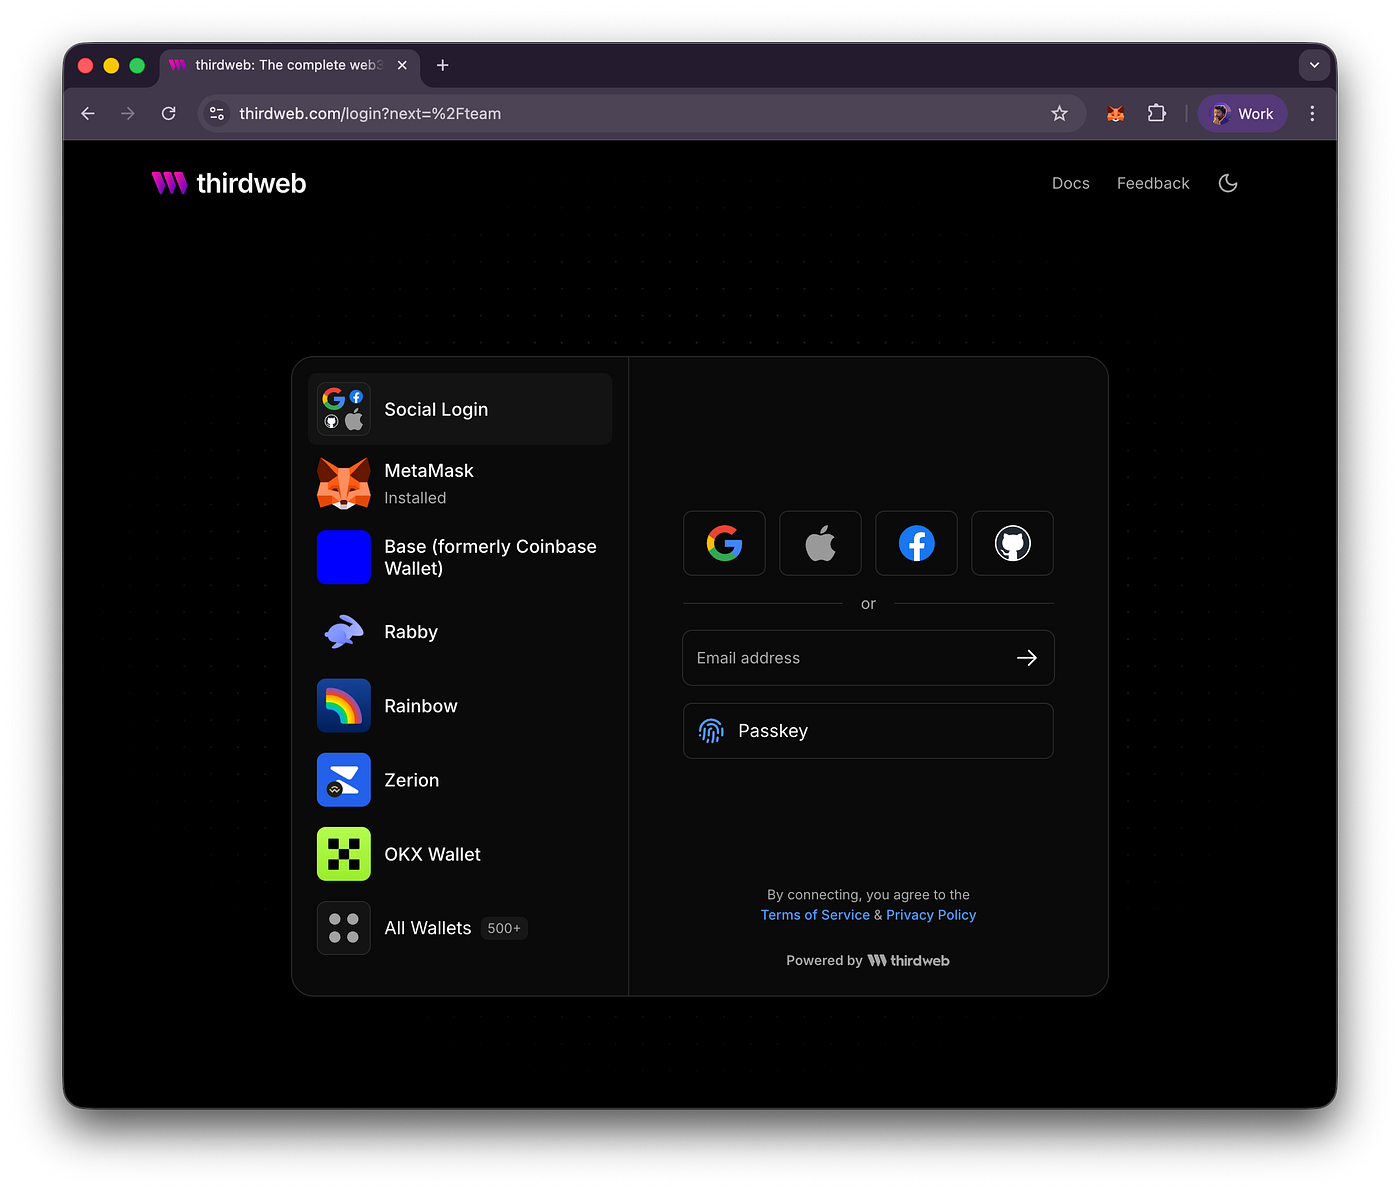
Once you’ve signed in, you’ll probably need to create a team at https://thirdweb.com/account if you haven’t done so already. I’m going to assume you have gone through the process and you have maybe set up a free account for that team.
After you’ve created a team, go into its projects and create a new one.
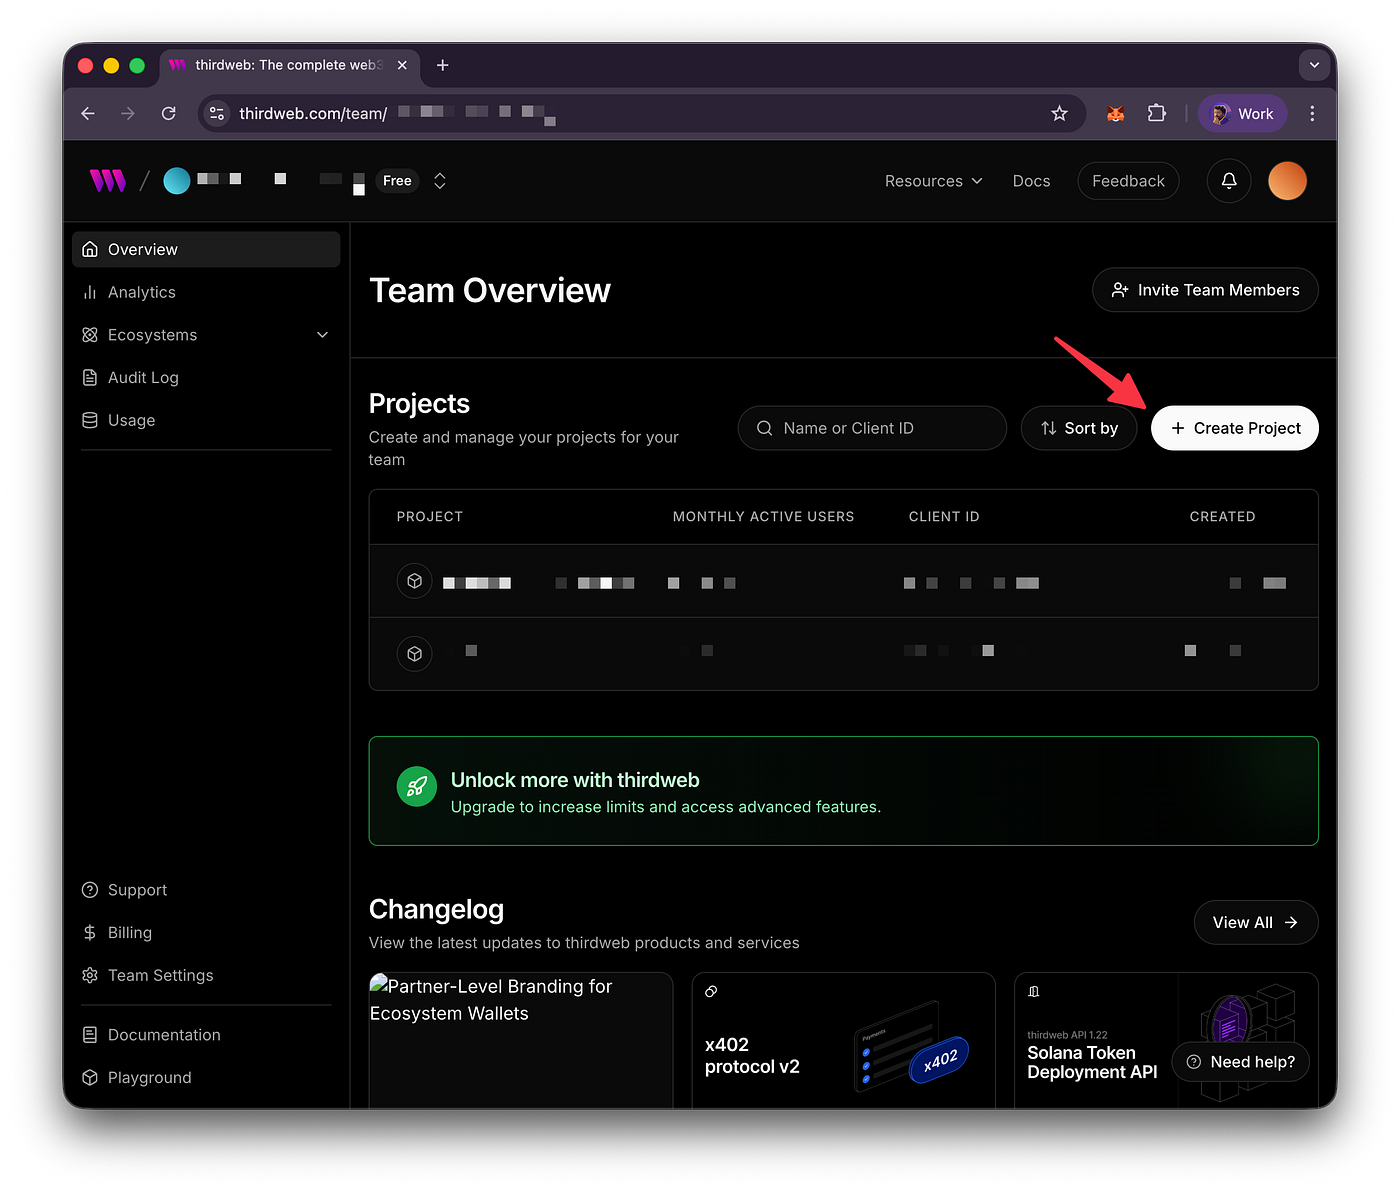
Thirdweb Create Project
While configuring the new project, we’re going to ensure that requests can be made from localhost:3000, which will be our backend api.
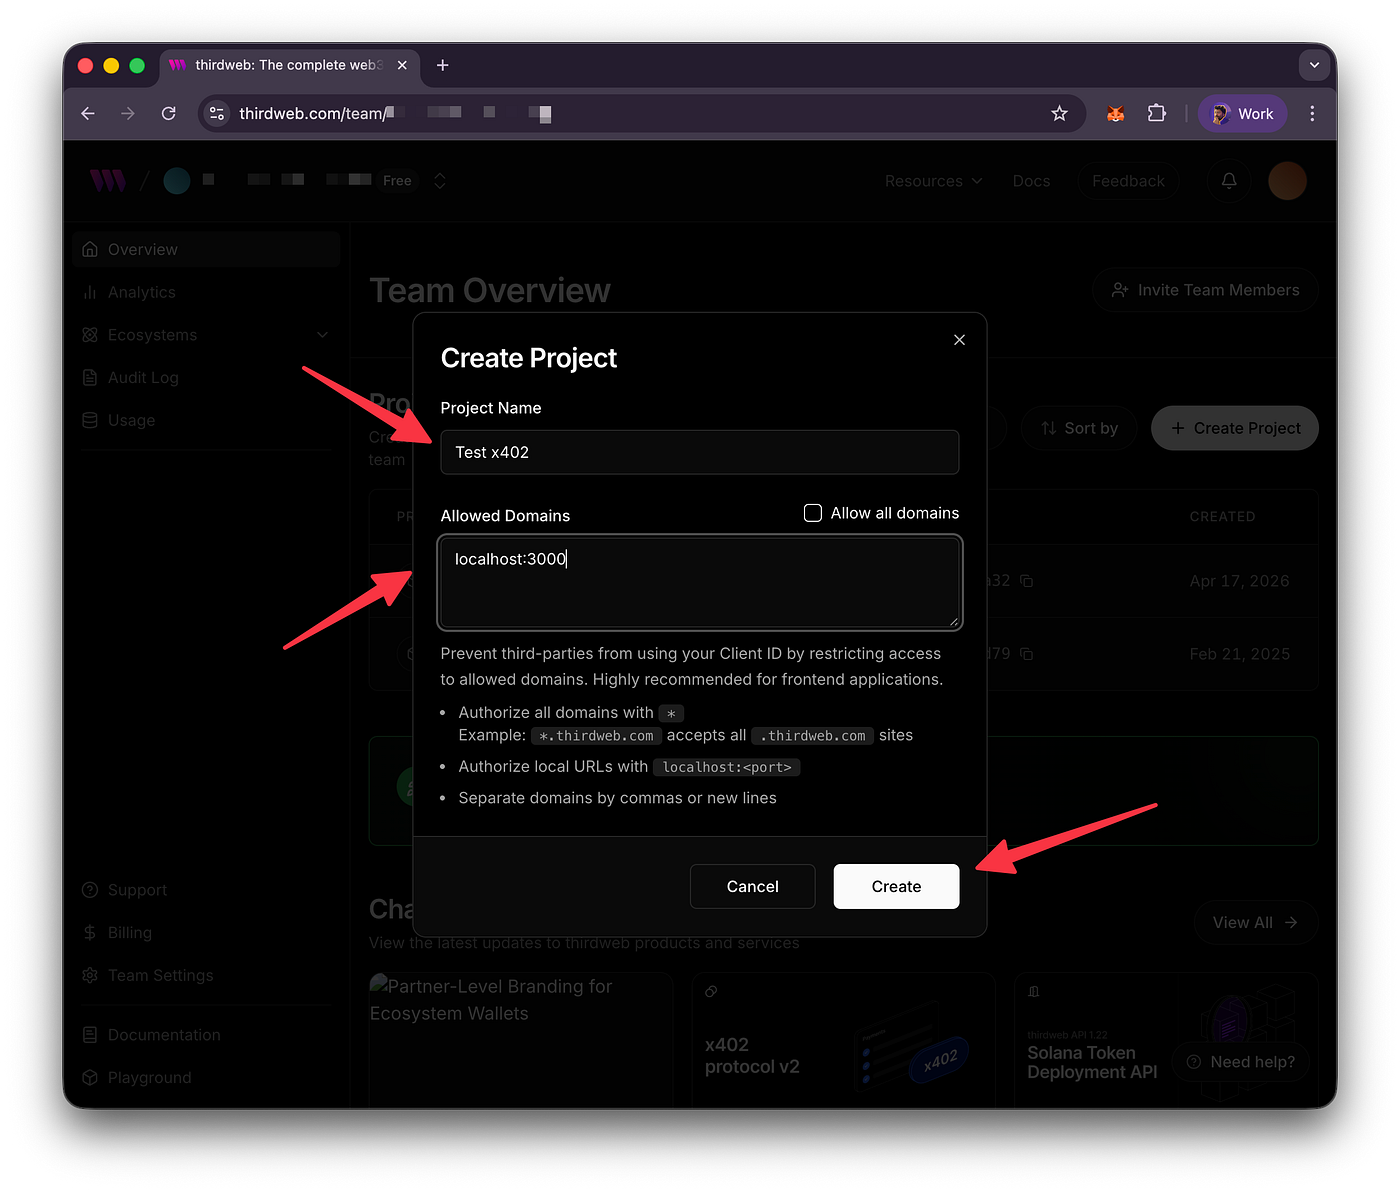
Configuring New Project
Copy your Client ID and your Secret Key and store them somewhere so that we can reference this later in our code.
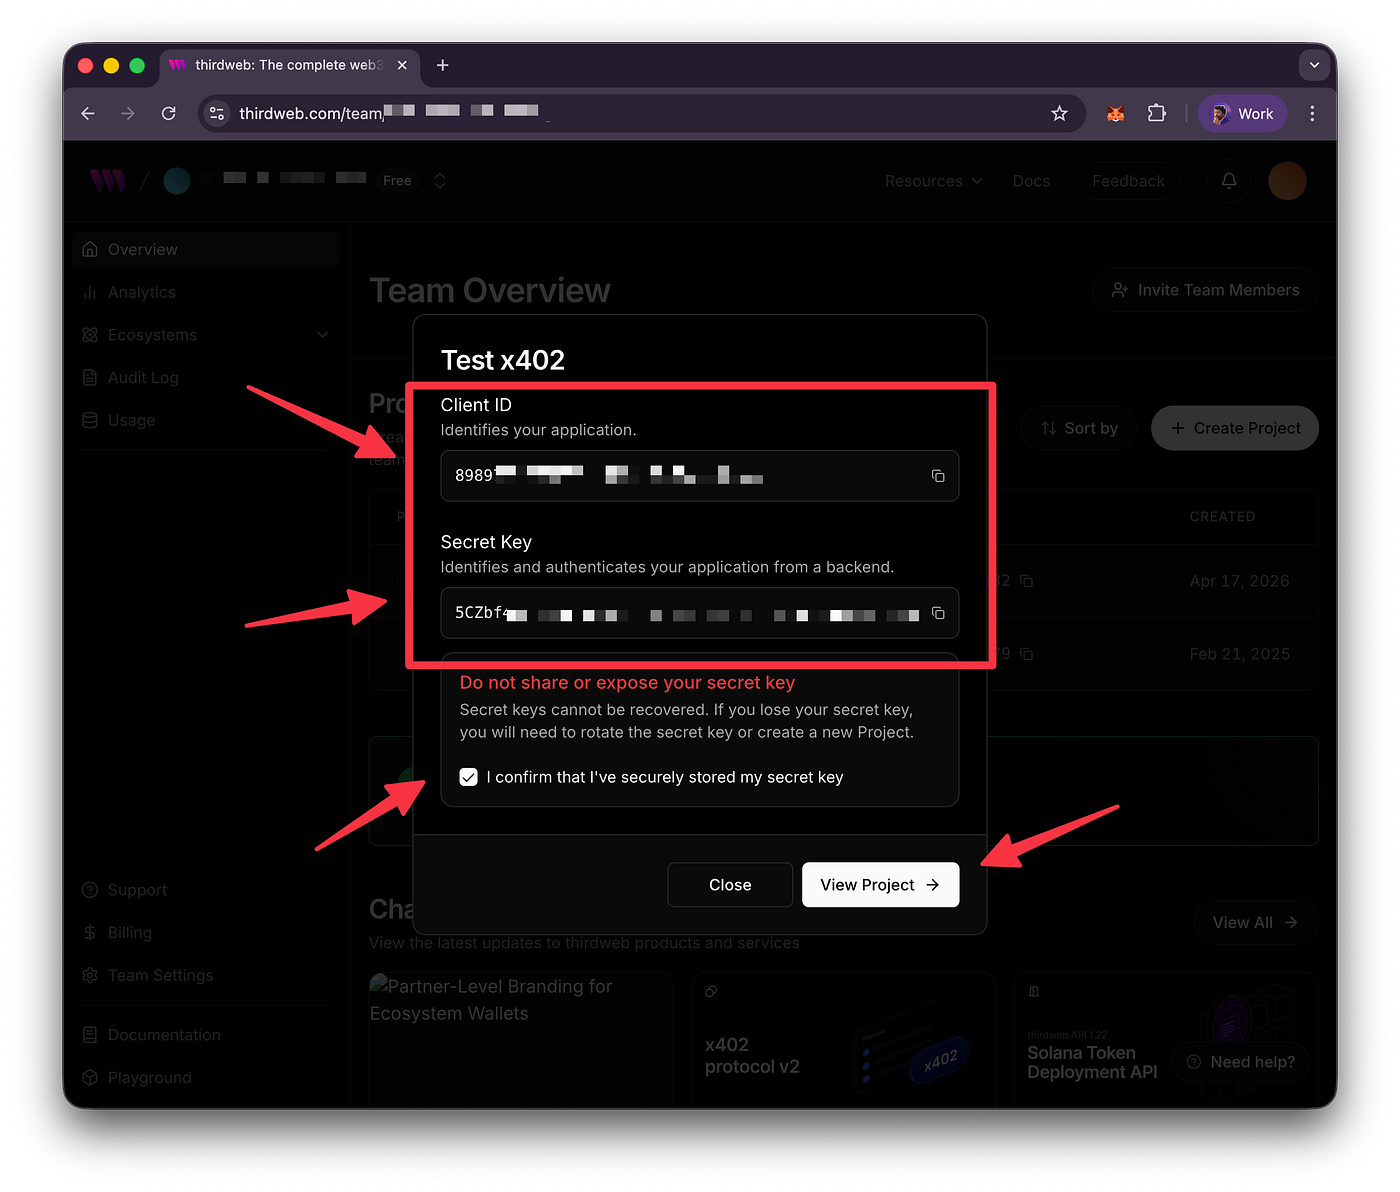
Thirdweb Project API Keys
Setup Server Wallet
Now that we have our project and API keys set up, the next thing we’ll need to do is create a server wallet. The server wallet is that will execute the transactions on behalf of the user for x402. We’ll be building this on Bepolia Testnet, but if you were running this on Berachain Mainnet it would likely need to have a balance of the native gas token BERA in order to sponsor those transactions.
When the wallet wanting to pay for a resource is ready, it doesn’t submit an on-chain transaction itself. Instead, it creates an offchain cryptographic signature (a payment authorization) that it attaches to the HTTP request. A facilitator server then verifies that signature and uses its own server wallet to settle the payment on-chain on the client’s behalf. The server wallet is what actually broadcasts the transaction and covers gas, which is why facilitators like Thirdweb’s use managed server wallets to handle this across many chains without manual gas management.
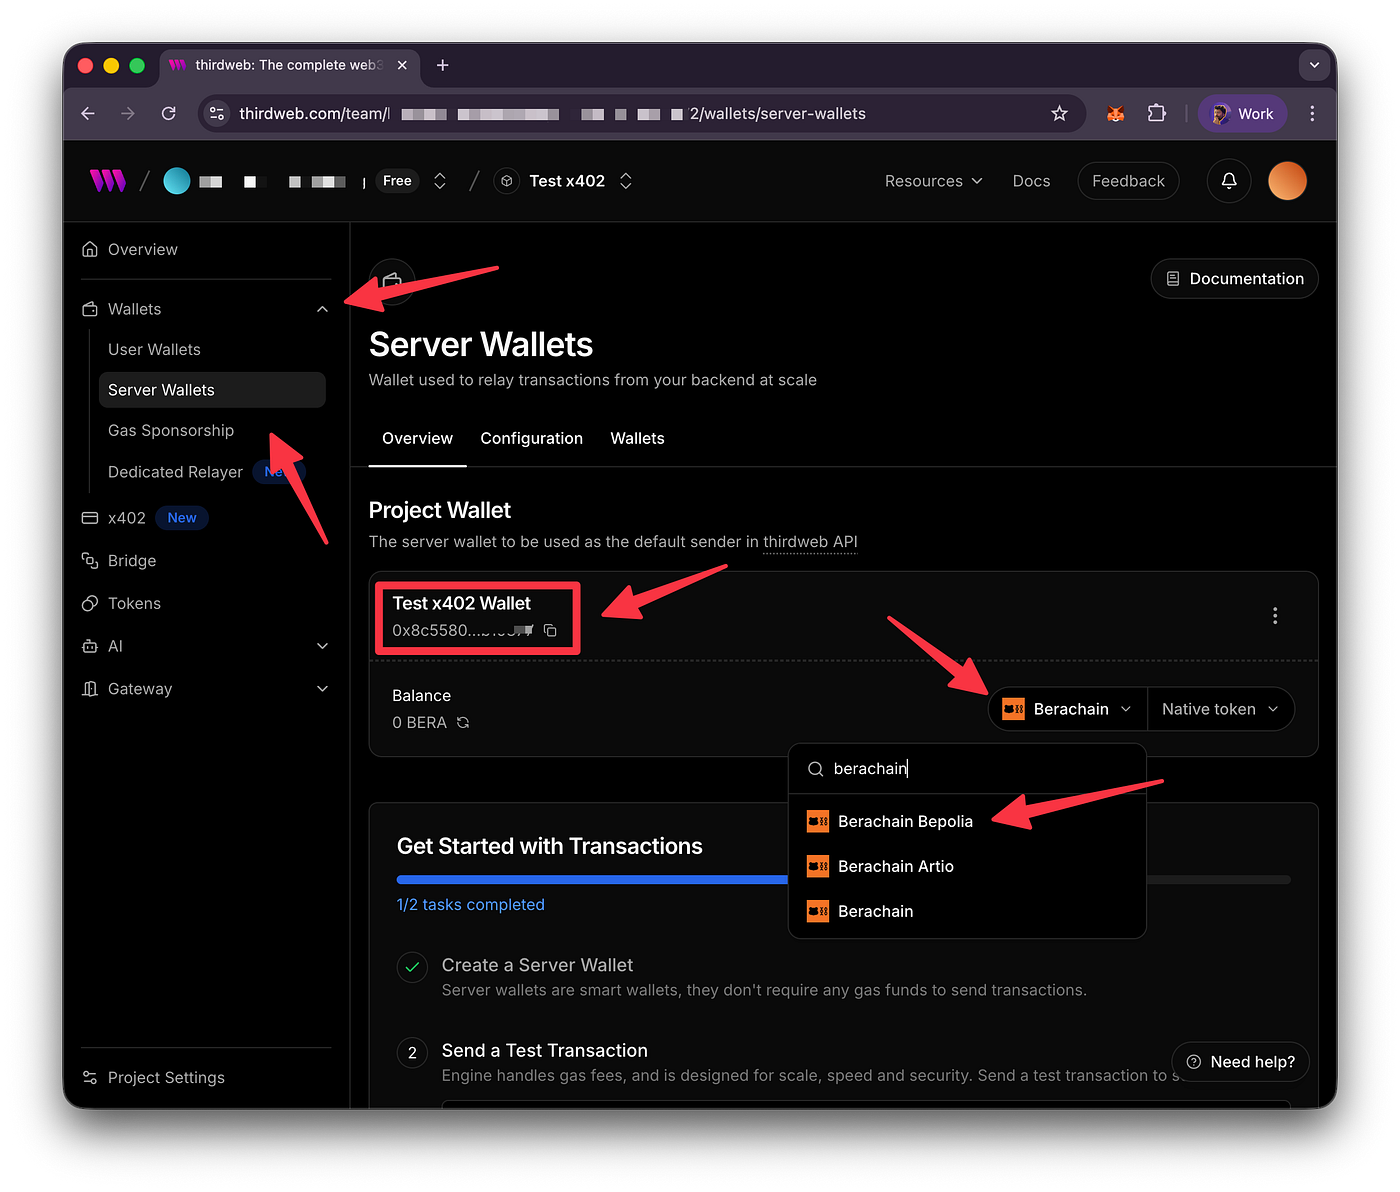
Thirdweb Server Wallets
Now that we have our API Keys and the Server Wallet address, we can start building.
Building Our Backend API With Cursor
Using Cursor, let’s start with a simple prompt using Opus 4.7 in plan mode to create the x402 backend API
I want to build a backend api that let's a user perform an x402 request to get the weather of a city in the US and process a payment on the Berachain EVM network.
It should include the ability to:
- Make a request that doesn't require an x402 payment to ensure that the request for the weather is working correctly
- Ability to make a x402 request for the weather of a city and require a payment
- Process the payment leveraging a facilitator from Thirdweb
- The payment should be made using Berachain's stablecoin called $HONEY

Make sure to look up Thirdweb's docs on x402.

Use the following APIs
- https://nominatim.openstreetmap.org/search?q=${encodeURIComponent(city)}&format=json&limit=1
- https://api.weather.gov/points/${lat.toFixed(4)},${lon.toFixed(4)}

For the tech stack
- Use bun as the package manager
- Use viem for any evm or wallet interactions
- Make sure it's built with TypeScript
- Utilizing Hono instead of Express
- Use Thirdweb as a Facilitator
- It should be built on top Berachain Bepolia Testnet - Chain ID 80069
- It should have have .env and .env.example with presets

Build this in a folder called /api
This is a good starting point and will definitely require a few more prompts to get it to place that we need. This is what was generated for me, but if you’d like to see the working code, see the full github repository link further down.
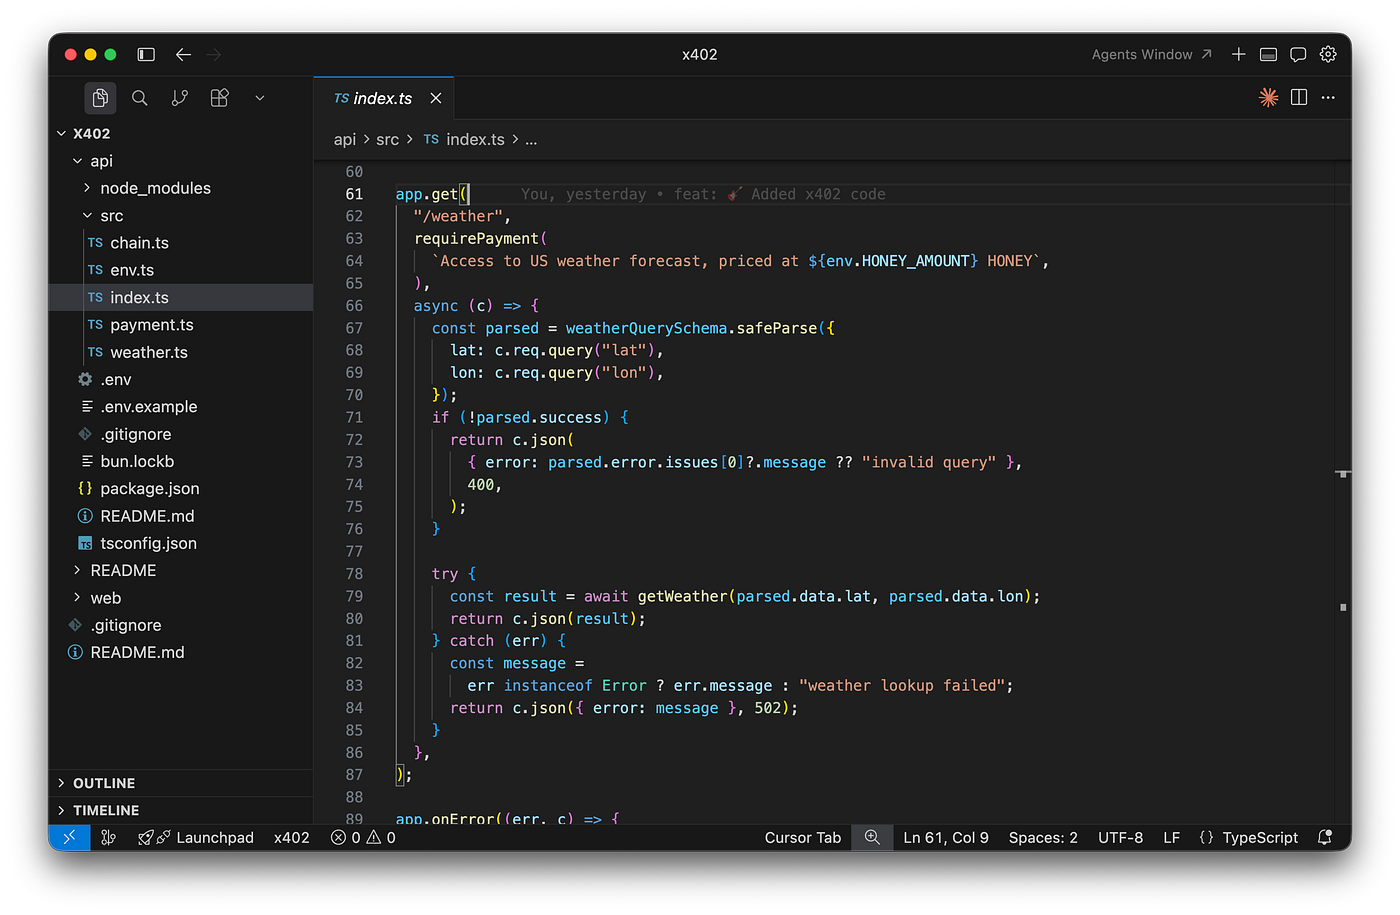
x402 Backend API
Once the project is setup, we’ll need to make sure our .env file has the right Thirdweb API keys, the receiver of the funds is setup, and we give the server wallet address we generated.
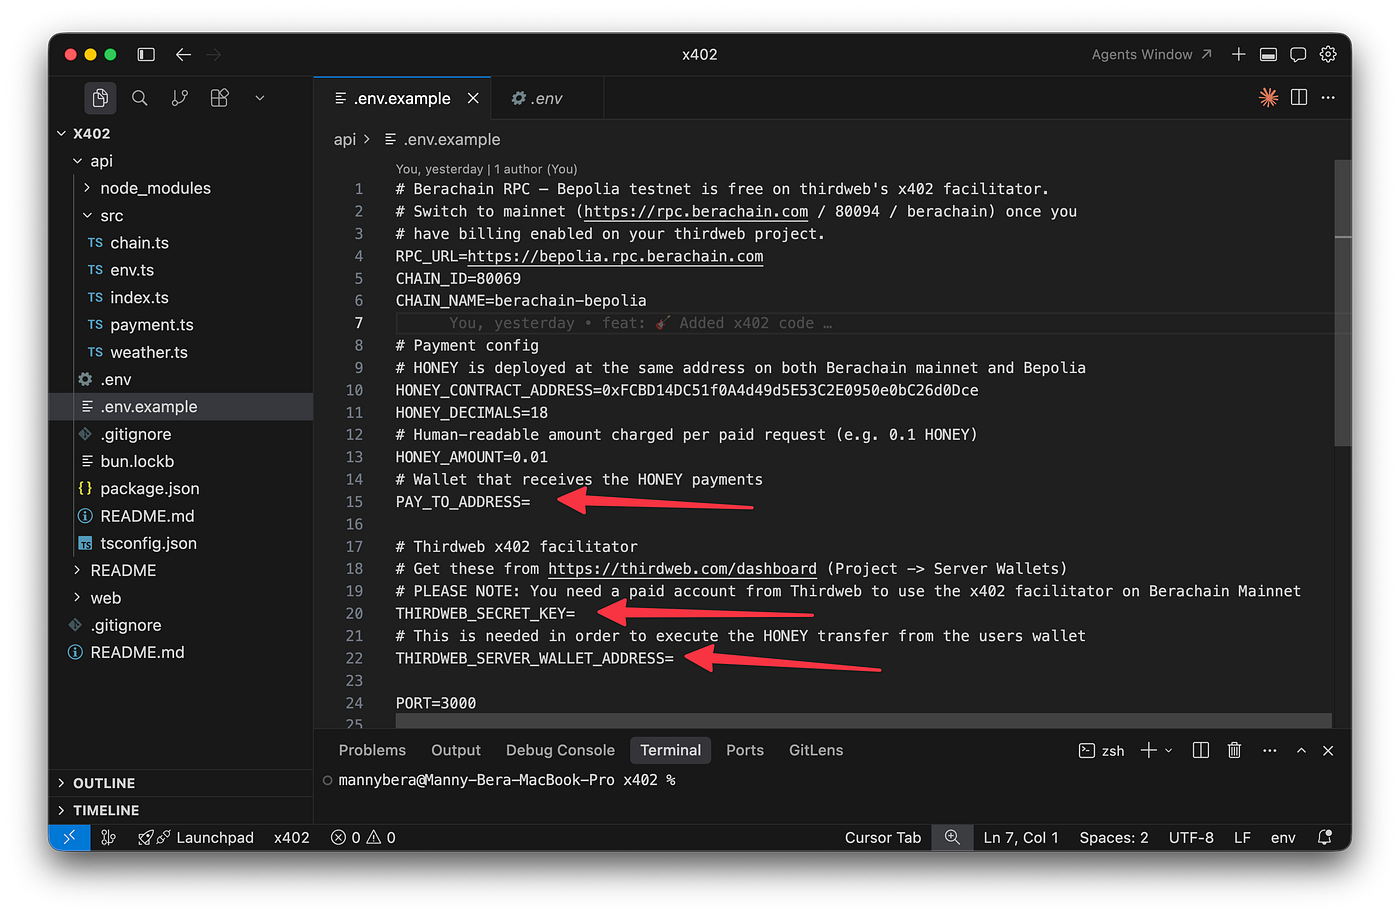
Cursor Backend Configuing Environment Variables
Building Our Frontend With Cursor
For the frontend, let’s work with the following prompt to plan things out:
I want to build a frontend that allows a user to connect their EVM wallet with the Berachain network to the page and perform the following:
1 - Make a request leveraging the non-x402 endpoint to get the weather for a city and show the response
2 - Make a request to the x402 weather api and return the response for the payment details
3 - Make a request to the x402 weather api, prompt the evm wallet to sign the necessary transaction, and pass the signature to process the payment through the x402 endpoint

These should be 3 different card sections for the user to interact with and shouldn't be dependent of each other.

Ensure that the backend has CORS enabled correctly to allow for requests coming from the frontend.

The tech stack should include:
- Use bun as the package manager
- Use viem for any evm or wallet interactions
- Make sure it's built with TypeScript
- Use React with Vite
- Ensure there the right integrations with Thirdweb's x402 facilitator
- It should be built on top Berachain Bepolia Testnet - Chain ID 80069
- It should have have .env and .env.example with presets
This should generate quite a bit, and this may take some additional prompts in terms of getting it to read through Thirdweb’s documentation and x402 to fully understand how to retrieve the signature and pass it to the x402 payment gated API.
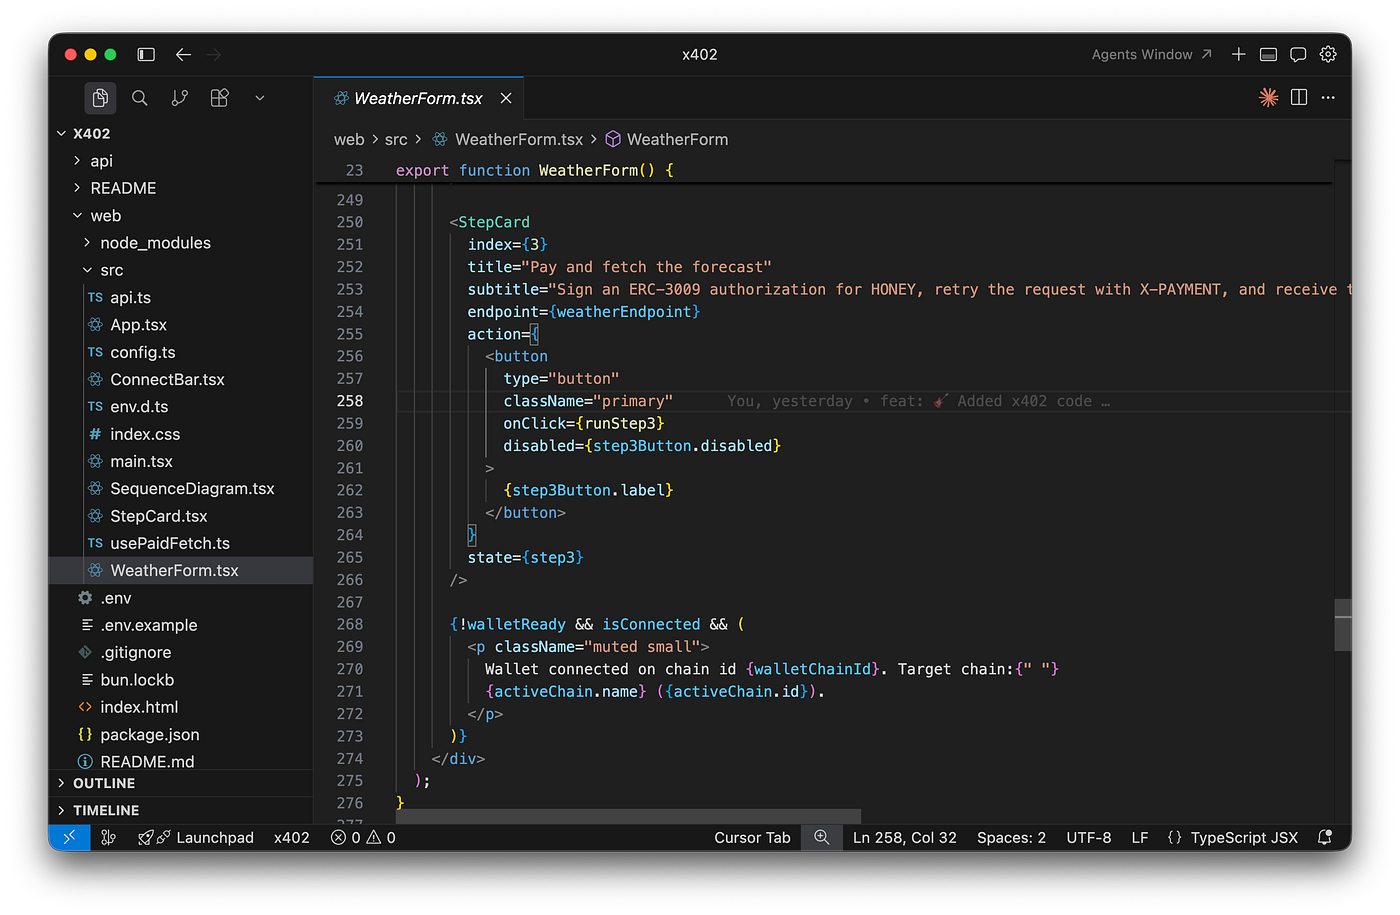
x402 Web
The frontend in this case will need the Thirdweb Client ID, in order to make the requests to Thirdweb.
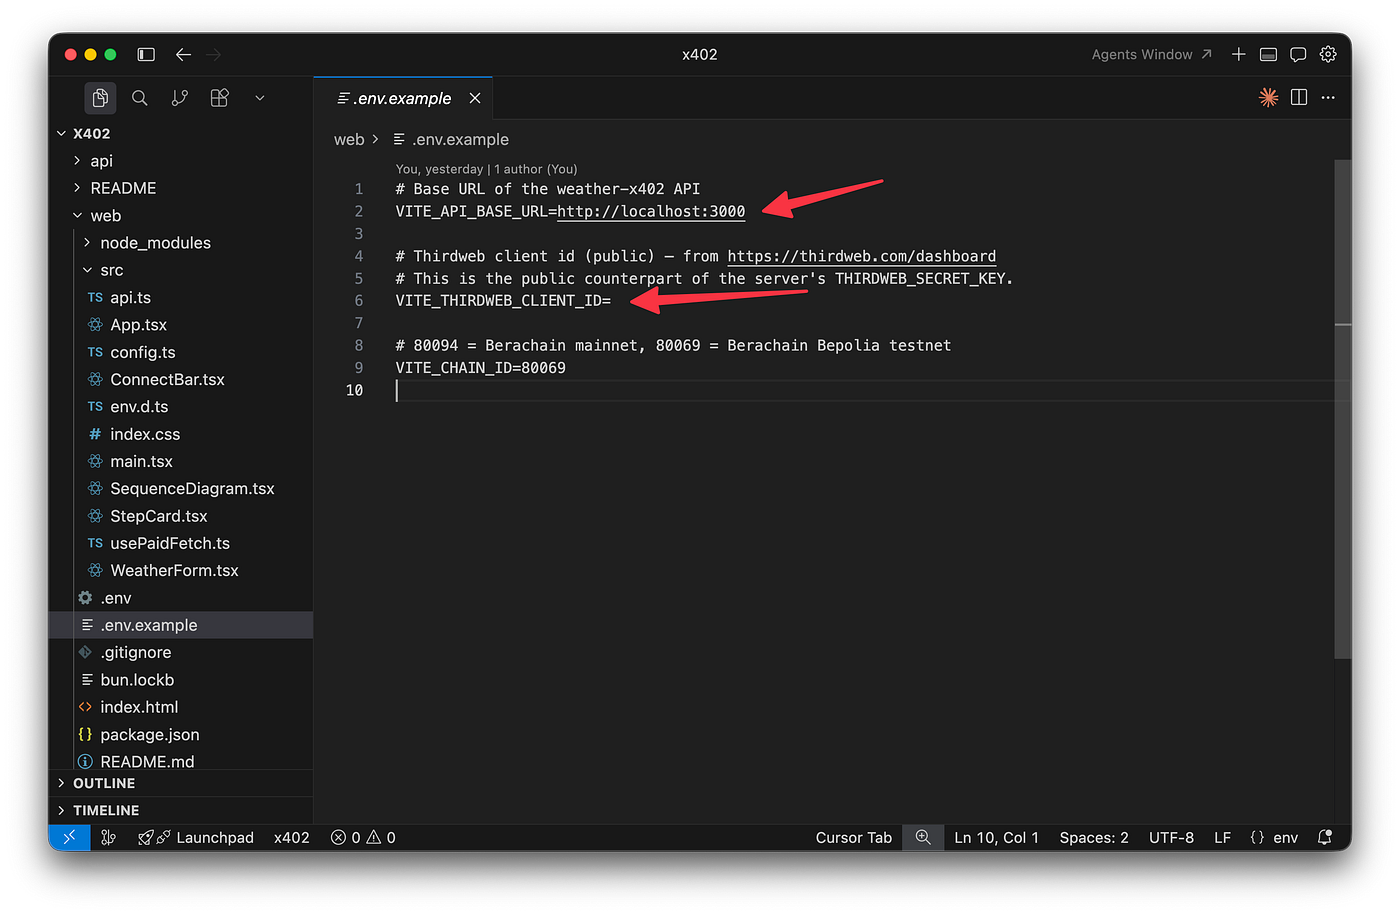
x402 Frontend Configuring Environment Variables
Now we’re ready to run the backend and the frontend in two different terminals and get it working together.
x402 Project In Action
The first request we’re going to make sure that the weather API works as expected.
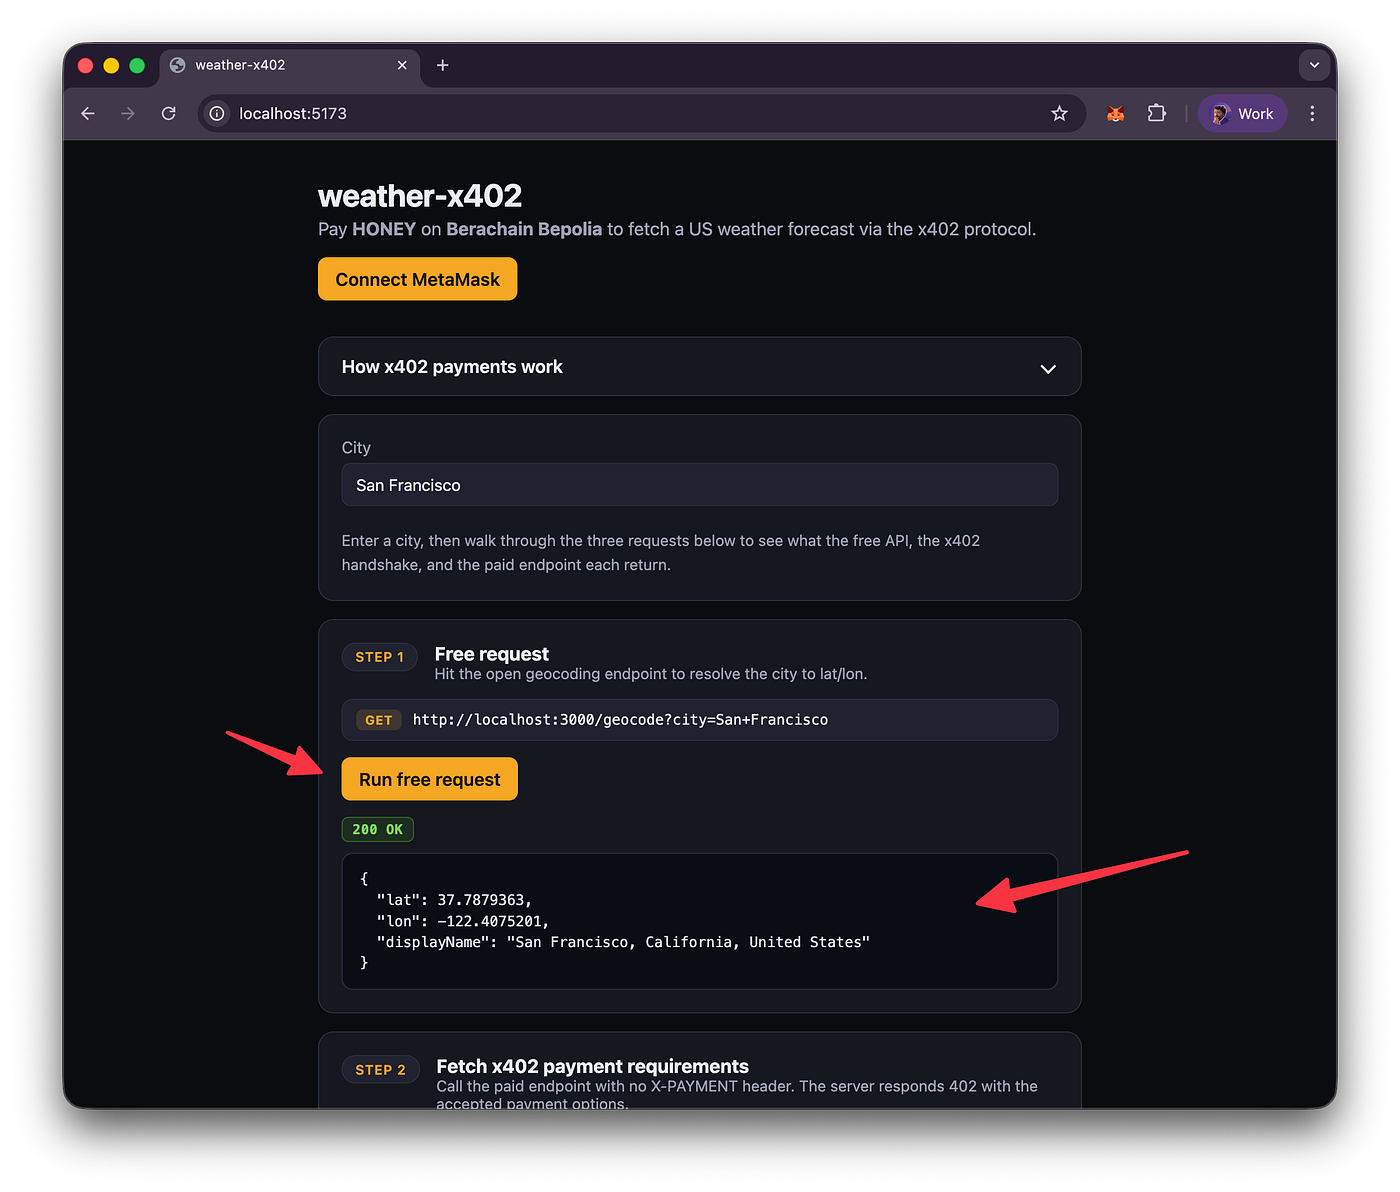
Successful Free Request
Next, we just want to see what the request for the x402 endpoint returns when it expects a payment and responds with instructions.
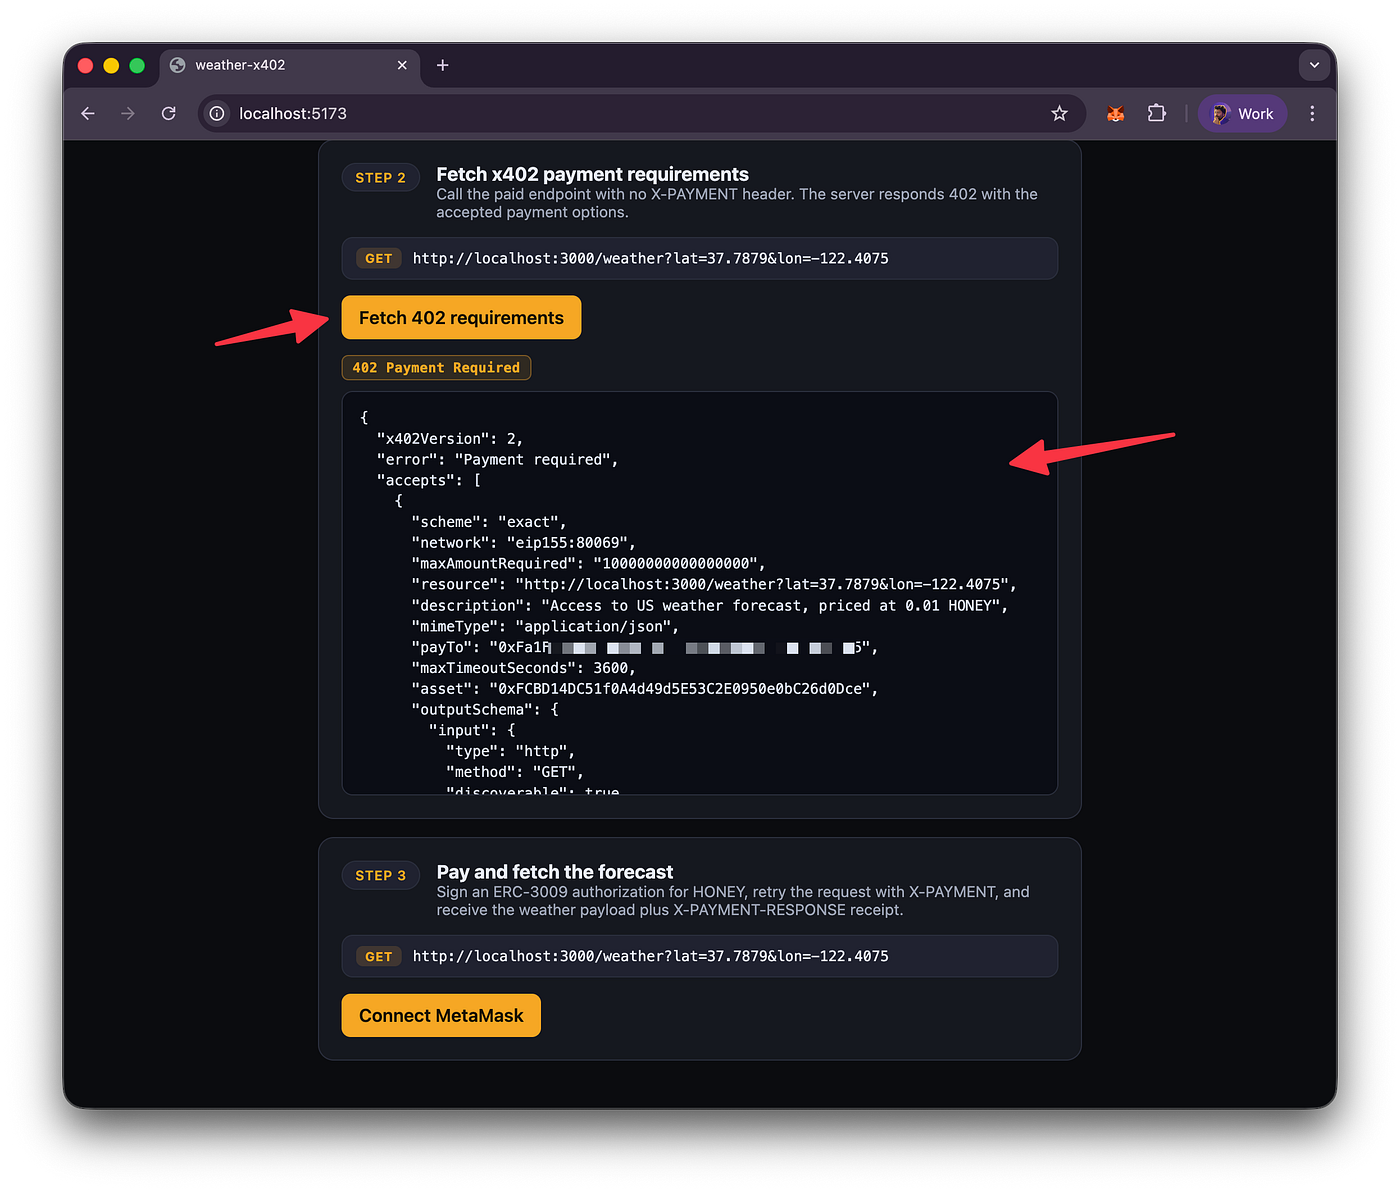
x402 API Endpoint Payment Instructions
Lastly, we’ll put that all together by connecting our wallet, getting the instructions for the x402 payment, signing a transaction, and sending that to validate and retrieve data.
NOTE: It’s not uncommon where it comes back with an error that the simulation fails. In those cases just try again and it should go through.
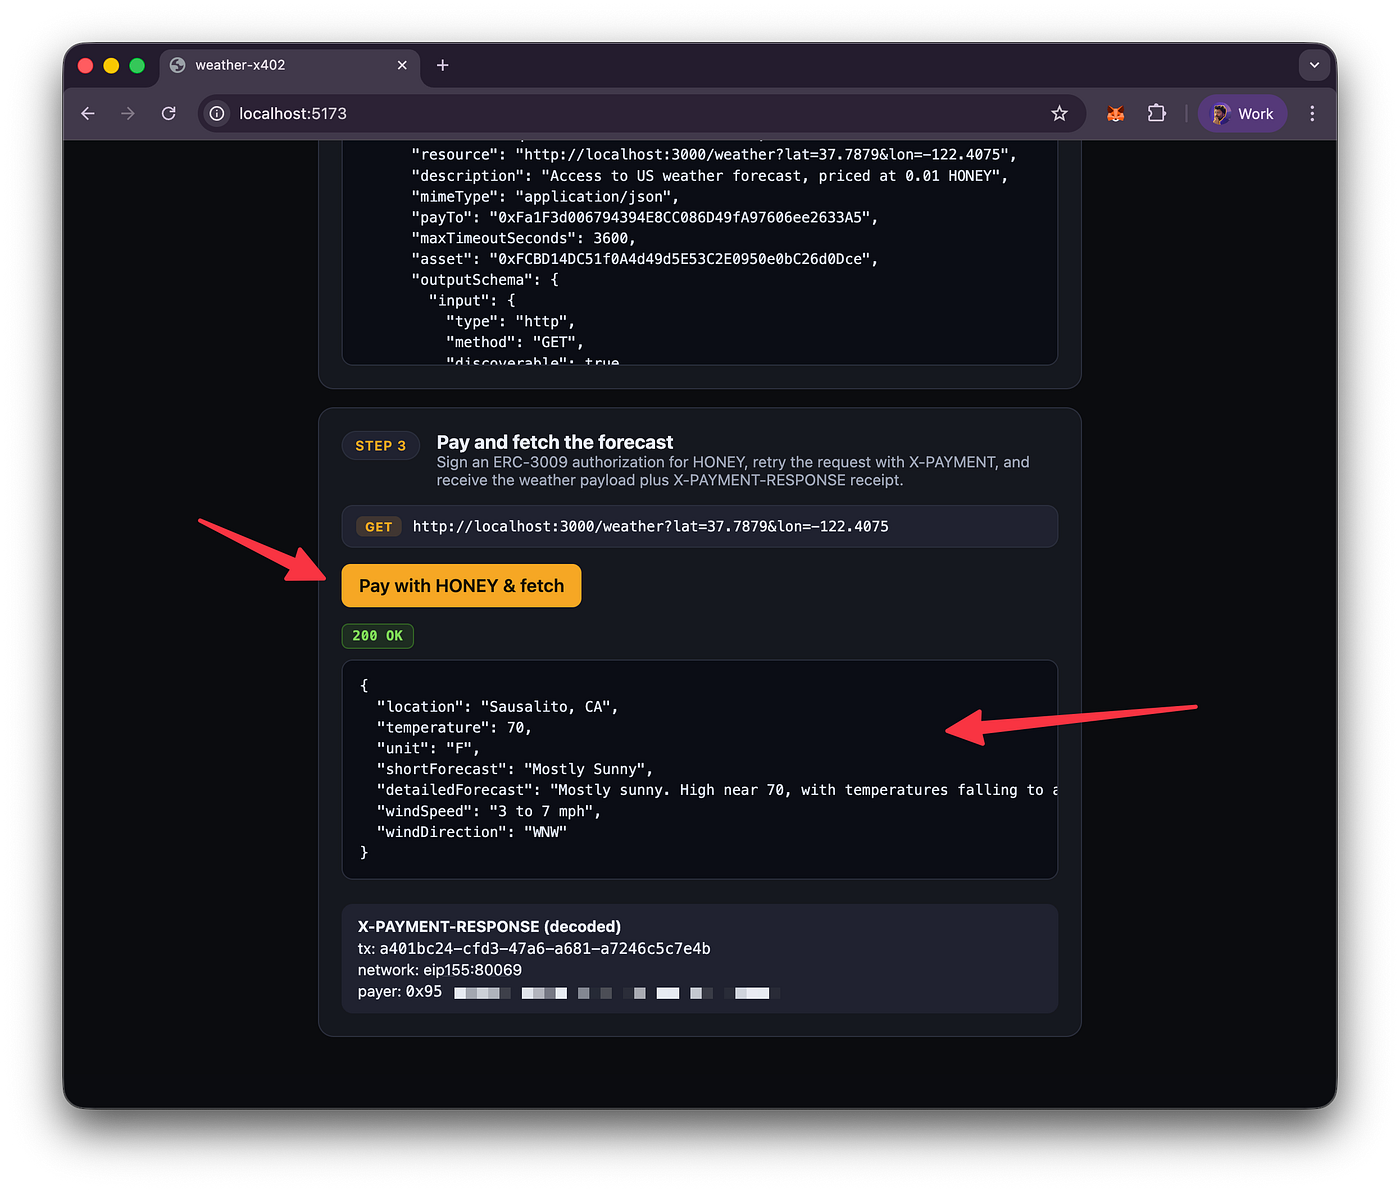
Successful x402 API Transaction Paid with Berachain $HONEY
This demonstrates the full cycle of getting payment instructions and making an x402 payment with Berachain’s native stablecoin $HONEY in order to receive the API response.
Full Code Project
If you’d like to run the code yourself, you can check out the full source code and results from the project here: ***https://github.com/berachain/guides/tree/main/apps/x402***
Next Steps
Now that you’ve built a working AI-native micropayment system on Berachain, here are some ideas to take it further:
- Dynamic pricing. Return different
X-Payment-Amountvalues per route (historical weather costs more than current), or per caller wallet based on usage history. - MCP configuration. Set up an agent wallet MCP which leverages this x402 API.
- Multi-token support . Extend the payment headers to list multiple accepted tokens. The
fetch_or_get_payment_termstool can select whichever token the agent wallet holds a balance of.
If you want to build more on Berachain and see more examples. Take a look at our ***Berachain GitHub Guides Repo*** for a wide variety of implementations that include NextJS, Hardhat, Viem, Foundry, and more.
❤️ Don’t forget to show some love for this article 👏🏼.
메타데이터
- post_id
- e8c24167c19f
- slug
- building-ai-agent-micropayment-apis-with-x402-on-berachain-e8c24167c19f
- url
- https://medium.com/@codingwithmanny/building-ai-agent-micropayment-apis-with-x402-on-berachain-e8c24167c19f
- canonical_url
- https://medium.com/@codingwithmanny/building-ai-agent-micropayment-apis-with-x402-on-berachain-e8c24167c19f
- author_url
- https://medium.com/@codingwithmanny
- status
- ok
- fetched_at
- 2026-06-09 14:34:10