A Beginner's Guide to YOLO Pose Detection
From Pixels to Skeletons
A Beginner's Guide to YOLO Pose Detection
From Pixels to Skeletons
I’ve spent the last three weeks trying to automate the “perfect squat” for a fitness app I’m bootstrapping. If you’ve ever tried to explain to a computer what a “knee” is versus a “really baggy pair of cargo pants,” you know the struggle.
In the old days (like, 2016), we had to stitch together three different models just to figure out where someone’s elbow was. Today, in 2026, we have YOLO26 and YOLOv11, and honestly, it’s almost cheating. If you’re a founder or a dev looking to add motion tracking, gesture control, or “is my worker wearing a helmet correctly” logic to your product, this is the guide I wish I had before I wasted forty hours on legacy libraries.
The Bottom Line (TL;DR)
- What it is: Pose detection identifies keypoints (joints like elbows, knees, etc.) and connects them to form a digital skeleton.
- The Tech: Use the Ultralytics library. It’s the industry standard for a reason: it’s fast, modular, and works on everything from a beefy RTX 5090 to a $50 edge device.
- The Model: Start with
yolo11n-pose.ptor the newyolo26n-pose.ptfor the best speed-to-accuracy ratio. - The Cost: $0 in licensing for personal use/R&D; a few lines of Python to get a demo running.
What is Pose Detection, and how does it actually work?
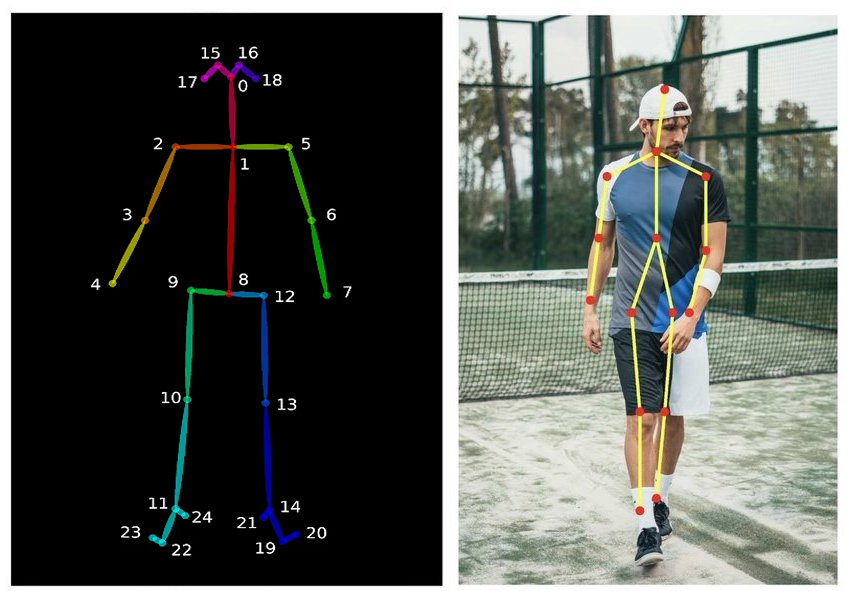
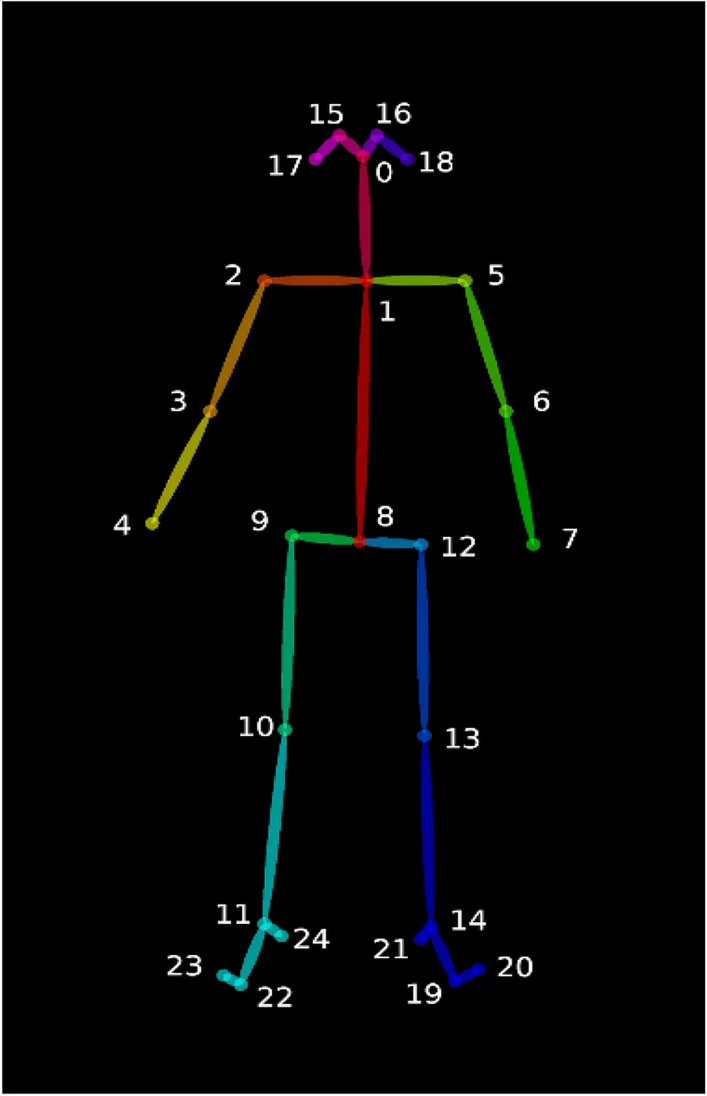
At its core, pose detection isn’t about “seeing” a person; it’s about locating specific coordinates on a person.
Imagine a stick figure. To draw that stick figure over a real person, you need 17 specific dots (keypoints): the nose, eyes, ears, shoulders, elbows, wrists, hips, knees, and ankles. YOLO (You Only Look Once) does this in one single “glance” at the image.
Unlike standard object detection, which just draws a box around a “person,” pose detection tells you what that person is doing. Are they falling? Are they waving? Are they doing a bicep curl with terrible form? That’s where the value is.
Why is YOLO better than MediaPipe or OpenPose?
This is the question I see most on Reddit. Here’s my “in-the-trenches” take:
If you’re building a production app that needs to track multiple people in a gym or a warehouse, YOLO is the winner. If you’re building a simple selfie-filter for a web browser, MediaPipe might be enough.
How to build Pose Detection in Python (Step-by-Step)
Let’s get your hands dirty. We’re going to use the Ultralytics framework because I’m too lazy to write a custom backbone from scratch, and you should be too.
Step 1: Install the Essentials
Pop open your terminal. You need Python 3.9+ and the library.
pip install ultralyticsStep 2: The “Magic” Code
Create a file called pose.py. This script will load a pre-trained model and run it on a video or your webcam.
from ultralytics import YOLO
import cv2
# 1. Load the "Nano" pose model (fastest for 2026 hardware)
model = YOLO('yolo11n-pose.pt') # 2. Run inference on a video file or webcam (source=0)
results = model.predict(source="0", show=True, conf=0.5)# 3. Print the coordinates of the first person's nose
for result in results:
keypoints = result.keypoints.xyn.cpu().numpy() # Normalized coordinates
if len(keypoints) > 0:
print(f"Nose position: {keypoints[0][0]}")What’s happening here?
**yolo11n-pose.pt**: This is the "Nano" version. It’s small enough to run on a laptop without the fans sounding like a jet engine.**source="0"**: This tells the computer to use your default webcam.**keypoints.xyn**: This gives you the $(x, y)$ coordinates normalized between 0 and 1. This is crucial because it means your logic won't break if you change the video resolution later.
The “Gotchas”: What they don’t tell you in the docs
I’ve hit these walls so you don’t have to:
- The “Confidence” Trap: YOLO will try to find a nose even if it’s looking at a chair. Always check the confidence scores (
result.keypoints.conf). If the score is below 0.5, ignore that joint, or your stick figure will start looking like a Lovecraftian horror. - Occlusion is Real: If a person turns sideways, one of their arms “disappears” behind their body. YOLO returns a visibility flag.
2: Visible and labeled.1: Labeled but occluded (the model is "guessing" where the joint is).0: Not labeled at all.- Pro Tip: Only trigger your app’s logic when visibility is
2. - Lighting Matters: If you’re building for a dark warehouse, the pre-trained COCO models (trained on sunny day photos) will fail. You’ll need to fine-tune the model on your own data.
Frequently Asked Questions
How many keypoints does YOLO detect?
By default, the human pose model detects 17 keypoints. This includes the face (5), upper body (6), and lower body (6).
Can I run this on a Raspberry Pi?
Yes, but don’t expect 60 FPS. With the YOLO26-Nano model, you can get about 10–15 FPS on a Raspberry Pi 5. If you need more juice, look into an NVIDIA Jetson or use TensorRT export.
Is YOLO Pose free for commercial use?
Ultralytics uses the AGPL-3.0 license. This means if you’re building a commercial product and you don’t want to open-source your code, you’ll likely need to buy a commercial license. Check their pricing page; it’s cheaper than hiring a lawyer later.
What’s Next?
Now that you have the skeleton, the real fun begins. You can calculate the angle between three points (e.g., shoulder-elbow-wrist) to see if someone is doing a pushup correctly using basic trigonometry ($a² + b² = c²$ still comes in handy, who knew?).
Now go ship something.
메타데이터
- post_id
- e99ea7db014c
- slug
- a-beginners-guide-to-yolo-pose-detection-e99ea7db014c
- url
- https://medium.com/@agneya/a-beginners-guide-to-yolo-pose-detection-e99ea7db014c
- canonical_url
- https://medium.com/@agneya/a-beginners-guide-to-yolo-pose-detection-e99ea7db014c
- author_url
- https://medium.com/@agneya
- status
- ok
- fetched_at
- 2026-06-28 04:42:08