Building Real-time Apps with Spring Boot and WebSocket — My Developer Journey
When I first started working with Spring Boot, most of my projects were built on traditional REST APIs — simple request and response. But…
Building Real-time Apps with Spring Boot and WebSocket — My Developer Journey
When I first started working with Spring Boot, most of my projects were built on traditional REST APIs — simple request and response. But at some point, I wanted to go beyond that. I wanted real-time communication — something that could instantly send and receive data without reloading the page.
That’s when I discovered WebSocket.
In this post, I’ll share how I learned to integrate WebSocket with Spring Boot to build real-time, bidirectional applications — the same foundation behind chat systems, live notifications, and multiplayer games.
Why Real-time Communication Matters ?
In today’s web, users expect updates the moment something happens — a new chat message, a notification, a stock price change, or even a live feed update. Traditional HTTP can’t handle that well since it relies on constant polling or refreshing.
WebSocket solves this problem beautifully by creating a persistent, two-way connection between client and server.
Once established, both can send messages anytime — no more waiting for requests.
What Exactly is WebSocket?
In simple words, WebSocket is a protocol that lets your client and server talk to each other instantly — both can send and receive messages at any time using just one connection.
Here’s what that means:
- 🧭 Two-way communication: The client and server can both send messages whenever they want.
- ⚡ At the same time: Data can flow in both directions simultaneously.
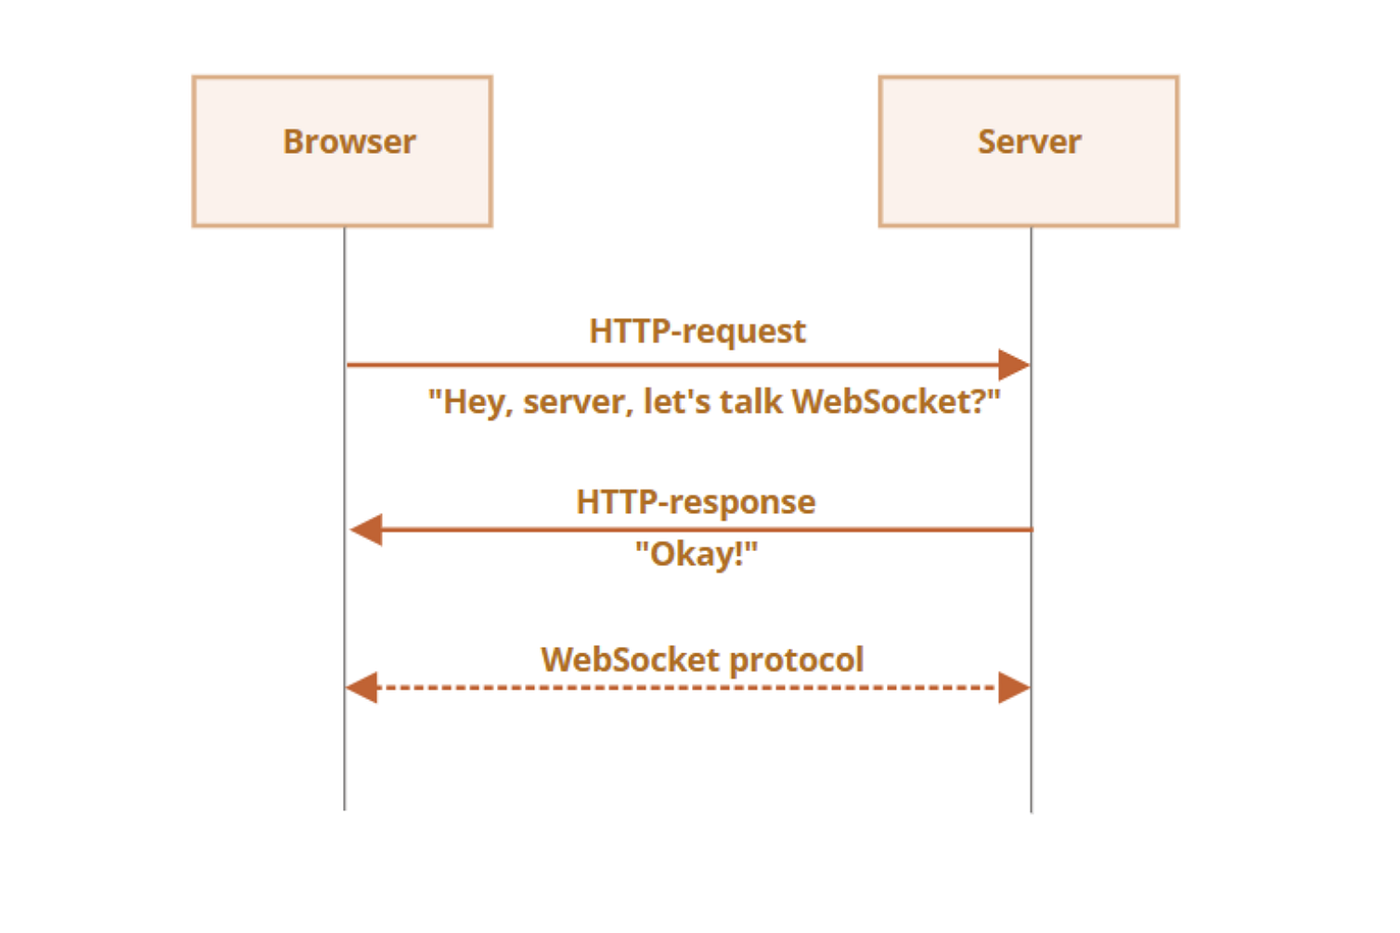
- 🔄 One connection only: It starts as an HTTP connection and then upgrades to a live, continuous WebSocket link.
- 🪶 Fast and lightweight: Messages are small and travel quickly compared to normal HTTP requests.
That’s why WebSocket is perfect for real-time apps like chat systems, live notifications, or dynamic dashboards.
Introducing STOMP — The Messaging Layer :
While WebSocket provides the connection, STOMP (Simple Text Oriented Messaging Protocol) defines how we send and receive structured messages over it.
Think of it as the language the client and server use to talk to each other.
STOMP supports commands like:
CONNECT, SEND, SUBSCRIBE, UNSUBSCRIBE, and DISCONNECT.
Spring Boot integrates STOMP beautifully, allowing us to:
- Handle messages in @Controller methods.
- Use an in-memory message broker for simple apps.
- Or connect to external brokers (like RabbitMQ or ActiveMQ) for more complex systems.
┌─────────┐        ┌───────────────────────┐        ┌─────────┐
│ Client  │  ⇄⇄⇄  │   WebSocket + STOMP   │  ⇄⇄⇄  │ Server  │
└─────────┘        │ (Messages over TCP)   │        └─────────┘
                   └───────────────────────┘
Setting Up a WebSocket Project in Spring Boot 🛠️:
Here’s how I got started:
Prerequisites
- Java 17+
- Maven or Gradle
- An IDE (IntelliJ IDEA, Eclipse, or VS Code)
Step 1 — Create a Spring Boot project :
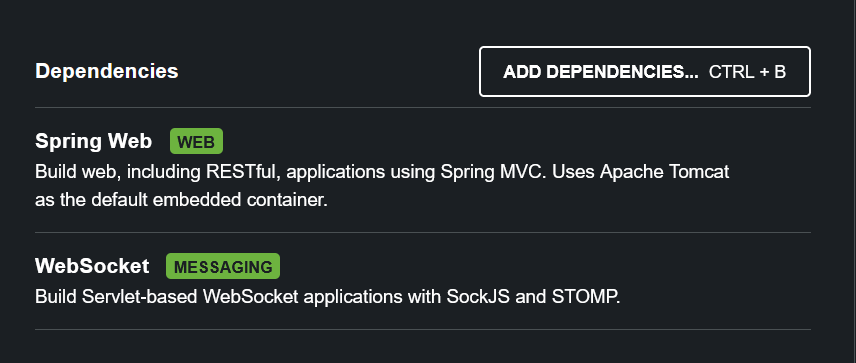
You can use Spring Initializr and include the dependencies:
Spring Web Spring WebSocket
Step 2 — Configure WebSocket :
In your config package, create a class like this:
@Configuration
@EnableWebSocketMessageBroker
public class WebSocketConfig implements WebSocketMessageBrokerConfigurer {

    @Override
    public void configureMessageBroker(MessageBrokerRegistry config) {
        config.enableSimpleBroker("/topic");
        config.setApplicationDestinationPrefixes("/app");
    }
@Override
    public void registerStompEndpoints(StompEndpointRegistry registry) {
        registry.addEndpoint("/ws").setAllowedOrigins("*").withSockJS();
    }
}
@ Configuration indicates that it is a Spring configuration class.
@ EnableWebSocketMessageBroker enables WebSocket message handling, backed by a message broker. Here we are using STOMP as a message broker.
The method configureMessageBroker does two things:
- configureMessageBroker sets up an in-memory message broker with one or more destinations for sending and receiving messages. The destination prefix /topic is used for messages to be carried to all subscribed clients via the pub-sub model.
- Defines the prefix /app that is used to filter destinations handled by methods annotated with @MessageMapping, which you will implement in a controller. After processing the message, the controller will send it to the broker.
The method withSockJS() enables SockJS fallback options, allowing our WebSocket to work even if the browser does not support the WebSocket protocol.
Step 3 — Create a Message Controller
@Controller
public class ChatController {
@MessageMapping("/sendMessage")
    @SendTo("/topic/messages")
    public String sendMessage(String message) {
        return message;
    }
}
Now your server can send and receive messages in real time.
Testing the WebSocket Connection :
For testing, I used a simple HTML/JS frontend that connects to the endpoint using SockJS and STOMP.js:
<script src="https://cdn.jsdelivr.net/npm/sockjs-client@1/dist/sockjs.min.js"></script>
<script src="https://cdn.jsdelivr.net/npm/stompjs@2/dist/stomp.min.js"></script>
<script>
let socket = new SockJS('/ws');
let stompClient = Stomp.over(socket);
stompClient.connect({}, () => {
stompClient.subscribe('/topic/messages', (message) => {
console.log("Received: ", message.body);
});
stompClient.send("/app/sendMessage", {}, "Hello from client!");
});
</script>Once you open multiple tabs and send a message from one, you’ll see it instantly appear in the others — no refresh needed.
That’s the magic of WebSocket + STOMP .
Beyond the Basics :
After getting the basics running, I realized how flexible this system can be.
You can:
- Send private messages to specific users.
- Integrate a real message broker like RabbitMQ.
- Secure WebSocket endpoints with Spring Security and JWT tokens.
Once you understand the fundamentals, the possibilities are endless.
Final Thoughts 🎯:
Working with WebSocket and Spring Boot opened a new world for me as a backend developer.
It’s not just about sending messages — it’s about building interactive experiences where the backend and frontend truly talk in real-time.
If you’ve been building REST APIs your whole career, give WebSocket a try.
Once you see that first instant message show up without a page reload, you’ll never look at HTTP the same way again .
메타데이터
- post_id
- ea3d461dcacd
- slug
- building-real-time-apps-with-spring-boot-and-websocket-my-developer-journey-ea3d461dcacd
- url
- https://medium.com/@ayoub.hamileddine/building-real-time-apps-with-spring-boot-and-websocket-my-developer-journey-ea3d461dcacd
- canonical_url
- https://medium.com/@ayoub.hamileddine/building-real-time-apps-with-spring-boot-and-websocket-my-developer-journey-ea3d461dcacd
- author_url
- https://medium.com/@ayoub.hamileddine
- status
- ok
- fetched_at
- 2026-07-16 04:26:08

