Cinemachine in Unity
A quick guide on how to use Cinemachine in Unity
Cinemachine in Unity
A quick guide on how to use Cinemachine in Unity
Photo by Grace Brauteseth on Unsplash
Brief
A quick guide how set-up and use Cinemachine to create follow and look at camera
Concept
Unity’s built-in Cinemachine package and it’s features will be used
Installation
To install Cinemachine simply open-up package manager window, select Unity registry and install it:
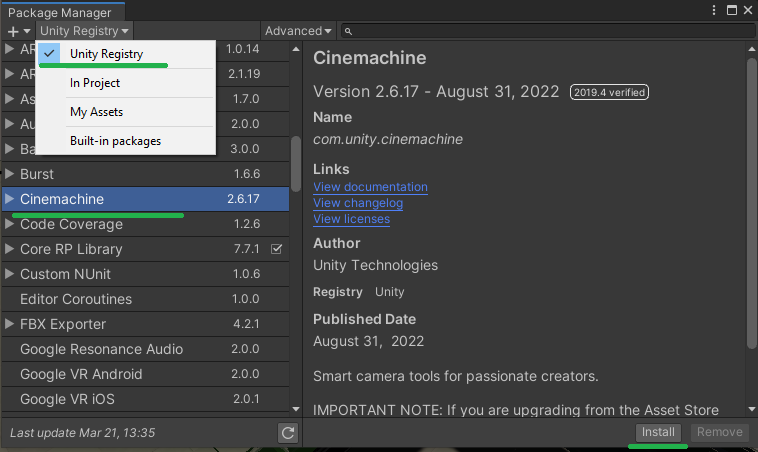
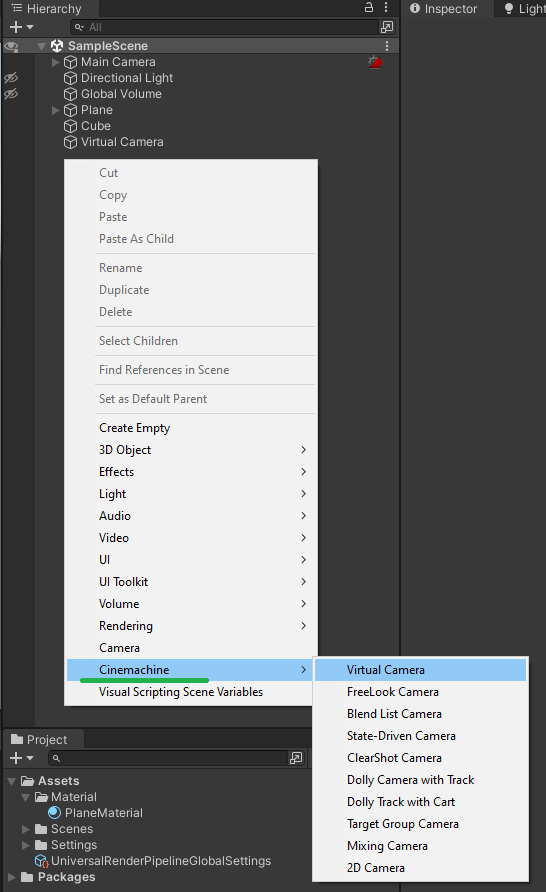
Once installed, additional Cinemachine context menu must appear in creation options:
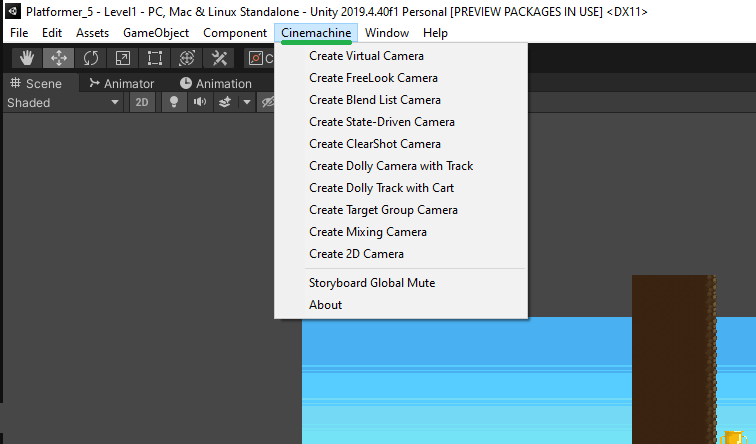
Or in some other Unity Editor versions Cinemachine adding is on top of window menu:
Adding a Cinemachine object
We’ll use basic Virtual Camera, once added certain changes are made automatically:
- Main camera now has a CinemachineBrain component
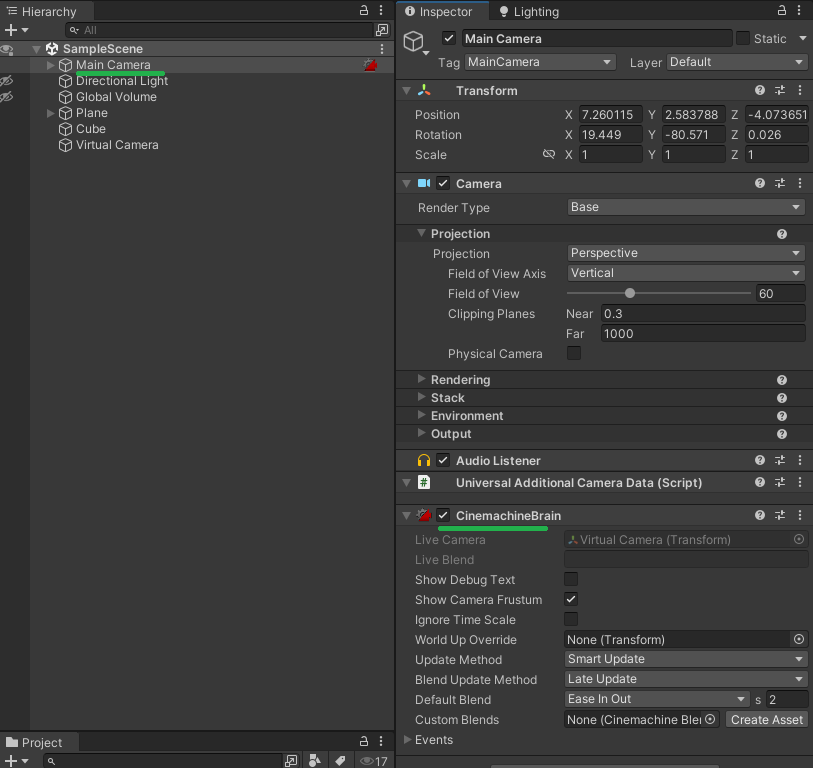
- Main camera now inherits all position and rotation values from a created Virtual Camera
The main concept of Cinemachine is to take control of main camera and make it follow certain positions, views and other vastly available settings.
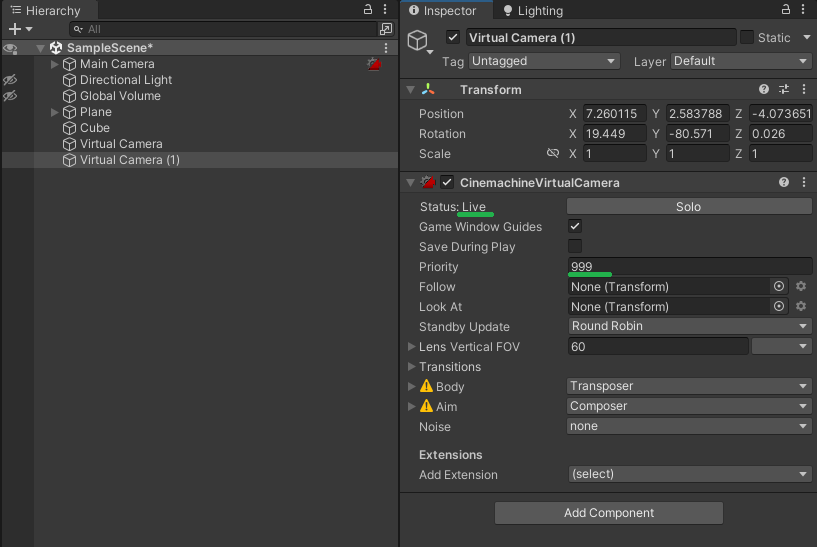
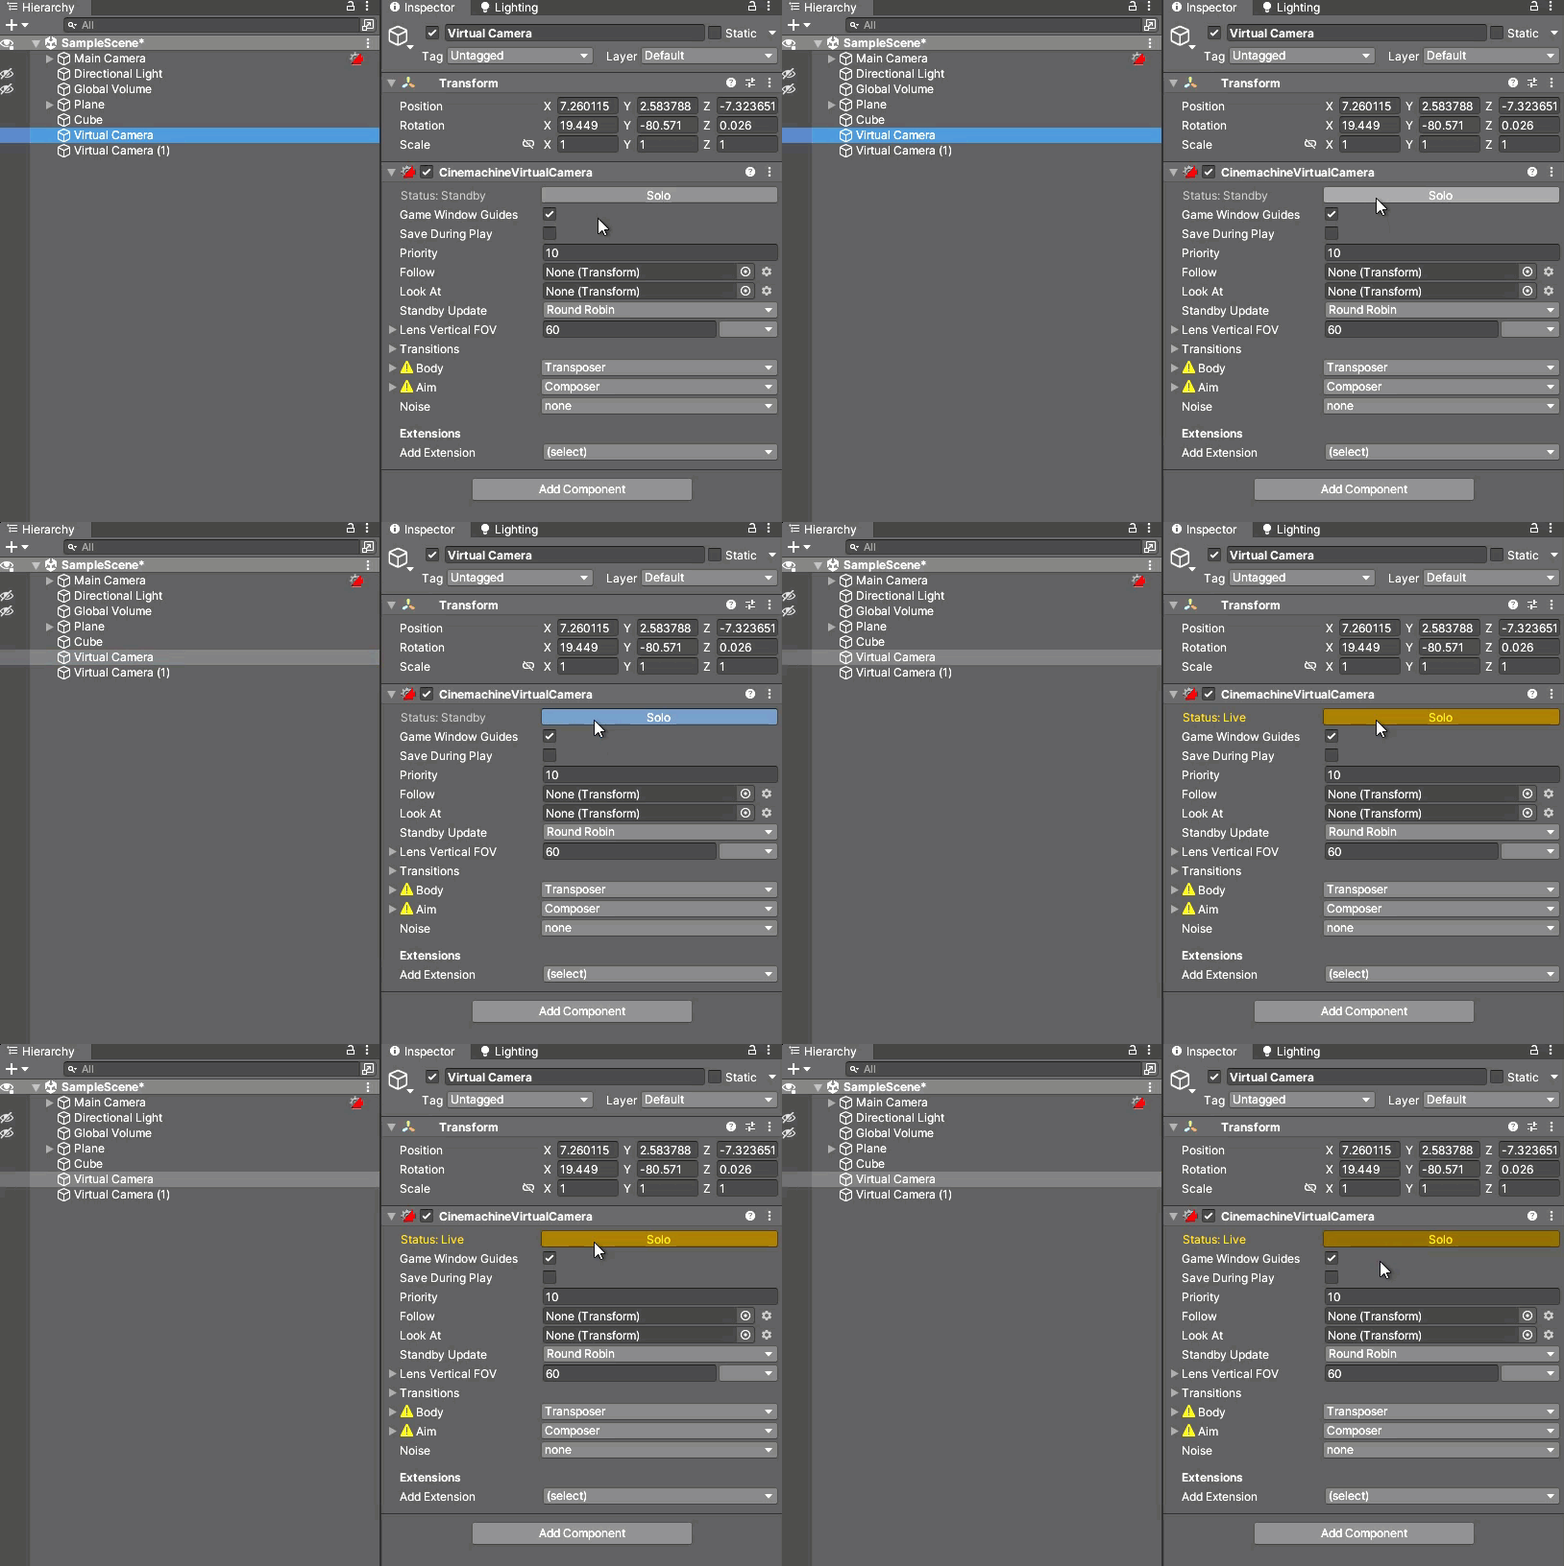
The Virtual Camera which is currently controlling the main camera has a Live status
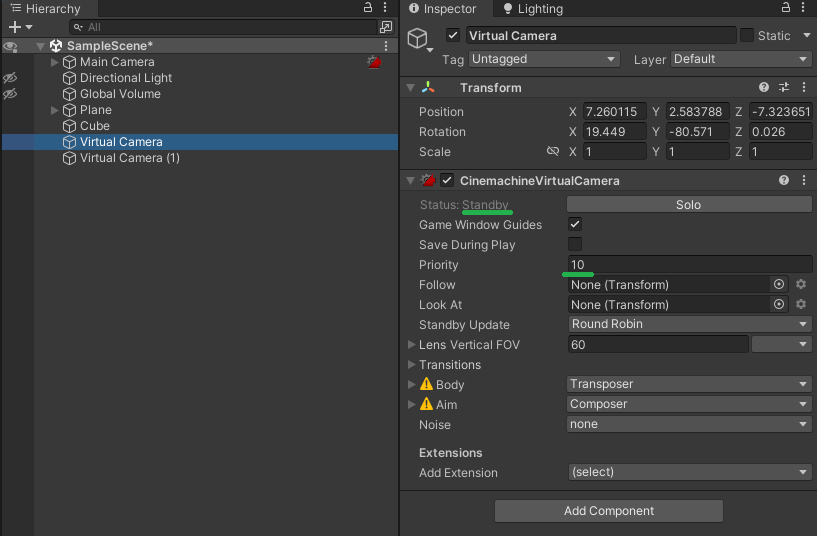
The Virtual Camera which is not controlling the main camera has a Standby status
Adding Multiple Cinemachine cameras
Multiple Cinemachine cameras should benefit game scene with multiple views. The main camera can be phased between these cameras. The general rules of switching between virtual cameras:
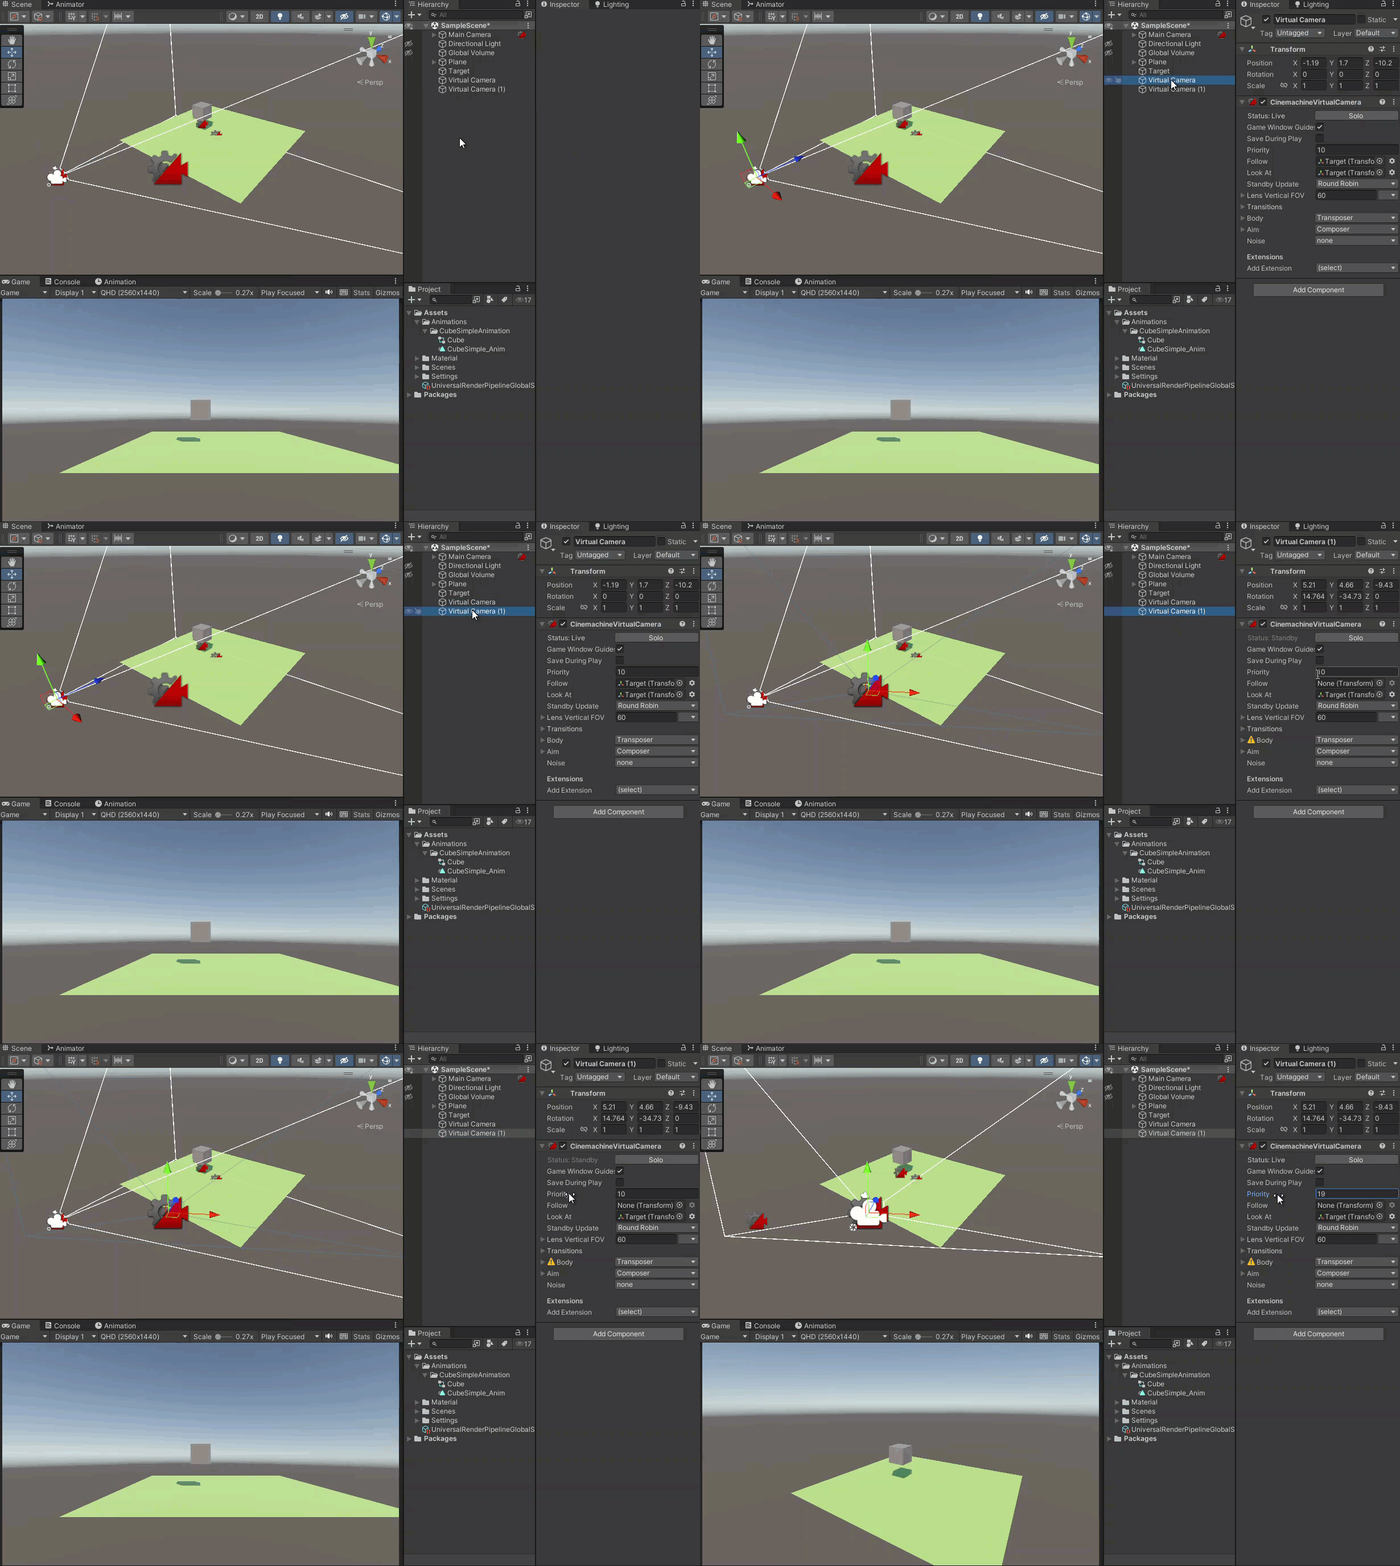
- Priority number tells which Virtual Camera must be live, an active Virtual Camera with highest priority number in the scene will be live:
- The Solo button can manually override the live status of Virtual Camera:
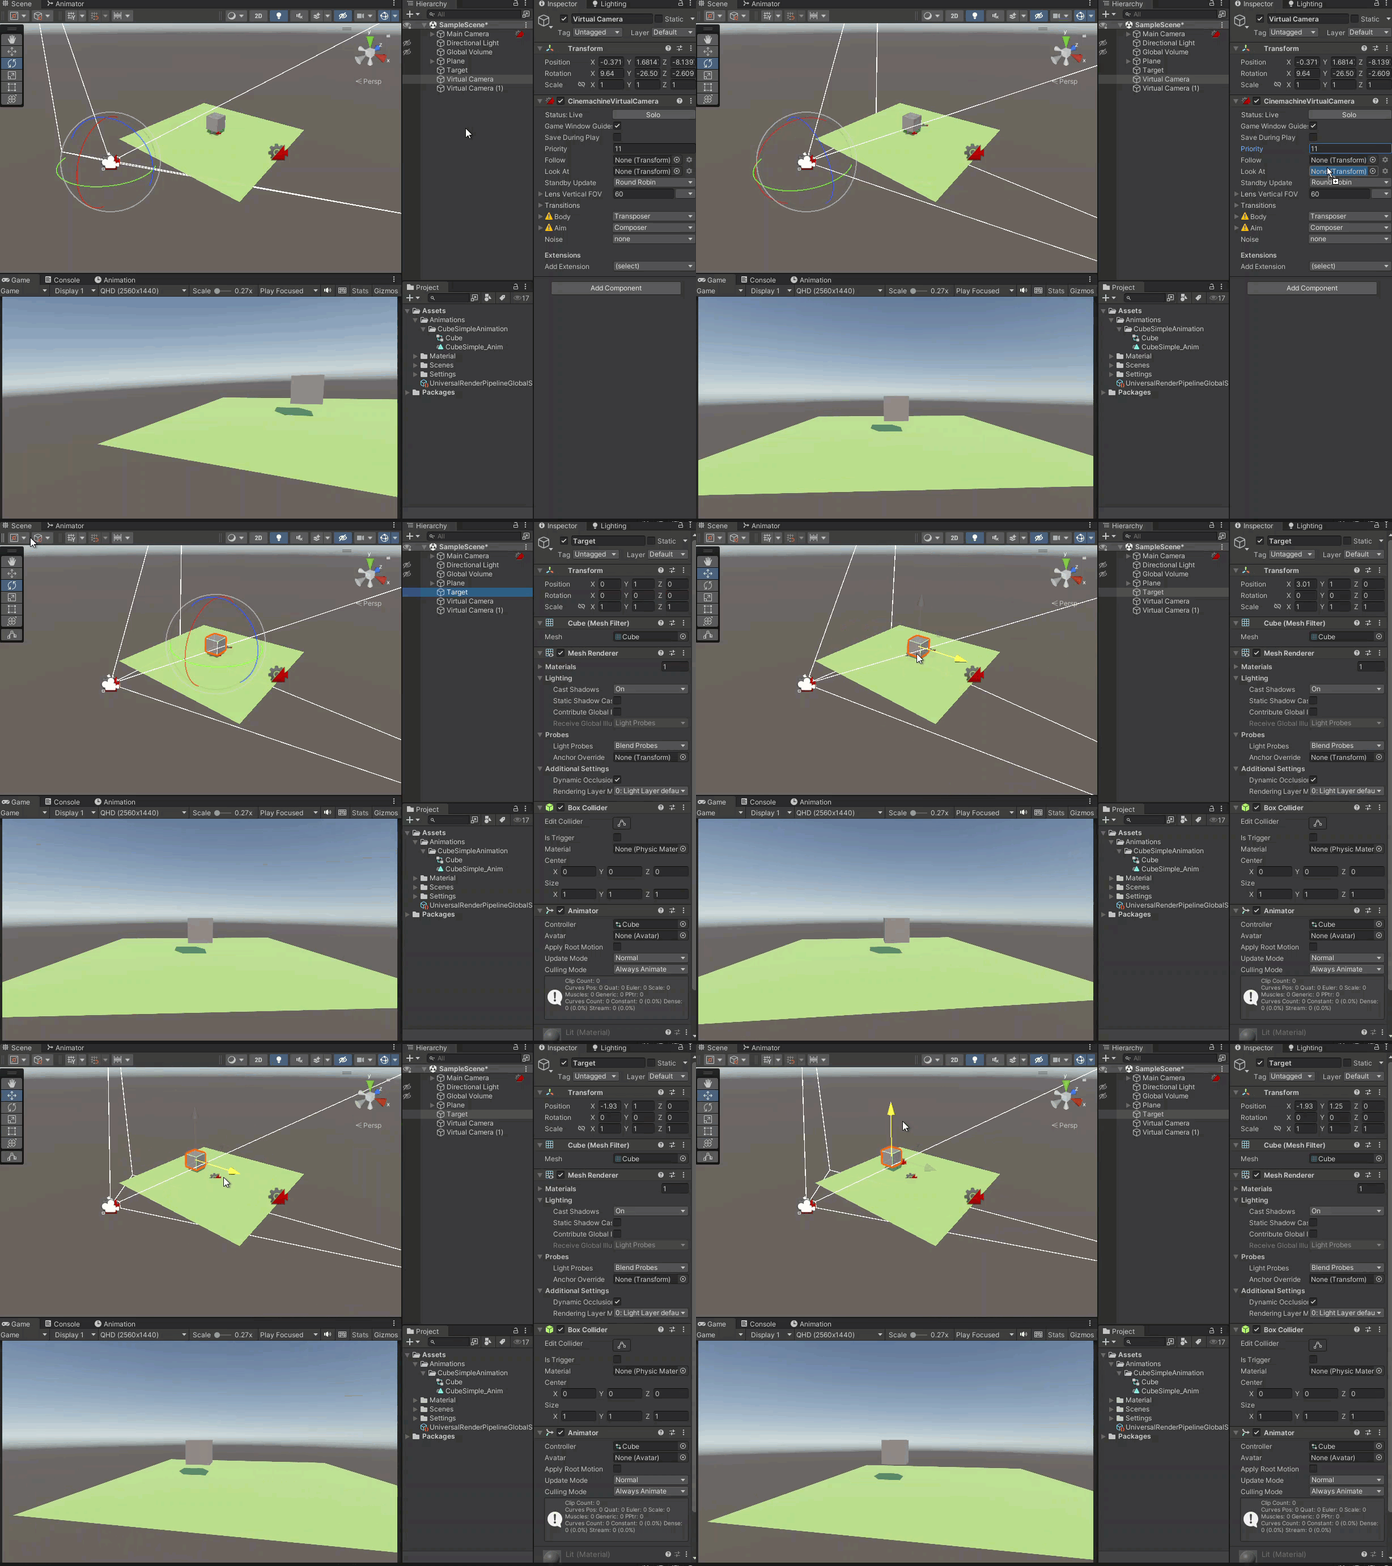
Look At Camera
Cinemachine Virtual Cameras can be set to look at some GameObject:
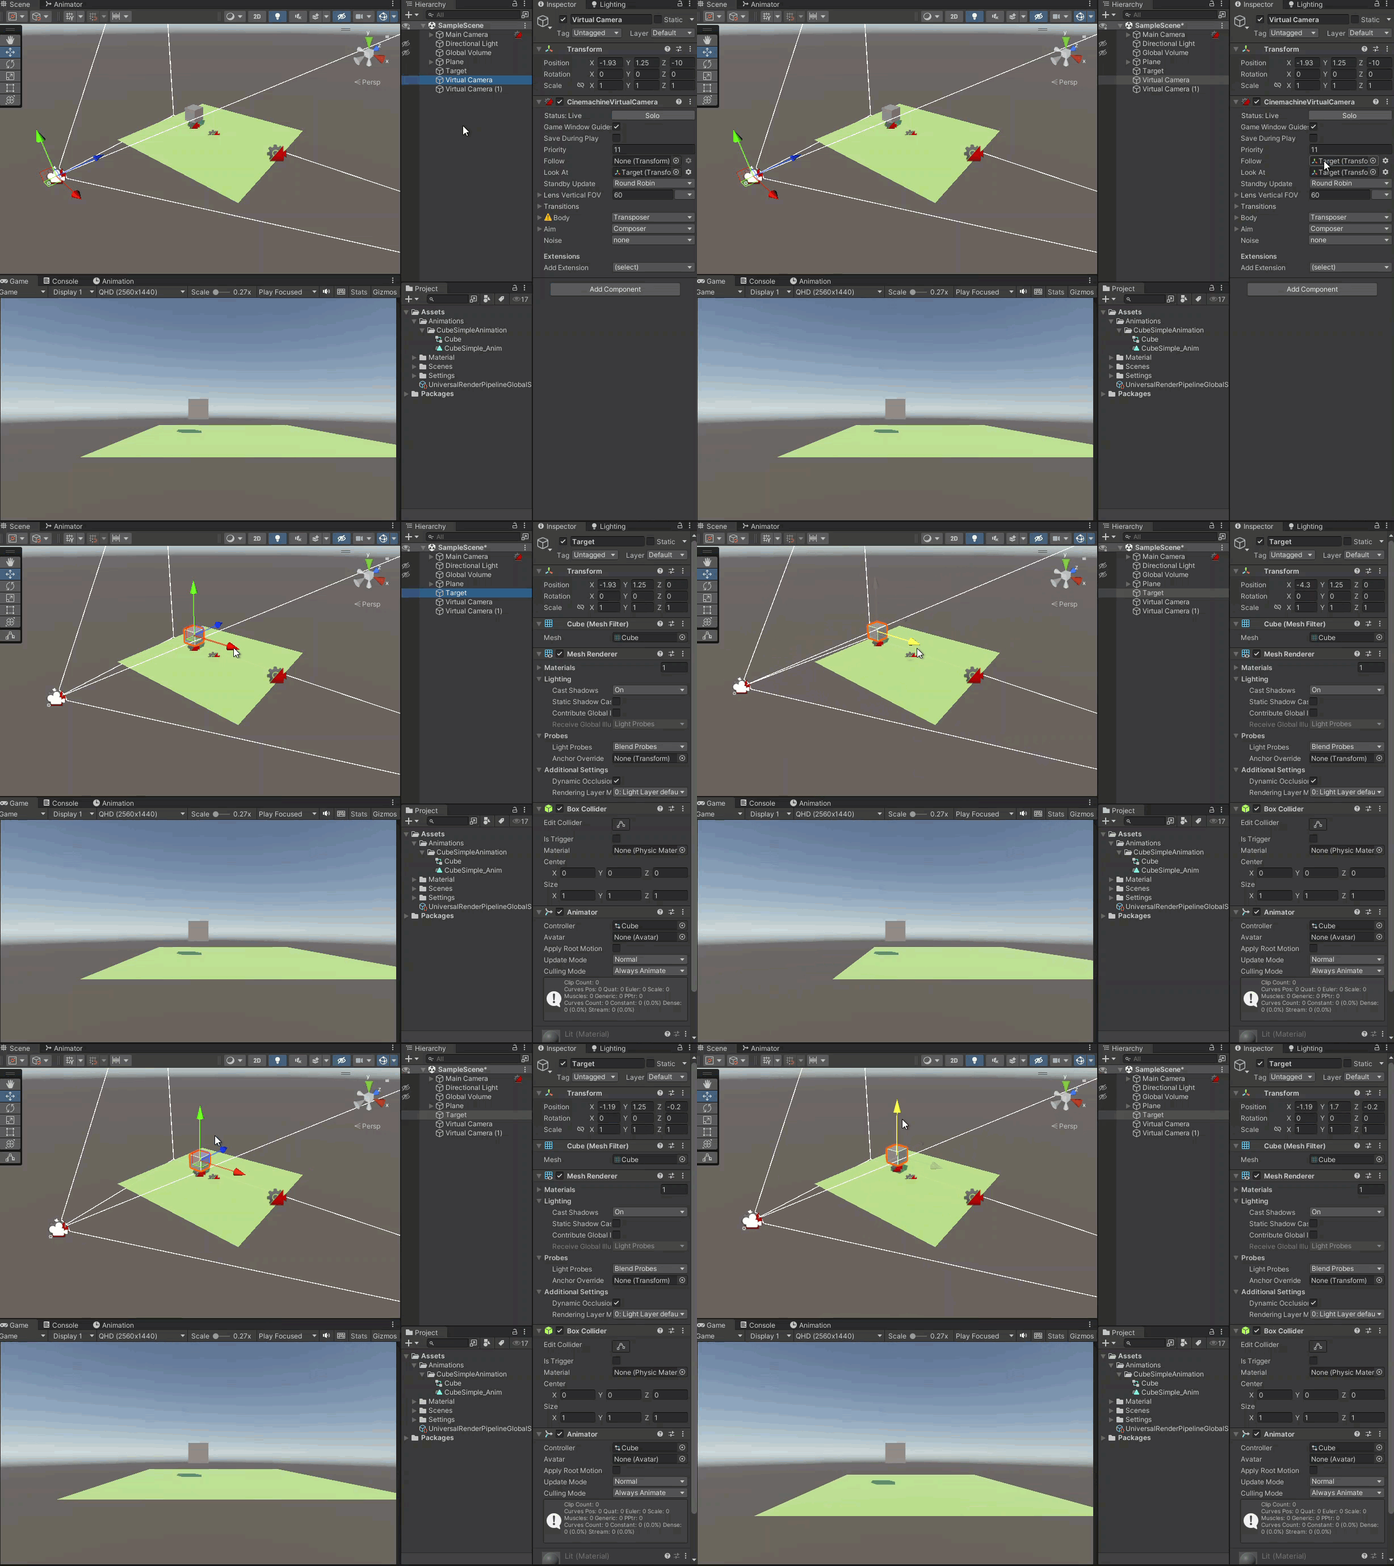
Follow
Cinemachine Virtual Cameras can also be set not just look at but follow some GameObject:
Switching between cameras
By manipulating the Priority of Virtual Cameras, or by using Solo action button, the main camera view can be switched:
Smooth switching between cameras
For a smoother switching between Virtual Cameras a change must be made on the main camera:
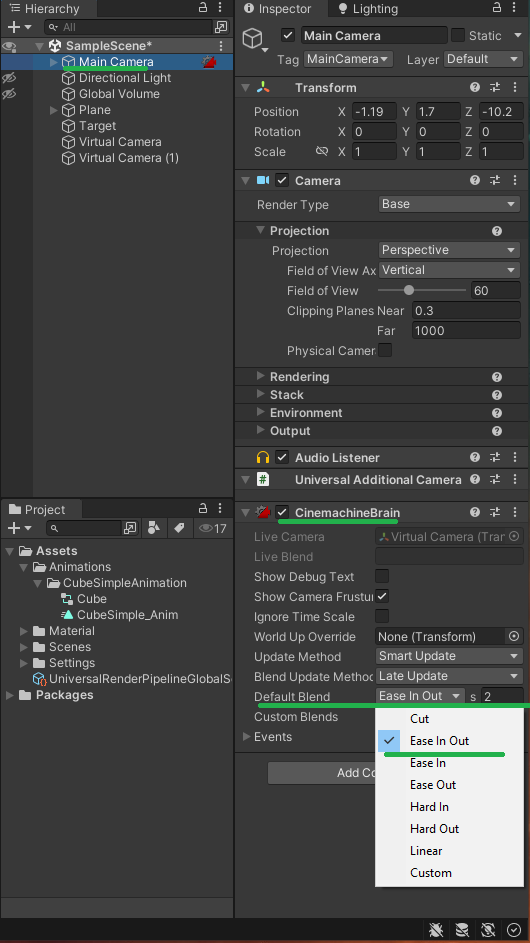
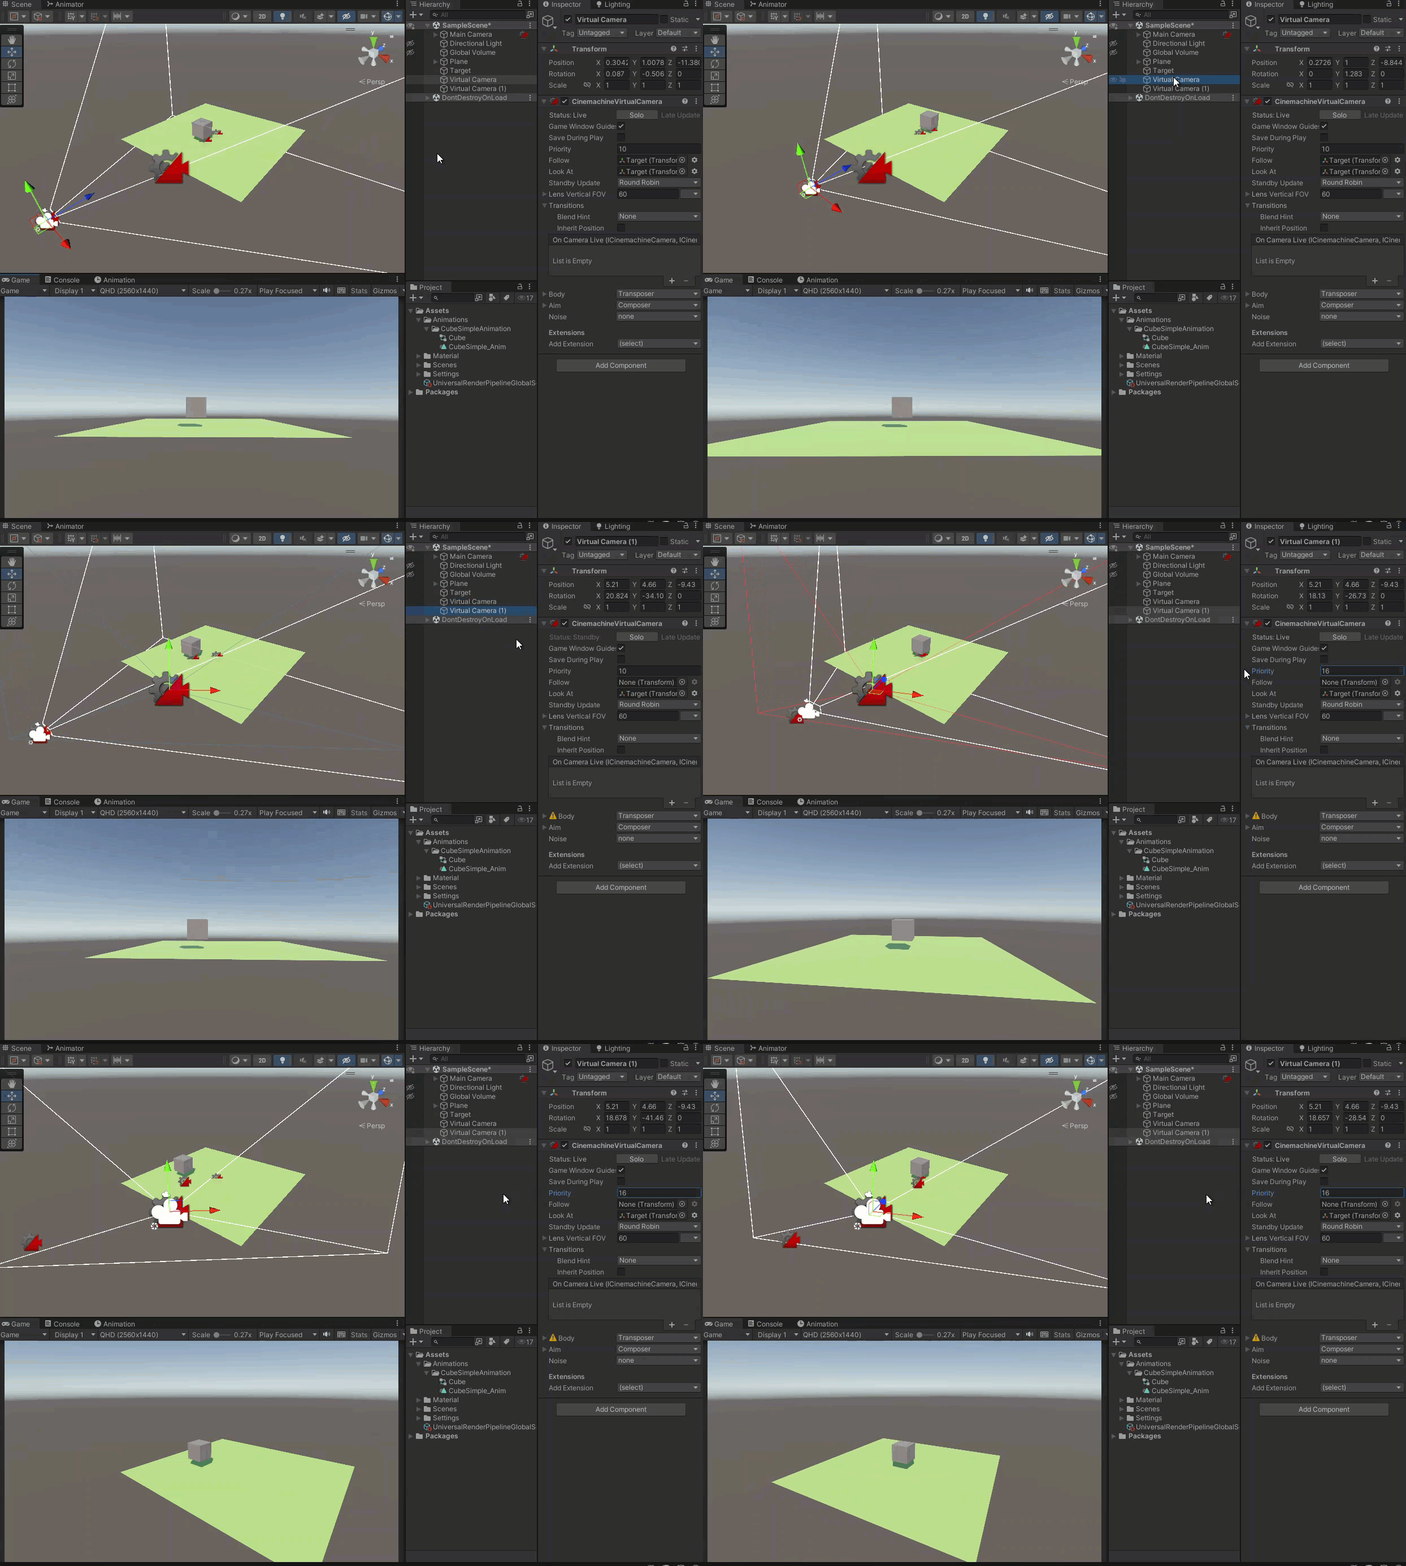
NOTE: Solo action will not make any switching a smooth effect, so use only changing the priority:
Lens settings
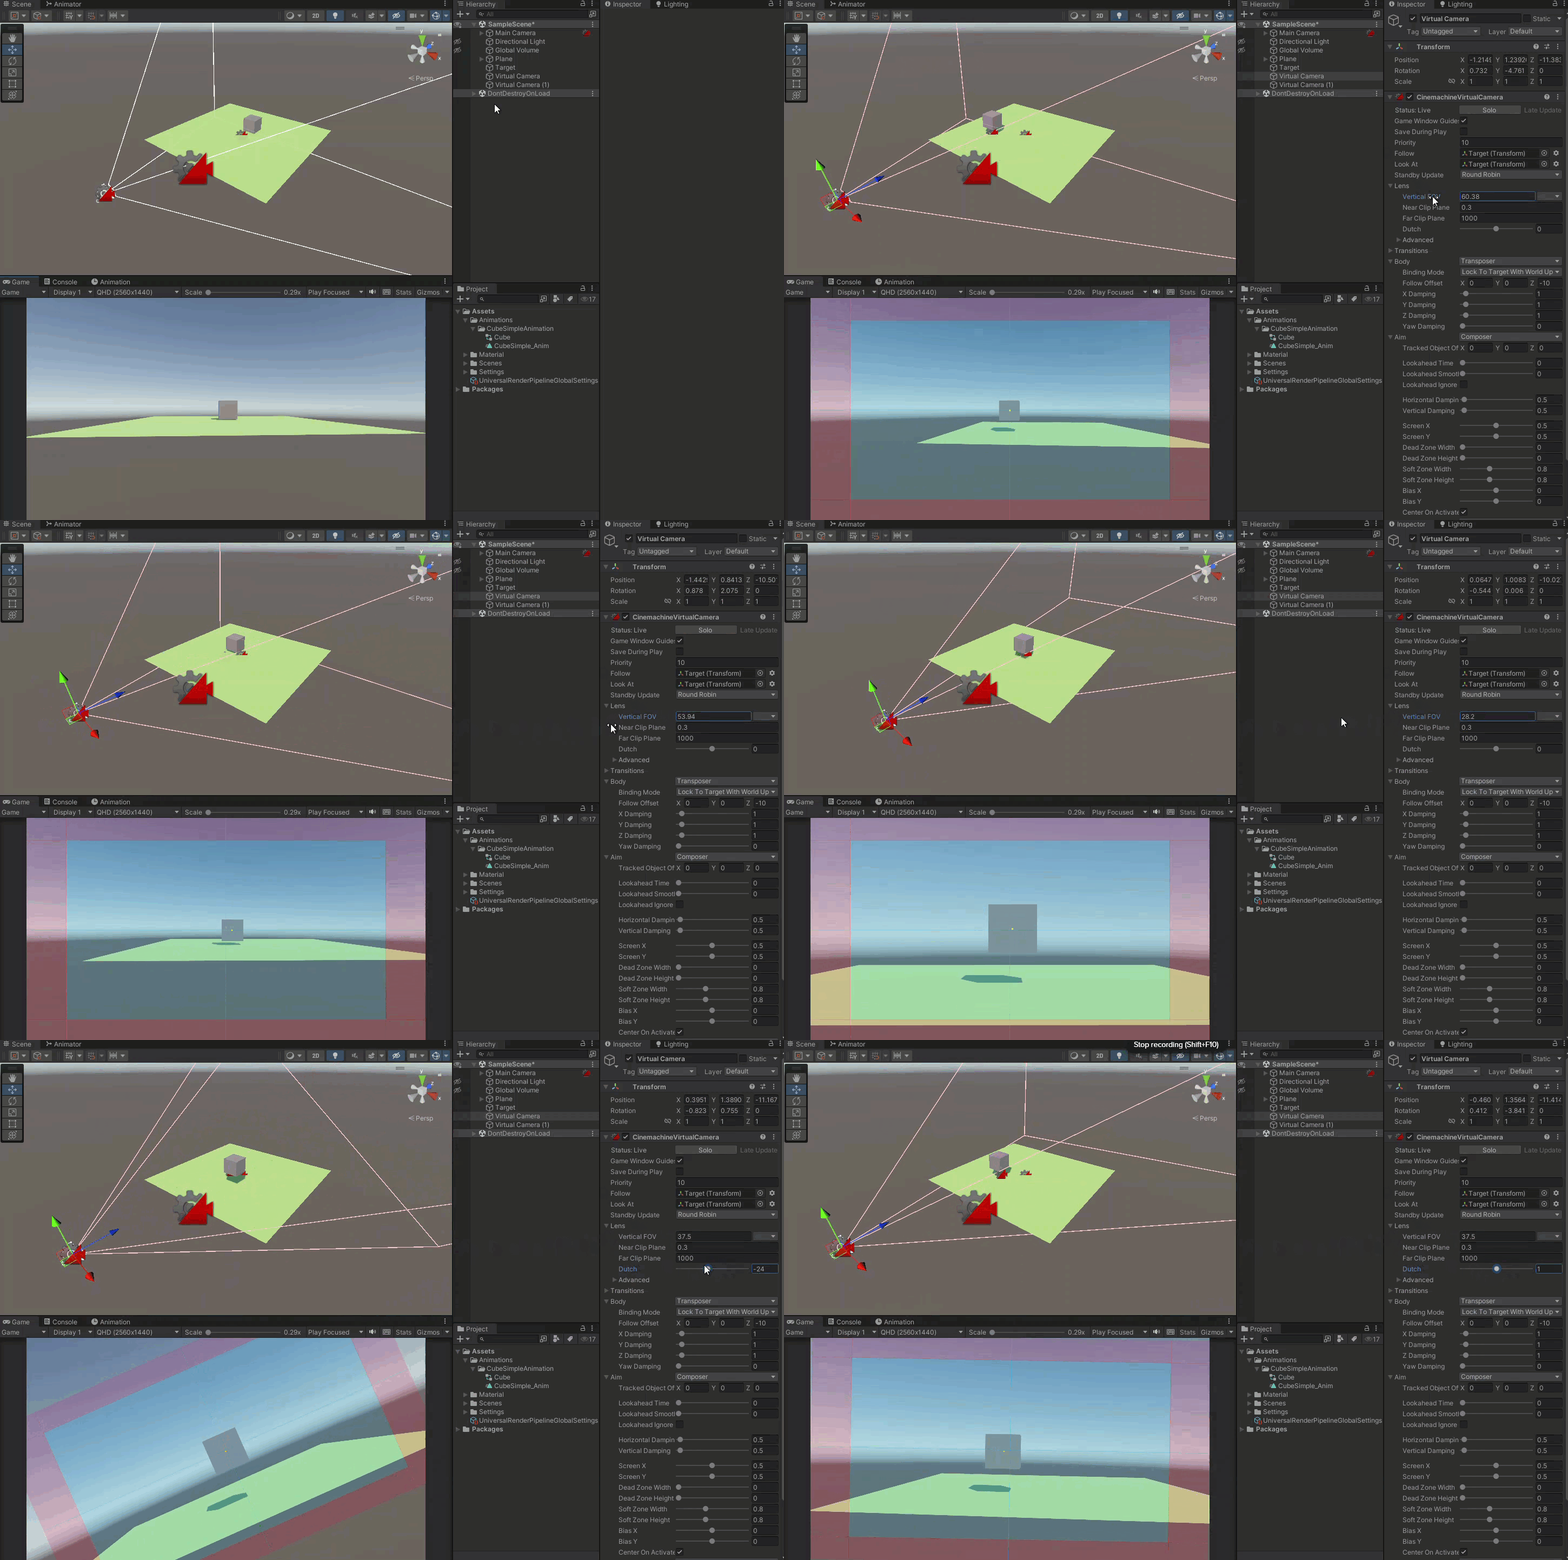
Lens has the following settings:
- FOV — field of view
- Near Clip Plane, Far Clip Plane — settings for clipping the view (example if object is too close to camera it will be clipped)
- Dutch — a Z rotation looking at target
Body settings
The Body settings will affect only if the Follow target was set. It itself has a variety of settings which affect on positioning of Virtual Camera:
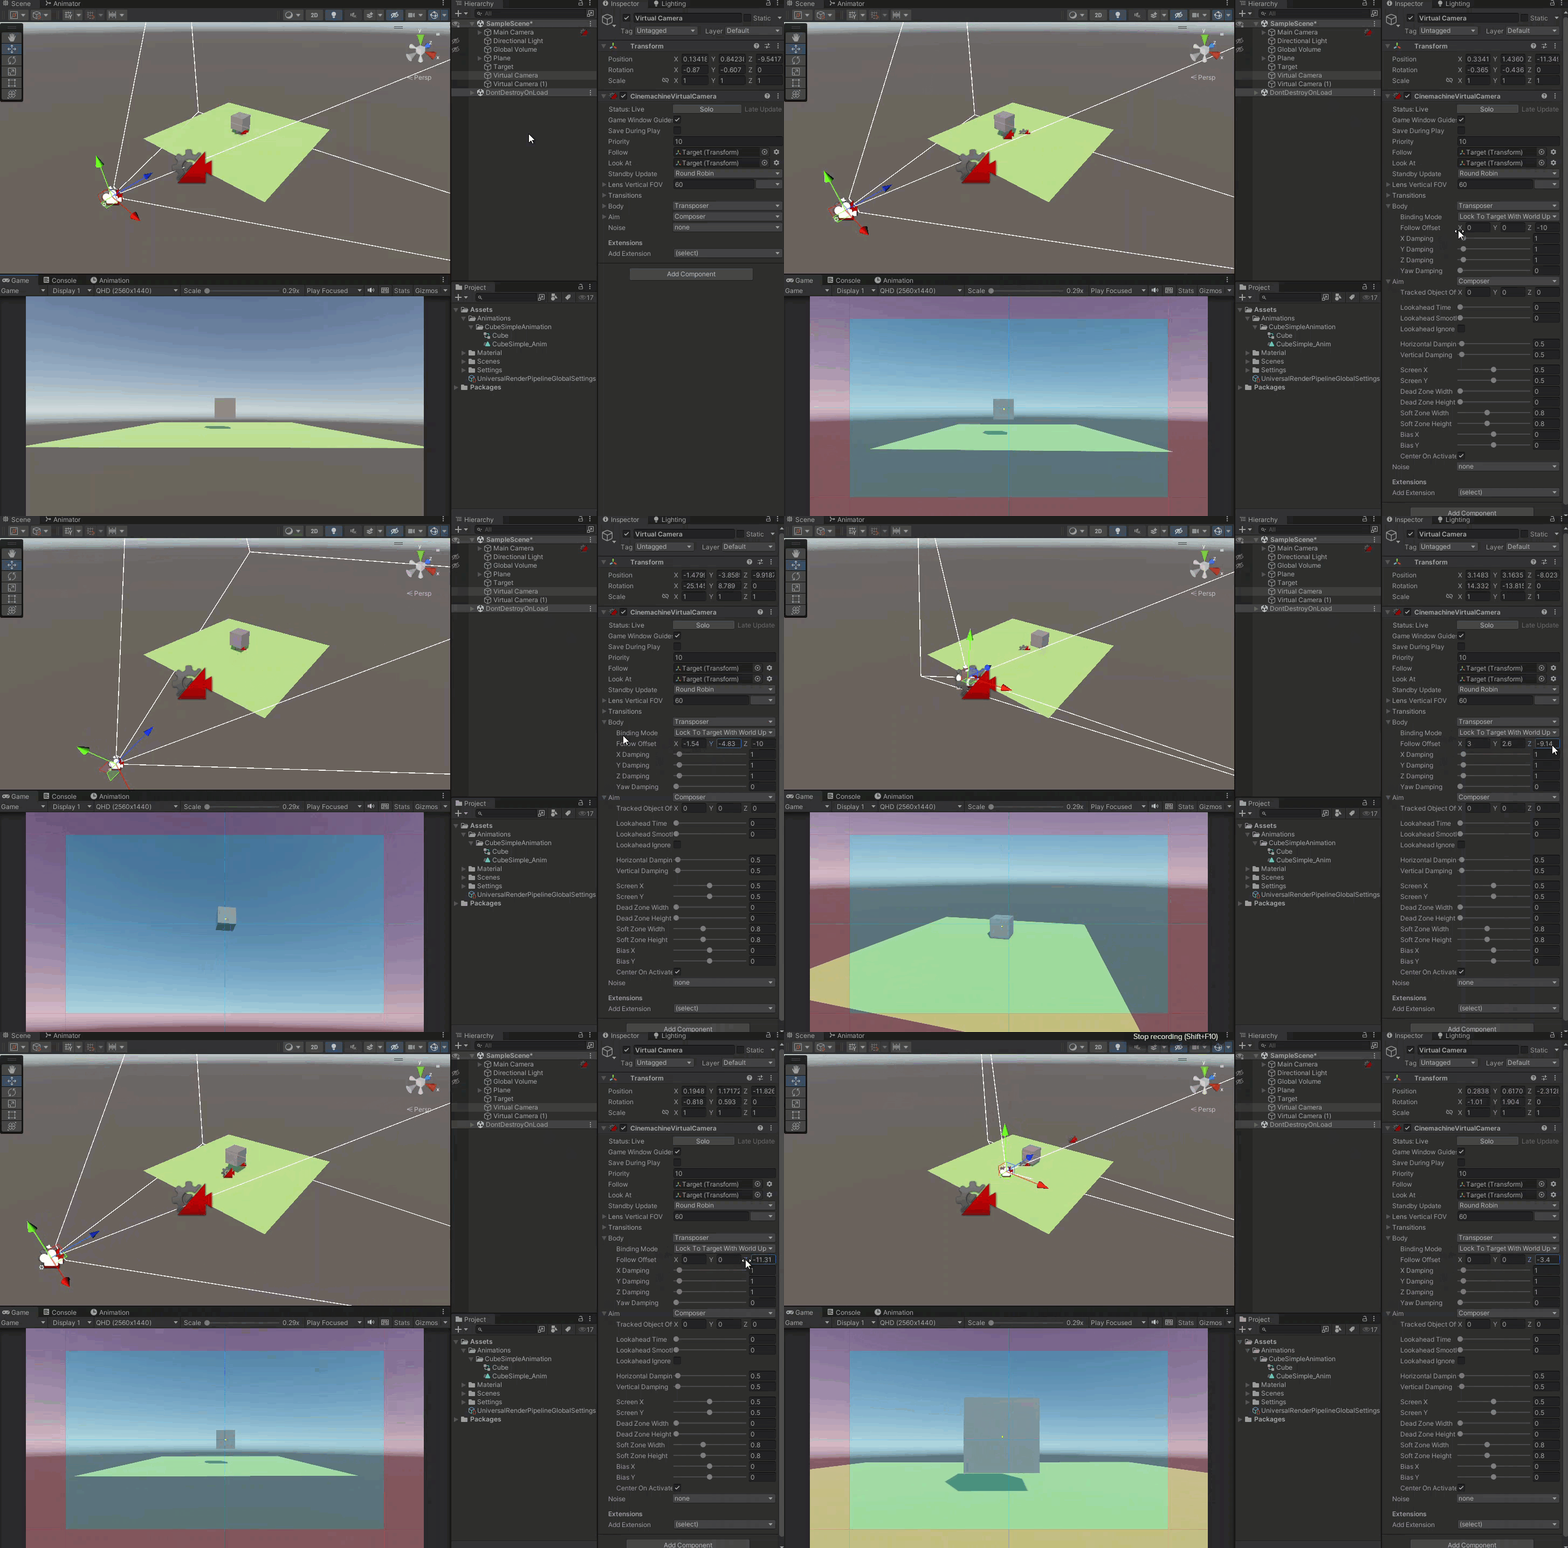
Aim settings
The Aim settings will affect only if the Look At target was set. It also has a variety of settings which affect the angle of viewing on target by Virtual Camera:
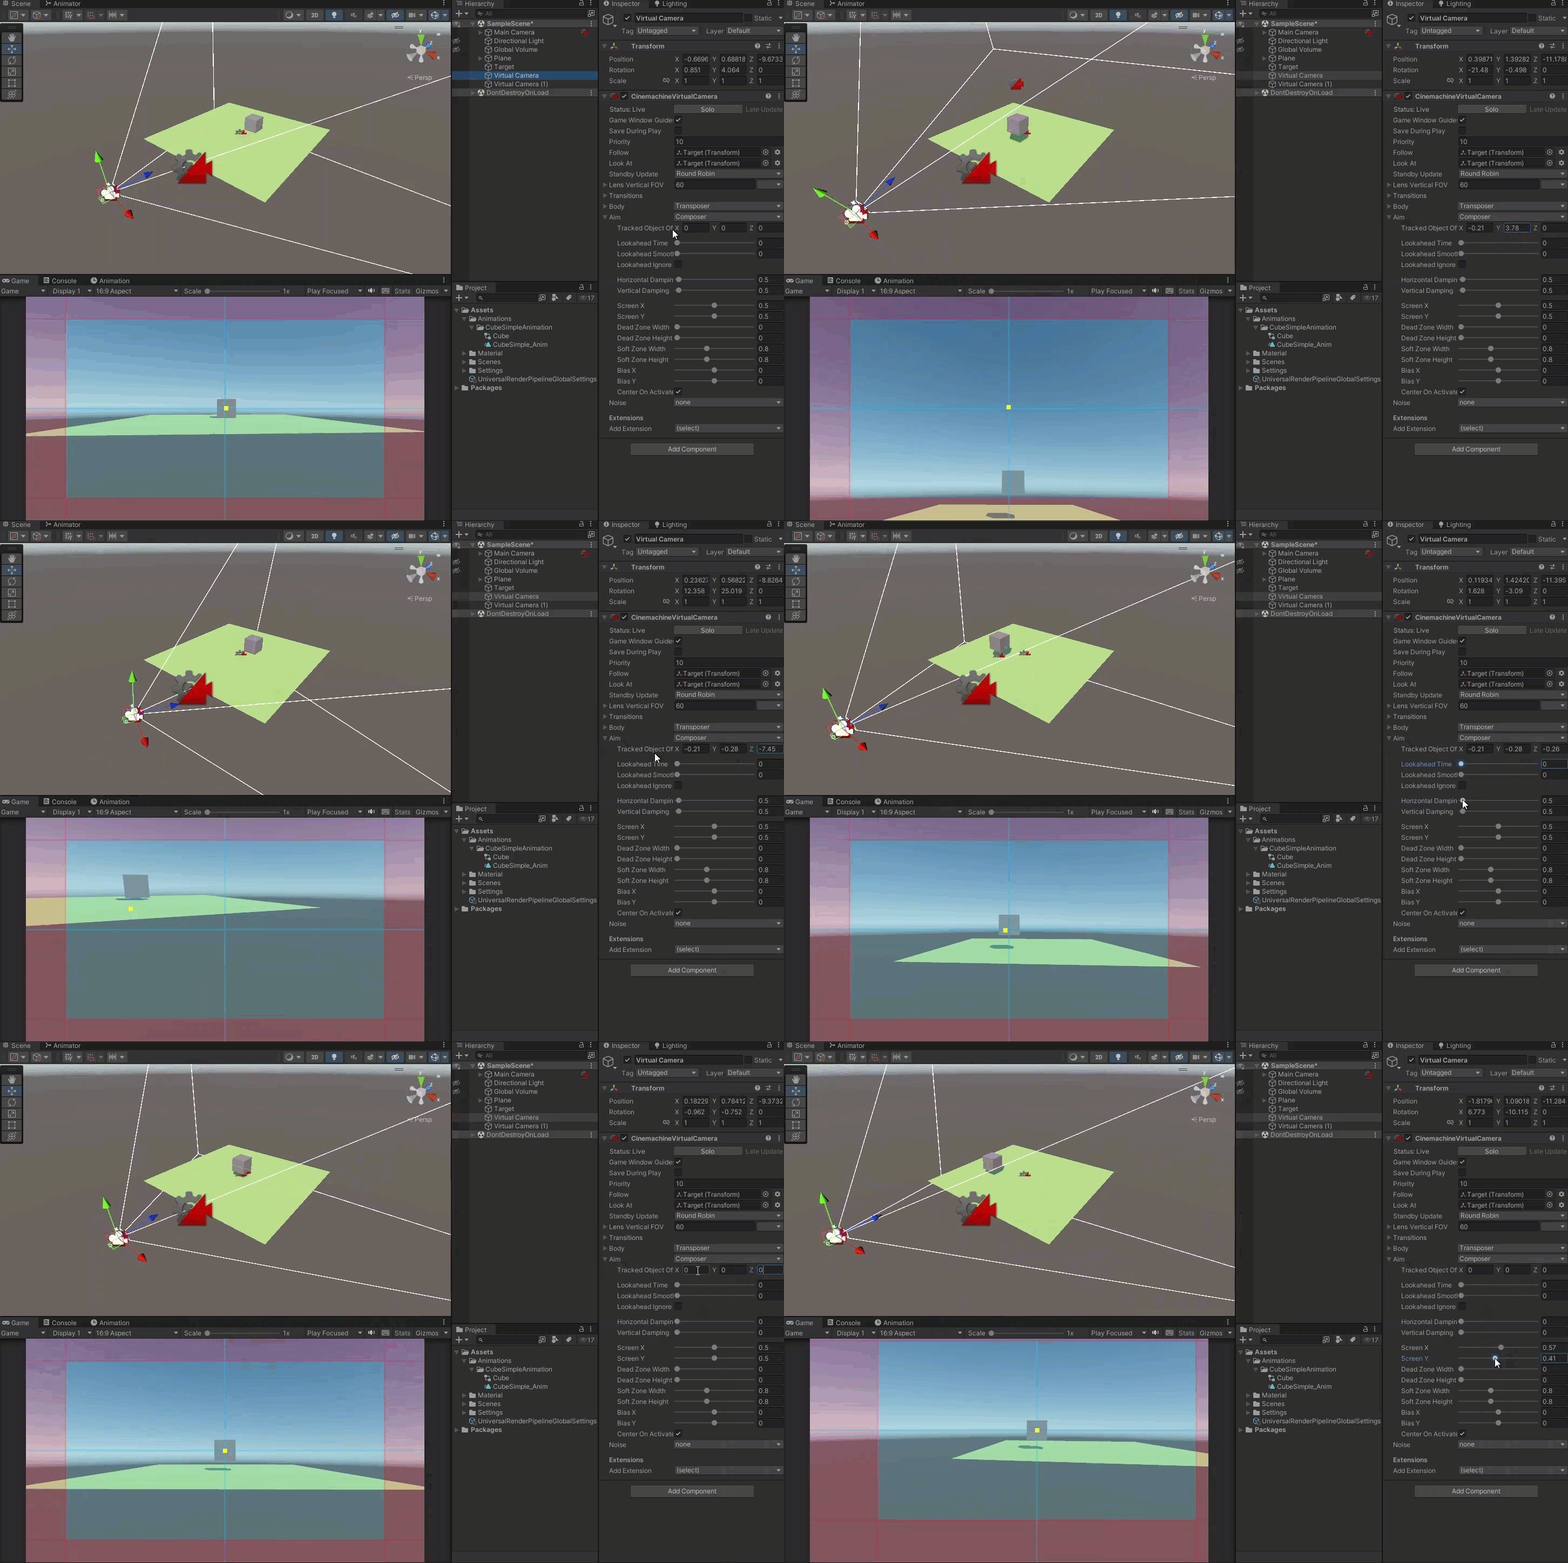
Extensions
Cinemachine has a lot of useful extensions, here we’ll look at confiners, which limit the camera to view only certain area and not let look at game edges — very helpful when making 2D platform:
- First we need to add 2D collider with Is Trigger setting on:
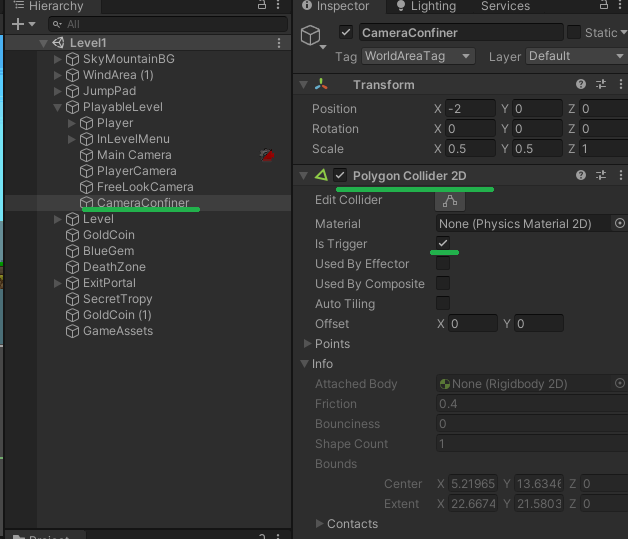
- Next, the borders of 2D collider must be edited to cover only what can be viewed:
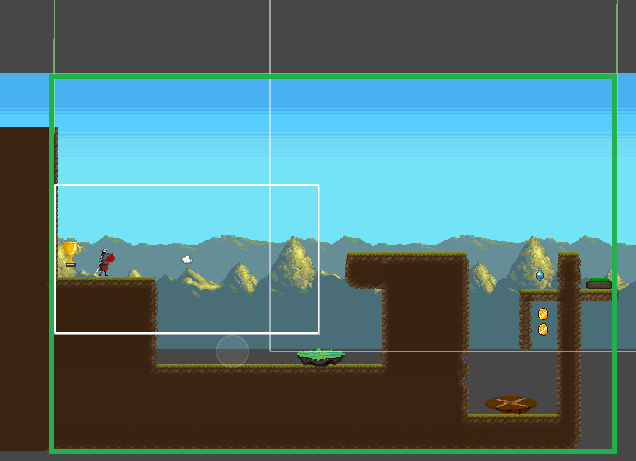
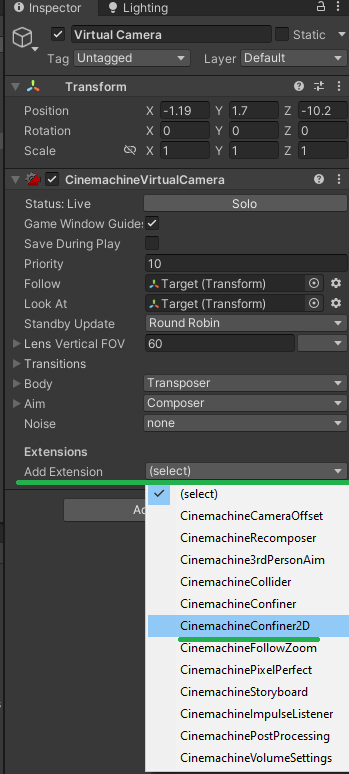
- Inside Cinemachine add CinemachineConfiner2D
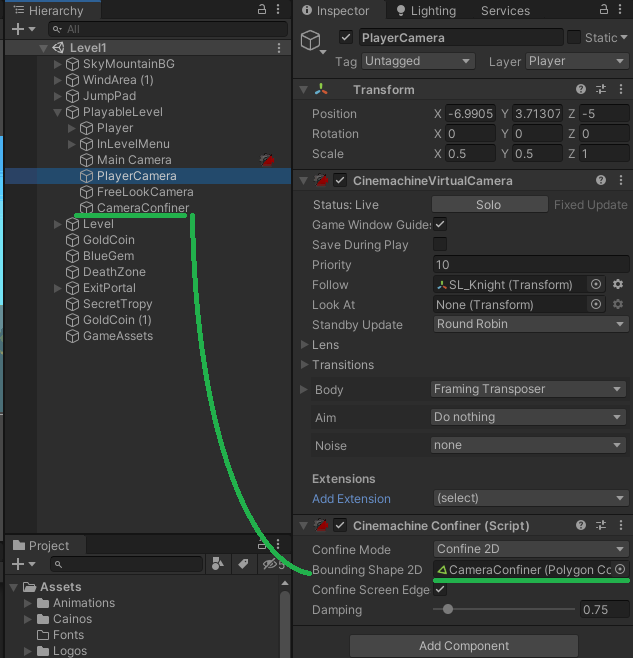
- A new Component will be added, then put reference to Colldier 2D:
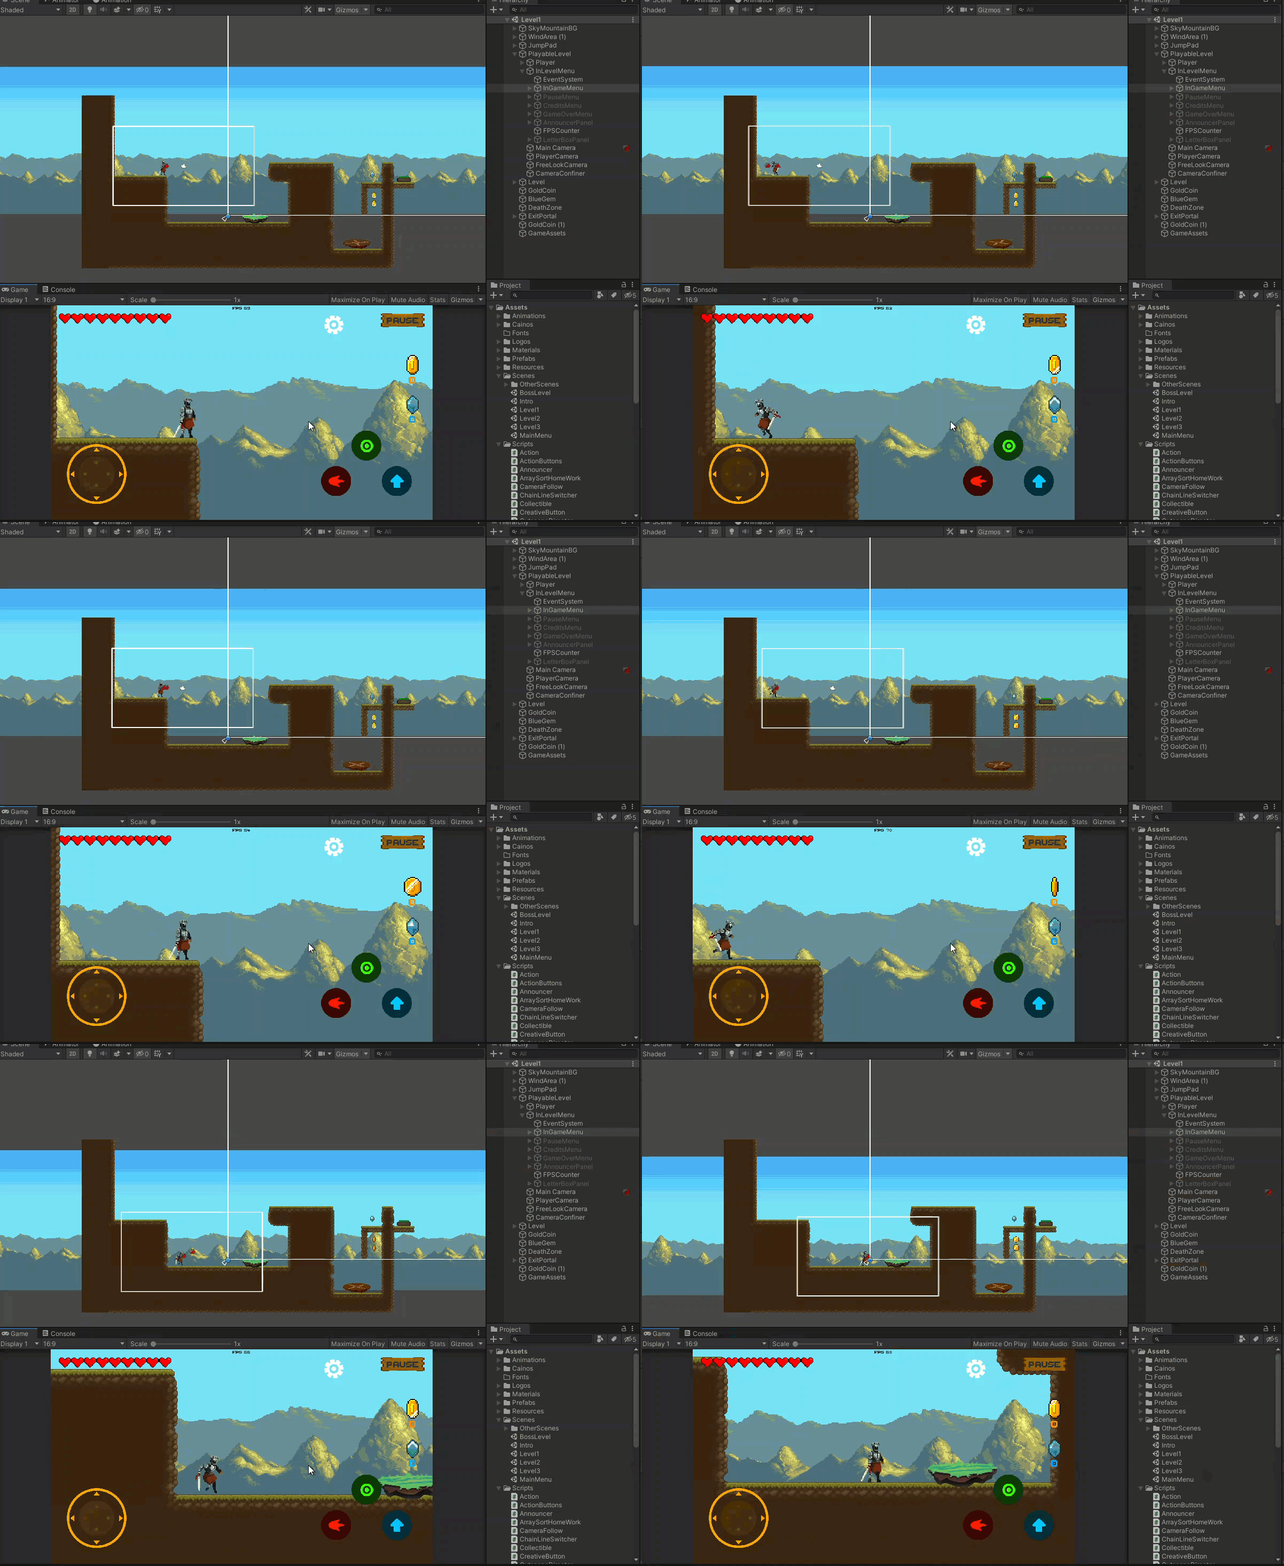
- In the end the Virtual Camera won’t go beyond given bounds:
메타데이터
- post_id
- efdec4f150c2
- slug
- cinemachine-in-unity-efdec4f150c2
- url
- https://medium.com/@aver.aurelis/cinemachine-in-unity-efdec4f150c2
- canonical_url
- https://medium.com/@aver.aurelis/cinemachine-in-unity-efdec4f150c2
- author_url
- https://medium.com/@aver.aurelis
- status
- ok
- fetched_at
- 2026-07-20 04:01:29