How to early access Microsoft’s latest system: Windows 11
This is Lucas. Showing you how to install the Windows 11 on the virtual machine.
{Tutorial} How to early access Microsoft’s latest system: Windows 11
Hi guys, I’m Lucas. Today I’m going to show you how to early access Microsoft’s latest system: Windows 11. Because Windows 11 is still on the Development version, it may have some bugs. To protect our computer and make it compatible, I’ll use a technology software called “Virtual Machine”. The Virtual Machine is used to install a system on our computer, but it’s also independent of our original system.
- Computer System
- Virtual Machine
- Independent System
OK — without further ado, let’s GO!
The Prepare
In the first step, you need to download and install the virtual machine software. My preferred VM software is the “VMware Workstation Pro”, so I’ll teach you how to download this software.
- Please click here to go to the download page, then scroll the page until you see a block: Workstation 16 Pro for Windows.
- Click the DOWNLOAD NOW then you’ll get an installer. This file is about 600~ MB, so you may need to wait a while.

Click DOWNLOAD NOW
- Once the installer is downloaded, please install the software by the instruction.
- It will need you to enter the key. Because of the law factor, I’ll not give you the key. You can search “VMware Workstation Pro key” to obtain the key code needed.
- Then go here to get the image file. This image file is built by me.
- To here, if you’re a newer just skip to the Setup chapter.
For advanced users: If you really care about computer safety, you can build your own image file.
Attention: Build the image file needs a lot of CPU performance and may take few hours. If you have a lot of time, you can do this.
Building the Image
After installing the VM software, we’ll need the Windows installer file. This file is used to install Windows 11 on our Virtual Machine.
- Click me to the iso-build file page. You need to find the [Windows 11 Insider Preview 10.0.22000.65 (co_release) amd64].

Click it.
This time we need to choose some options.
- The first option is choosing the system language. I’ll use English as an example.

Choose language and click Next.
- Then you will see many checkboxes. We usually use the Home or Pro edition, so just check these two checkboxes. (N is for the special region)

Check Windows Home and Pro then click Next
- Here is the final step for downloading the Windows 11 installer file. Please check the all checkboxes then click Create download package.

Check all options and click “Create download package”
This is the last thing we need to prepare. You can do it!!!
- Click me to download a “downloader”. This is used for the Win11 installer file download.
- Decompression of these two files to the same directory(convenience to the management).
- Open the Aria2 folder. We need to add some command files.
- — Please paste these codes into the notepad.
[embed]
- — Then rename the file as “aria2.conf”. Please notice that the filename extension should be “.conf” not “.txt”.
- — After that, just create a file called “aria2.session”. We don’t need to enter anything into it.
- — Then paste these codes into the notepad.
[embed]
- — Save as the “Start.vbs”.
- — Then paste these and save them as “Status.bat”.
[embed]
- — Then paste these and save them as “Stop.bat”.
[embed]
- — Then paste these and save them as “Restart.bat”.
[embed]
- — Complete!
- Then click the “Start.vbs”. You’ll not see anything because the aria2 is running in the background. If you want to know about the status, you can click “Status.bat”.
OK. So far, so good. This step is the simplest. Go back to the Windows 11 installer folder and click “uup_download_windows.cmd” and you can go to do something like cooking, walk the dog, etc.
If you see Press 0 to exit. then Press 0 and we finished it!
Setup the virtual machine
- Go to the VMware program. You can see three big buttons on the home page. Click the first one: Create a New Virtual Machine

Click the first button.
- Choose Typical(Recommended)

Typical
- Choose “Installer disc image file” then browse and find the iso file we just downloaded.

Second.
- Choose Windows 10 x64 (The default).
- Give it a name you like.
- Enter the maximum disk size. My disk has 347GB free, so I set it to 100GB. Then choose store virtual disk as a single file.
- Then click finish.
- Go to the left-up side and click Memory.

Click the Memory label.
- Set it to your computer memory’s half. For example, my computer has 8GB of memory, so I set it to 4096MB(4GB).
Install the System

Press any key on the keyboard.

Here you can choose Language, Time and Currency, Keyboard.

Click install now.

Click this button.

Click Custom
- Click New>Apply>OK>Next.
- Then the system will start to install.

Click Restart now.

If you see this screen, that means the Windows 11 is almost complete. Please configure these options by your situation.
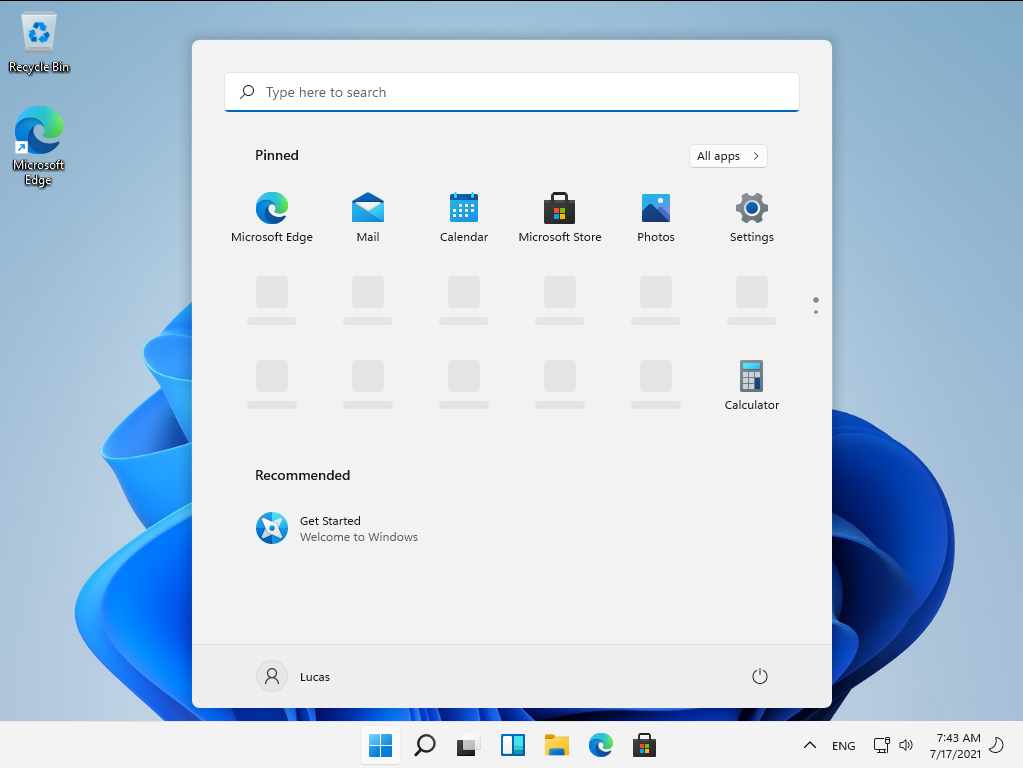
And this means… Windows 11 is completely installed on your virtual machine!

But you may realize that the virtual machine isn’t very smooth. So we could install VMware Tools.

Please click “Install Tools” under the screen. Then press Win+R and enter D:\setup64.exe.
- Click Next>Next>Install>Finish>Yes. Then it will Restart.
- Now you can early access the Windows 11 system!
I’m Lucas and this is my first English blog article. So I have many grammar errors. Today’s tutorial is a little complex, hope you can try and succeed!
메타데이터
- post_id
- f2c4178b5c24
- slug
- how-to-early-access-microsofts-latest-system-windows-11-f2c4178b5c24
- url
- https://medium.com/@Lucas_EGG/how-to-early-access-microsofts-latest-system-windows-11-f2c4178b5c24
- canonical_url
- https://medium.com/@Lucas_EGG/how-to-early-access-microsofts-latest-system-windows-11-f2c4178b5c24
- author_url
- https://medium.com/@Lucas_EGG
- status
- ok
- fetched_at
- 2026-07-28 03:34:09