How to Connect Google Search Console & Google Analytics Using Google Site Kit (Complete…
This guide explains how to connect Google Search Console (GSC) and Google Analytics (GA4) to your WordPress website using the Google Site…
How to Connect Google Search Console & Google Analytics Using Google Site Kit (Complete Step-by-Step Guide)
This guide explains how to connect Google Search Console (GSC) and Google Analytics (GA4) to your WordPress website using the Google Site Kit plugin.
Google Site Kit is the official plugin by Google, and it automatically installs the required tracking codes on your website.
STEP 1 — Login to Your WordPress Website
First, log in to your website dashboard.
- Open your website login page
Example:
https://yourwebsite.com/wp-admin
- Enter your username
- Enter your password
- Click Log In
After login, you will enter the WordPress Dashboard.
STEP 2 — Install the Google Site Kit Plugin
Now we need to install the official Google plugin.
- On the left sidebar click:
Plugins
- Click:
Add New Plugin
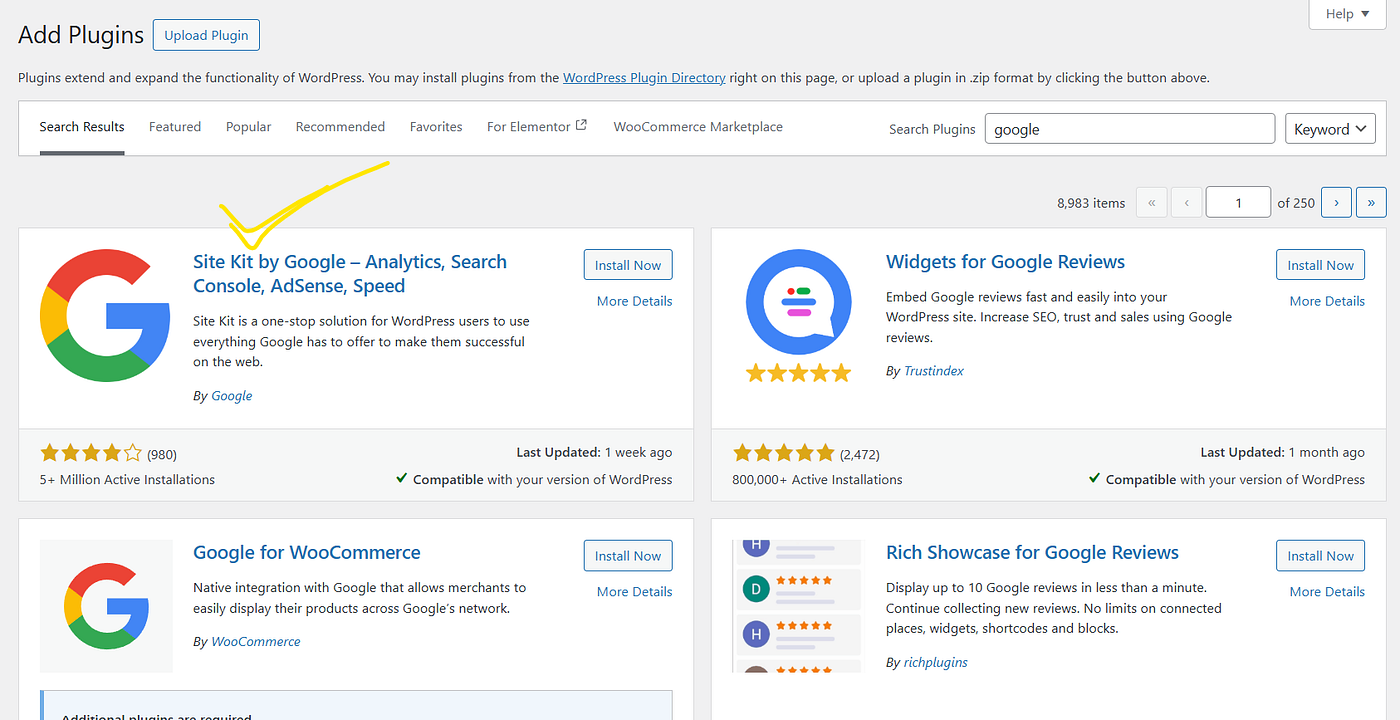
- In the search bar (top right) type:
Site Kit by Google
- You will see a plugin named:
Site Kit by Google — Analytics, Search Console, AdSense, Speed
Developer: Google
- Click:
Install Now
- Wait a few seconds for installation.
- When installation finishes click:
Activate
STEP 3 — Open Site Kit Setup
After activating the plugin:
- In the left sidebar click:
Site Kit
- Click the button:
Start Setup
You will now be redirected to Google to connect your account.

STEP 4 — Sign in With Your Google Account
A Google login page will appear.
- Choose the Google account you want to connect to.
Important: Use the same Google account that you want to use for:
- Google Search Console
- Google Analytics
- Enter your Google password if asked.
- Click Continue.
STEP 5 — Grant Permissions to Site Kit
Google will now show several permission requests.
These permissions allow Site Kit to connect your website with Google services.
You will see permissions like:
- View and manage Search Console data
- View and manage Google Analytics data
- Verify site ownership
- View site data
Click:
Allow
You may need to click Allow multiple times.
This is normal.
STEP 6 — Verify Website Ownership (Search Console)
Now Site Kit will verify that you own the website.
You will see a message like:
Verify Site Ownership
Click:
Verify
Site Kit will automatically verify your website in Google Search Console.
If your website is not already added to Search Console, Site Kit will automatically create the property for you.
You do not need to manually verify anything.
STEP 7 — Allow Access to Your Google Account Data
After verification, Site Kit will ask for additional access permissions.
You may see options like:
- Allow Site Kit to access Search Console
- Allow Site Kit to access Analytics
- Allow Site Kit to view your site data
Click Allow for all required permissions.
This allows WordPress to display your Google data inside the dashboard.
STEP 8 — Connect Google Search Console
After verification, Google Search Console will automatically connect.
Search Console helps you see:
- Google search keywords
- Indexed pages
- Clicks and impressions
- Website SEO performance
Once connected, Search Console will start collecting data automatically.
STEP 9 — Setup Google Analytics
Now we will connect Google Analytics 4 (GA4).
Site Kit will show a button:
Set up Google Analytics
Click it.
STEP 10 — Select Your Analytics Account
Now you will see options for:
Analytics Account
If you already have an Analytics account:
Select it from the dropdown.
If you do not have one:
Choose:
Create New Account
Example name:
YourSite Analytics.
STEP 11 — Create or Select Analytics Property
Next you will see:
Property
A property represents your website inside Google Analytics.
Options:
Select existing property or Create a new property
If creating new:
Example:
Yourwebsite.com Website.
STEP 12 — Select Data Stream
Next option:
Web Data Stream
This is where website traffic data is collected.
Options:
- Select existing stream Or
- Create new stream
Usually Site Kit will automatically create this.
STEP 13 — Confirm Analytics Configuration
Now review the configuration:
You will see:
- Analytics Account
- Property
- Data Stream
After confirming everything is correct, click:
Configure Analytics
STEP 14 — Automatic Tracking Code Installation
Site Kit will now automatically install the Google Analytics tracking code on your website.
Important:
You do NOT need to add any tracking code manually.
The plugin handles everything automatically.
STEP 15 — Setup Complete
After everything is connected, you will see a message like:
Congrats! Site Kit is set up.
Click:
Go to Dashboard
STEP 16 — View Data Inside WordPress
Now go to:
WordPress Dashboard → Site Kit → Dashboard
Here you will see:
Search Console Data
- Top search queries
- Clicks
- Impressions
- Indexed pages
Google Analytics Data
- Visitors
- Page views
- Traffic sources
- Top pages
STEP 17 — Wait for Data Collection
New websites may take some time to show data.
Typical timeline:
Google Analytics
- Data starts appearing in 1–6 hours
Search Console
Data usually appears in 24–48 hours.
If you have any question, feel free to comment down, will help you in every possible issue you face regarding this topic. Thanks for reading.
메타데이터
- post_id
- f828034cfb33
- slug
- how-to-connect-google-search-console-google-analytics-using-google-site-kit-complete-f828034cfb33
- url
- https://medium.com/@shahbazliaquat/how-to-connect-google-search-console-google-analytics-using-google-site-kit-complete-f828034cfb33
- canonical_url
- https://medium.com/@shahbazliaquat/how-to-connect-google-search-console-google-analytics-using-google-site-kit-complete-f828034cfb33
- author_url
- https://medium.com/@shahbazliaquat
- status
- ok
- fetched_at
- 2026-06-11 10:13:20