Microsoft Flight Simulator
This is an assignment about learning to fly on Microsoft Flight Simulator (MSFS 2020) for the AL Aerospace Engineering course at Concordia…
Microsoft Flight Simulator
This is an assignment about learning to fly on Microsoft Flight Simulator (MSFS 2020) for the AL Aerospace Engineering course at Concordia International School, conducted by Dr. Peter Tong (aka D.T). This article will discuss the different modules of MSFS and the different techniques that were learned to successfully fly an airplane.
This lab was split into 2 major parts, the beginners part that was made up of eight modules that introduces you to the basics of flying. In this part, modules include subjects like pitch control, power settings, and aircraft rolling, as shown in Figure 1. Mastering every concept in this unit is essential to flying in properly in later modules, especially the units about movement and power control.
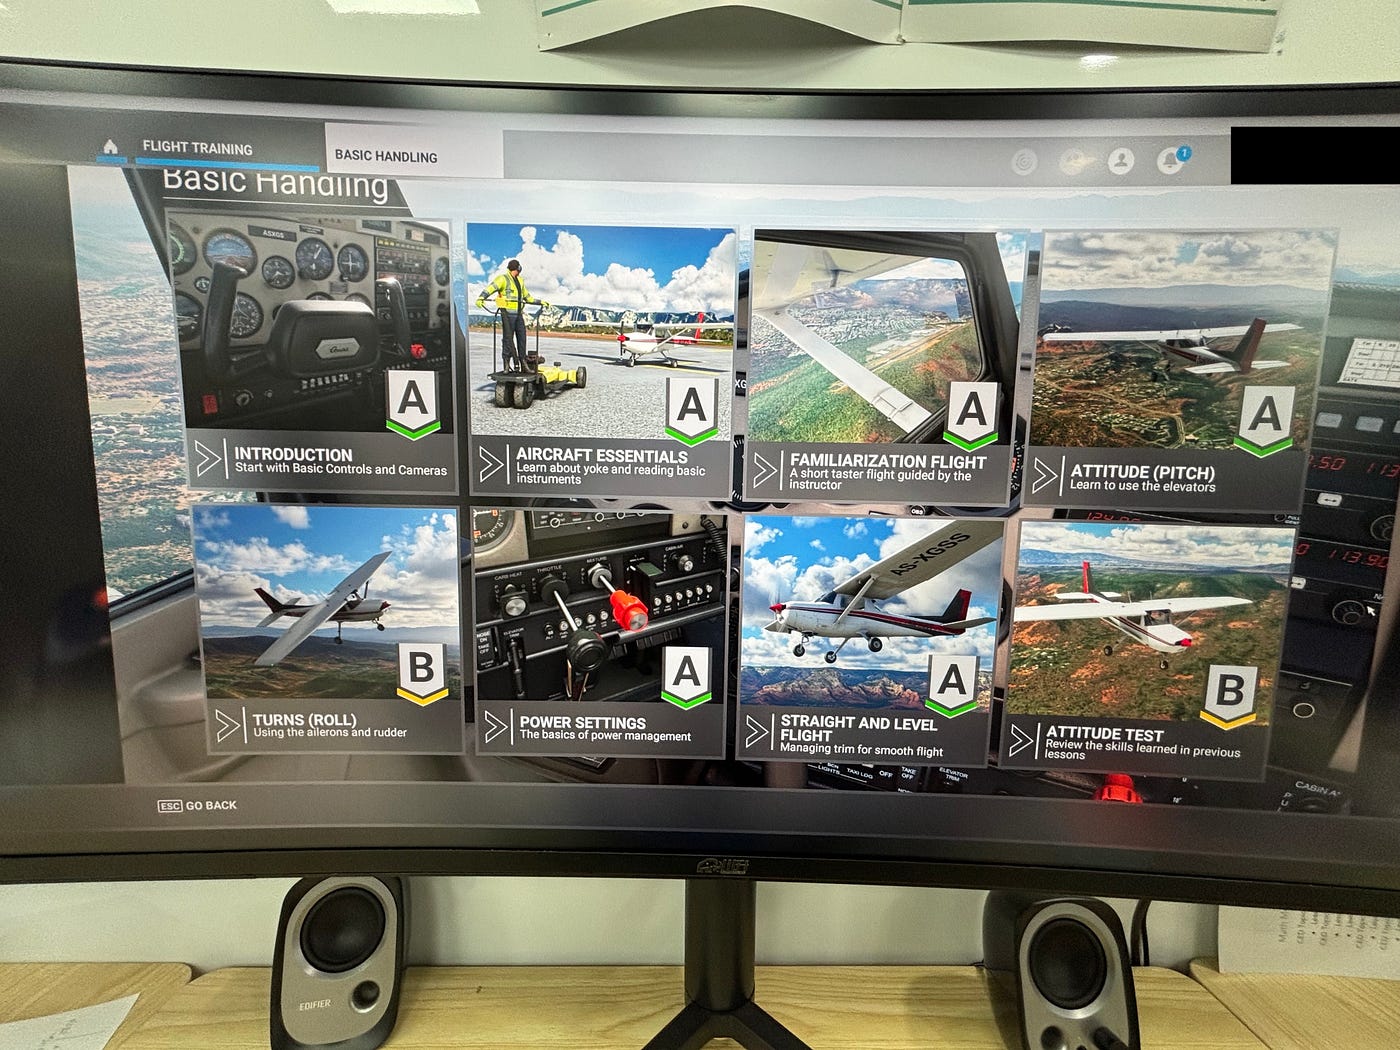
Figure 1 — Flight Introduction Modules Page
The key for movement in MSFS is small, controlled movement and not large irrational pulls and pushes on the yoke, shown in Figure 2. This is because every movement is sustained in an airplane. When a roll is conducted, it keeps that angle of roll until another adjustment is made. Additionally, the pedal is especially sensitive to movement. A push with a little bit too much power will cause the plane to run off course. Every piece of equipment for this flight simulator is very sensitive to movement, so it is important that every motion is small.
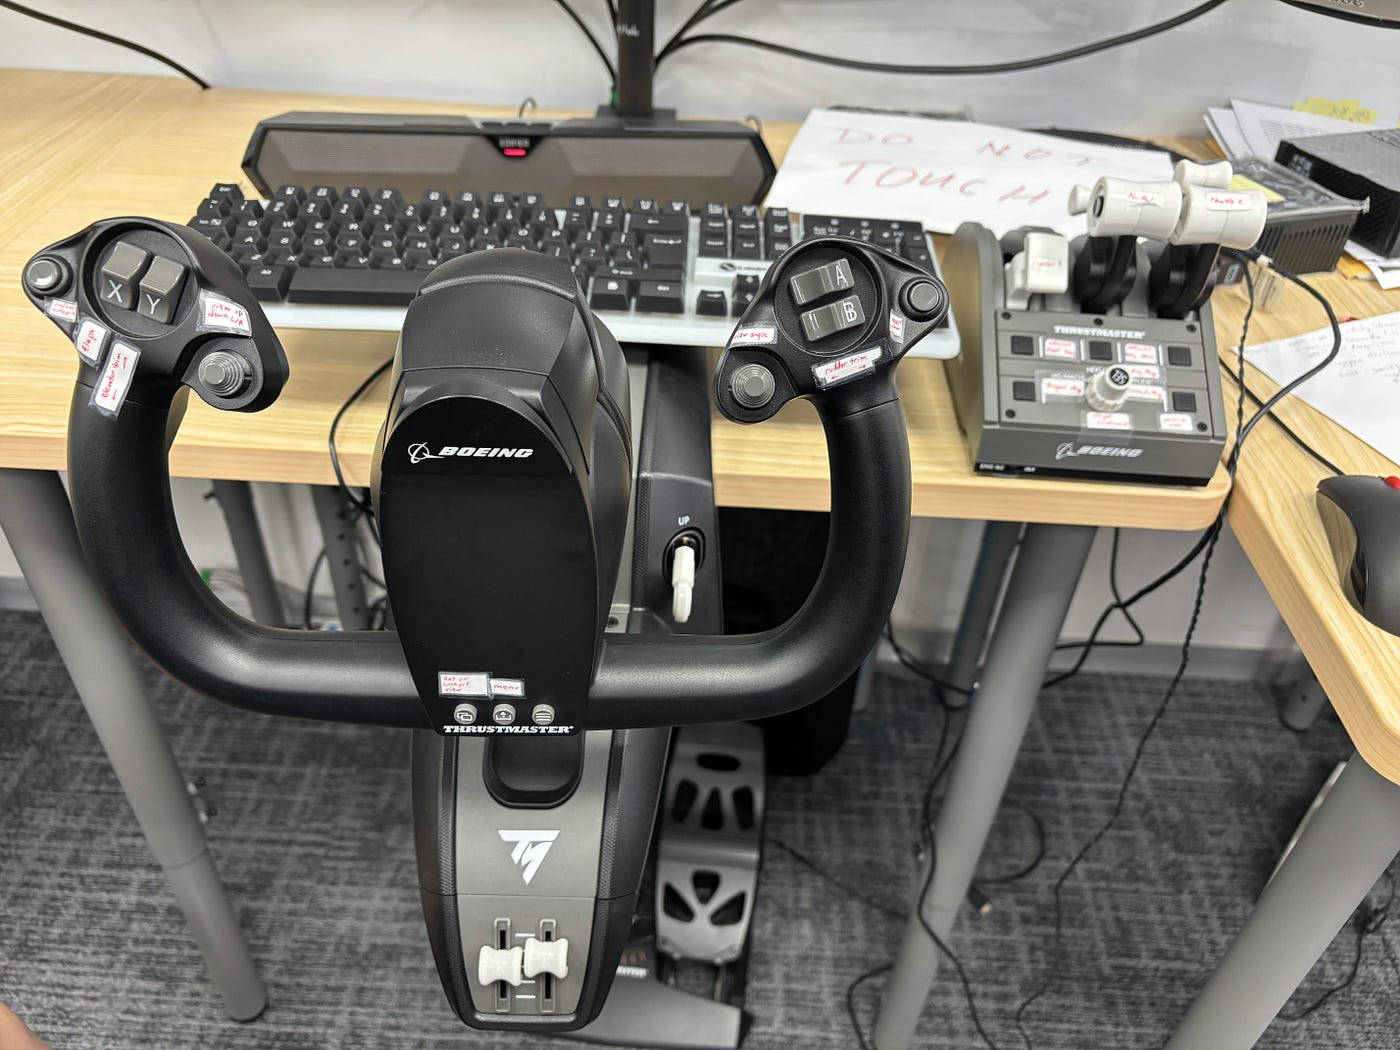
Figure 2 — Flight Simulator Yoke (Left), Pedal (Bottom), and Control Panel (Right)
Next is the most important part, I like to call this the beginners test. This part holds the most difficult modules, each one requiring near mastery of everything from the previous modules. This part has modules like taxiing, takeoff, and landing, as shown in Figure 3.
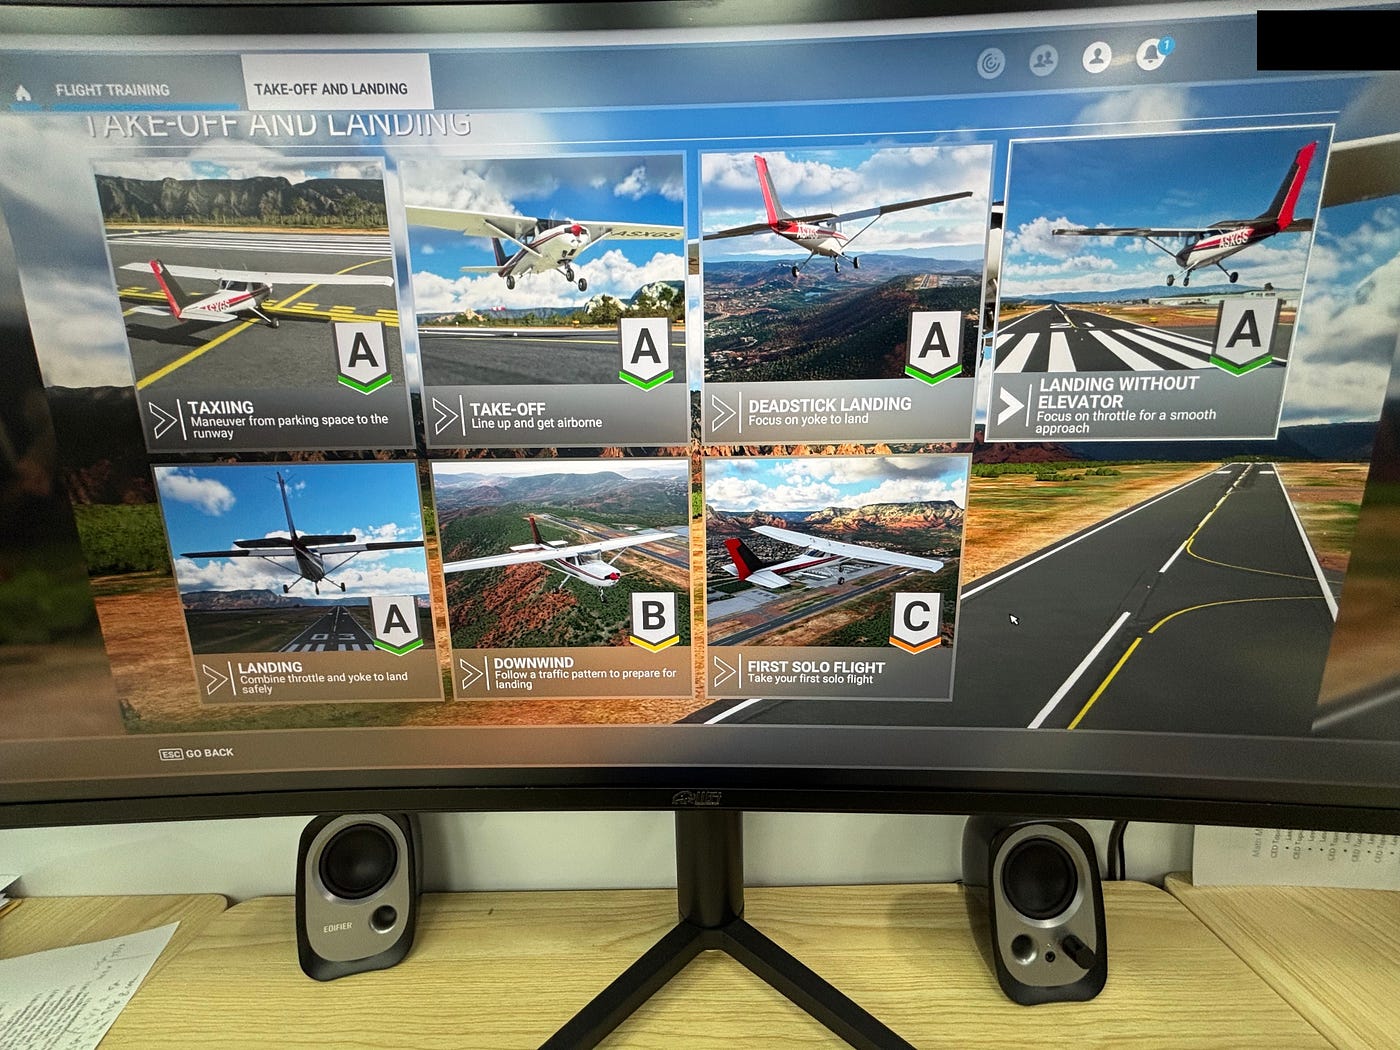
Figure 3 — Take-Off and Landing Modules Page
Take off is split into two different parts, taxiing and the actual take off. For taxiing, it requires land movement, specifically precise pedal movement that moves the plane into position for the actual take-off. For take-off, it requires precise manueverability as when accelerating, it is extremely easy to lose control of the plane’s direction. To take-off, it requires the plane to accelerate to a speed of atleast 50 knots, which is around 25 meters per second, as shown in Figure 4. Finally, when the plane has reached the minimum speed, the yoke needs to be pulled back in order to raise the nose of the plane up and take off.
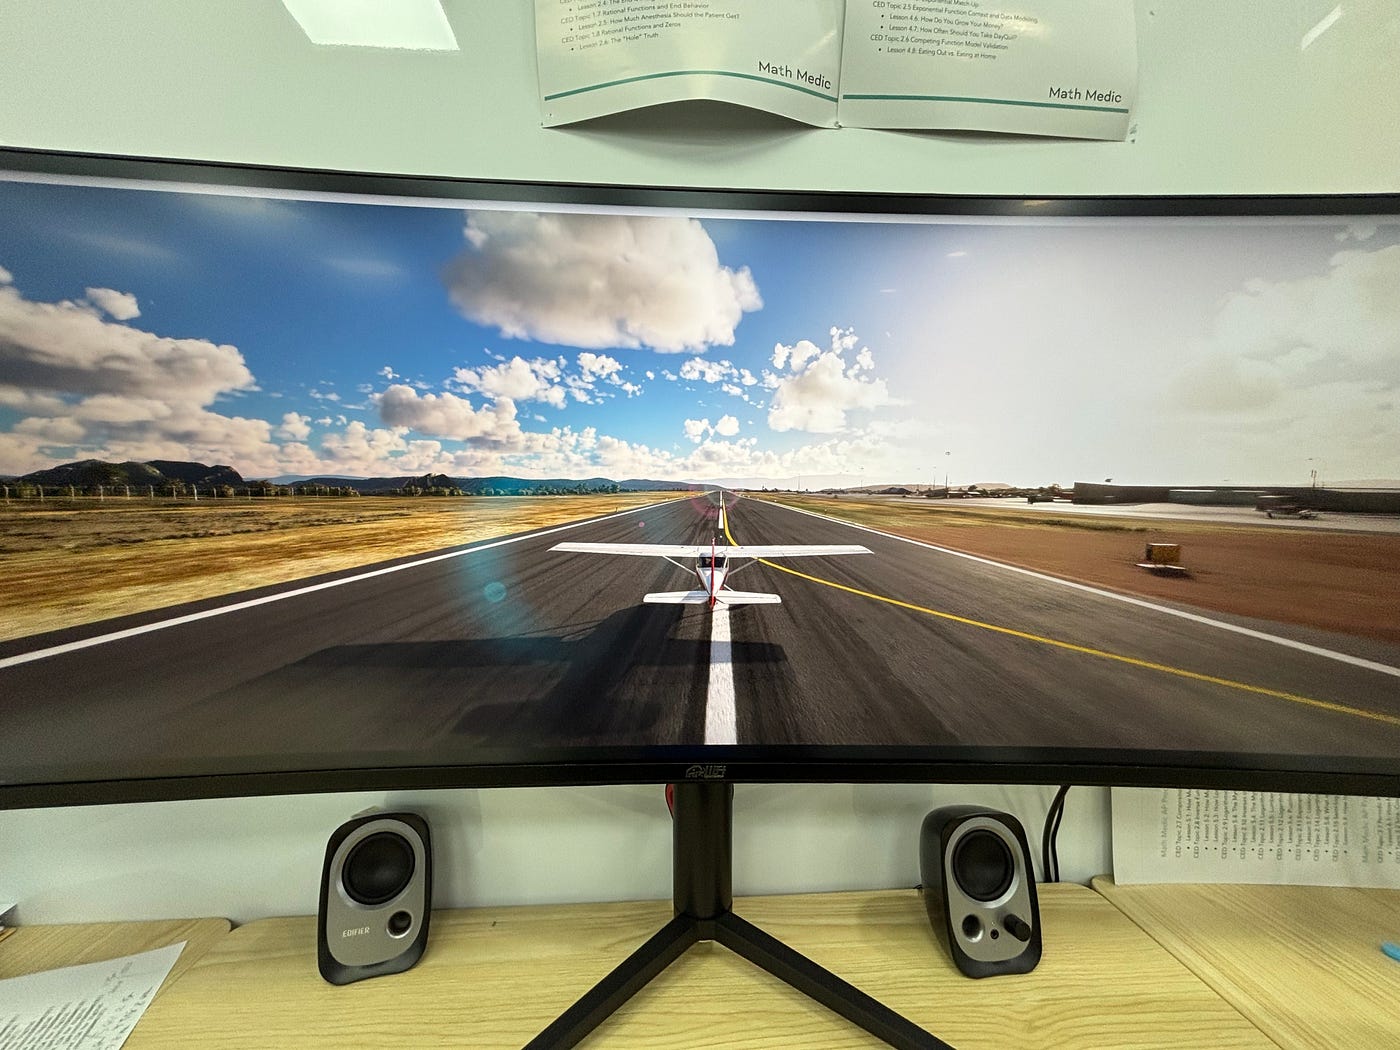
Figure 4 — Airplane Accelerating on the Runway
But compared to landing, take-off is nothing. Landing is easily the most difficult module of this assignment and flying in general. Landing combines both the difficulties of movement in the air and the precision of ground movement control needed in taxiing. While in the air, you need to make sure to keep alignment with the runway while also keeping an airspeed of around 65 knots, as shown in Figure 5. This is especially difficult as one minor mistake could lead you off alignment with the runway, and once you are off in alignment it becomes very hard to become realigned. Approaching the runway in the air requires mastery over yoke management and instrument reading.
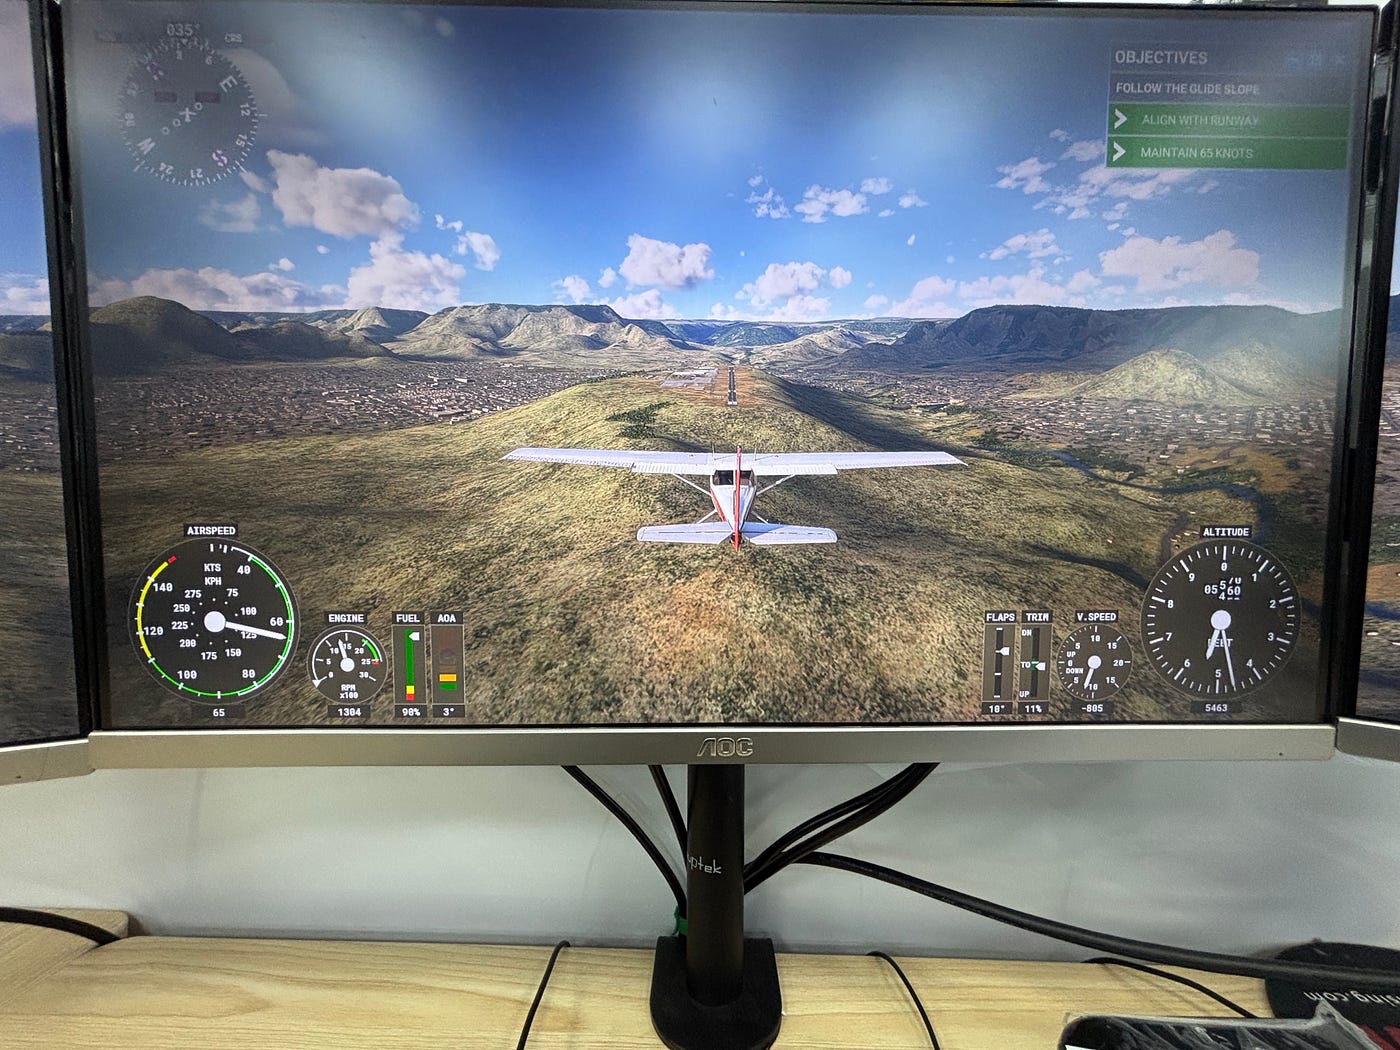
Figure 5 — Airplane Approaching the Runway for Landing
While for the actual landing part, it requires you to know when is the right time to perform a flare. A flare is a manuever that you do when you are close to the runway where you slowly pull back on the yoke to raise the nose of the plane, as shown in Figure 6. This slows down the airplane for smooth landing and positions the plane so that the back two wheels of the landing gear are able to land first.
Figure 6 — Diagram of an Airplane Flaring (Source: AOPA)
This is very difficult as you need to know at what height to flare and how much you need to flare. Making a mistake in either one of these can cause the plane to balloon, which means that the airplane bounces on impact with the ground, or can potentially lead the plane to crash. Luckily in most cases, a recovery can be made after ballooning, as is shown in Figure 7.
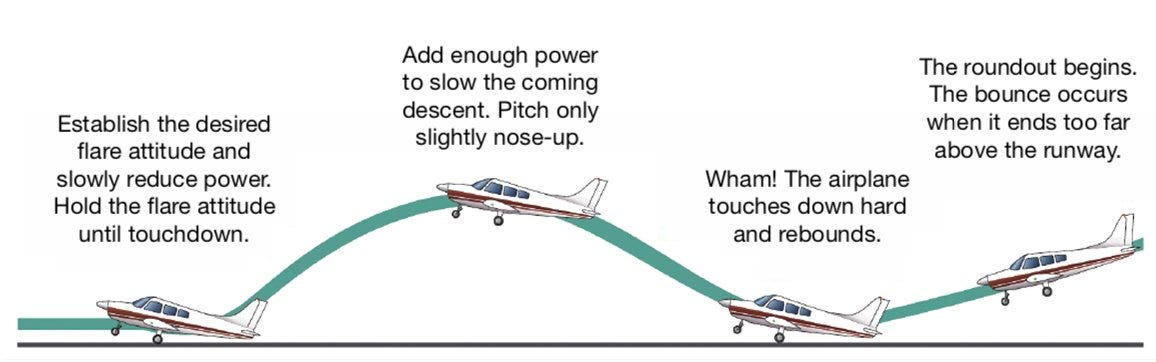
Figure 7 — How to Recover from Balloning (Source: FLYING Magazine)
Once you have successfully landed, you will also need to control the vehicle while it is breaking. This is still very difficult as the plane is still moving at high speeds after landing, which makes controlling its movement much harder. All of these factors combined make it landing one of the hardest skills to perform successfully, and it takes a lot of time and practice to achieve the coveted A rating, shown in Figure 8.
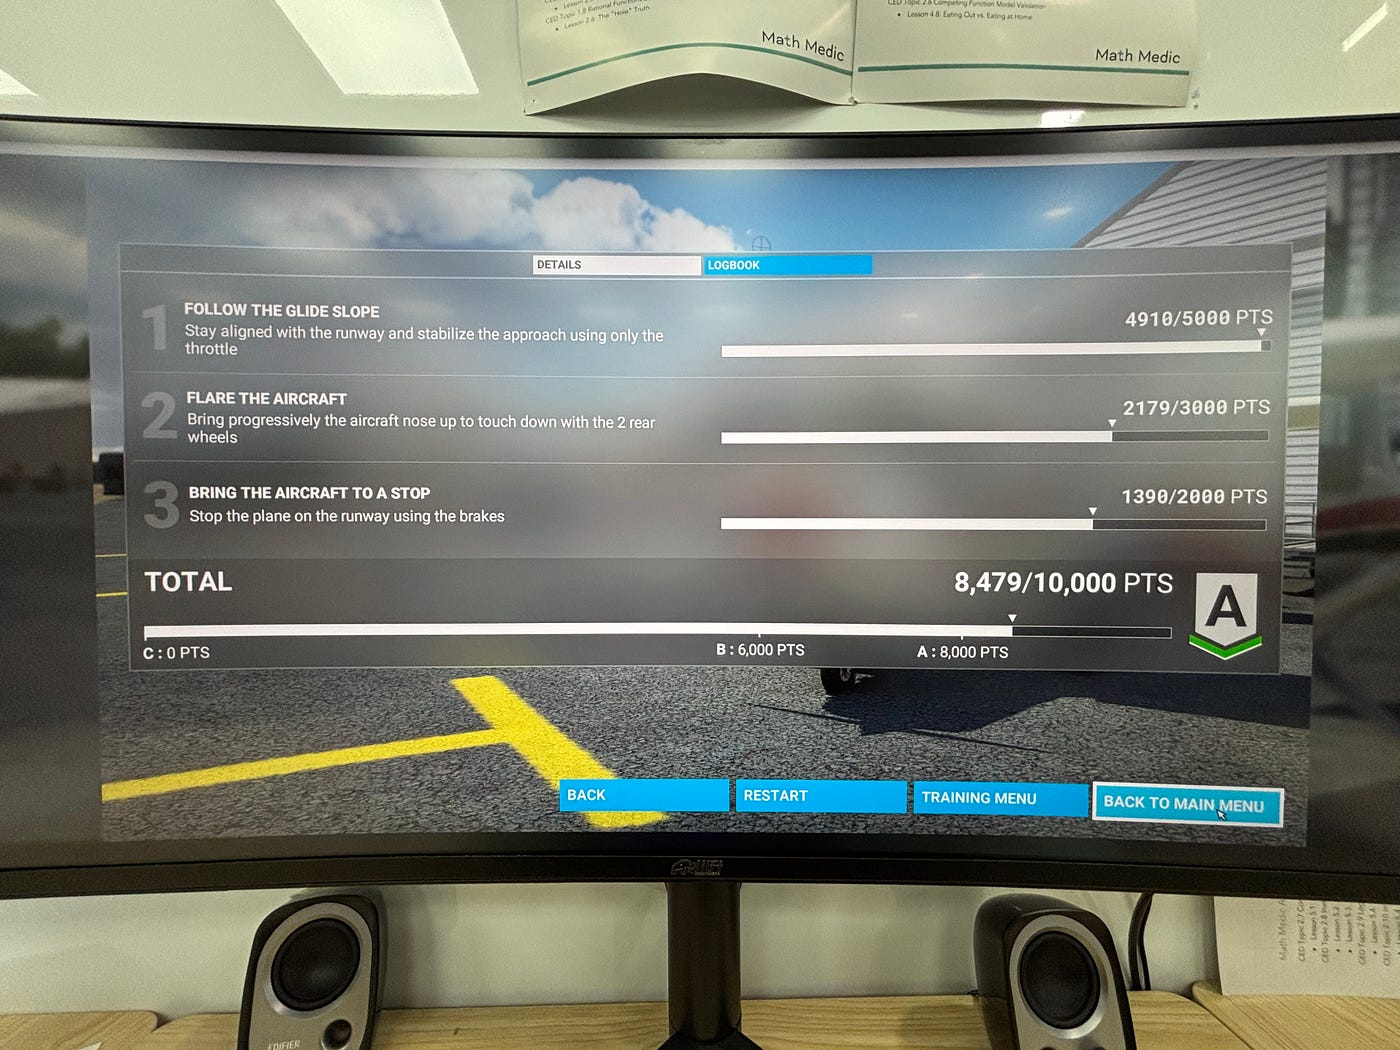
Figure 8 — Score Distribution of an A Rating for Landing
Conclusion
This final lab of this course brought together all the knowledge about airplanes that we have learned in the past semester to a hands on lab. It was a very fun and rewarding way to finish the course, being able to see all the different pieces of information about the building and composition of an airplane working together. Though this lab was very difficult, it also brought a feeling of accomplishment and pride after mastering each module and skill. Obtaining an A rating for landing after hours of failed attempts is a feeling that is unmatched.
This final lab also marks the conclusion of the AL Aerospace Engineering Course. This has been a very fulfilling course, though there were many challenging obstacles, there were also many fun moments. Thank you for our instructor D.T. for making this course the way it is. This course is an experience that will last in my memory for years to come. And for you readers, thank you joining me on this adventure and I hope this doesn’t mark the end for your aerospace journey. As always, stay curious.
메타데이터
- post_id
- fa44bc2fe01e
- slug
- microsoft-flight-simulator-fa44bc2fe01e
- url
- https://medium.com/aeroacademic/microsoft-flight-simulator-fa44bc2fe01e
- canonical_url
- https://medium.com/aeroacademic/microsoft-flight-simulator-fa44bc2fe01e
- author_url
- https://medium.com/@andy2027084
- status
- ok
- fetched_at
- 2026-08-04 12:45:51