Getting Started with ngrok: Tunnel Your Docker App to Public Internet
The problem
Getting Started with ngrok: Tunnel Your Docker App to Public Internet

The problem
Imagine you’re building an e-commerce application.
A customer clicks “Buy Now”, your application sends the payment request to Stripe, and the payment is processed successfully. But how does your application know whether the payment was approved, declined, or requires additional verification?
The answer is webhooks.
After processing the payment, Stripe sends an HTTP request to a URL that you provide, notifying your application about the payment status.
- Customer pays → Stripe processes payment → Stripe sends webhook → Your application updates the order.
This works perfectly in production because your application is hosted on a public server. During development, however, your application usually runs on:
http://localhost:9000And that’s where the problem begins.
localhost only exists on your machine. External services such as Stripe, GitHub, Slack, Shopify, or Twilio cannot access it because it's hidden behind your router, firewall, and private network. As a result, webhook requests never reach your application.
The Solution: ngrok
ngrok creates a secure tunnel between the public internet and your local machine.
Instead of exposing your network or deploying to a remote environment, ngrok provides a temporary public URL that forwards requests directly to your local application.
For example:
- Local application:
[http://localhost:9000](http://localhost:9000) - Public URL generated by ngrok:
[https://a1b2c3d4.ngrok-free.app](https://a1b2c3d4.ngrok-free.app)
Now, any external service can send requests to the public URL, and ngrok securely forwards them to your application running on localhost.
This means you can:
- ✅ Test Stripe webhooks locally
- ✅ Receive GitHub webhook events
- ✅ Debug third-party integrations in real time
- ✅ Develop and test without deploying
- ✅ Inspect incoming requests and responses
Why ngrok?
ngrok is a small agent that runs on your machine, dials out to the ngrok cloud, and holds open a tunnel. When someone hits your public https://something.ngrok-free.app URL, ngrok’s servers forward that request down the tunnel to your local app and stream the response back.
Because the tunnel is outbound, you don’t open any inbound ports and you don’t touch your router. It just works, even behind corporate NAT.
What makes it perfect for development:
- A real HTTPS URL: Third parties that require
https://(which is most of them) are happy. - Request inspection: A built-in web UI at
localhost:4040shows every request: headers, body, response, and timing. You can even replay a request, so you don’t have to push to GitHub ten times to debug one handler. - Zero deploy loop: Change your code, and the next webhook hits the new code instantly. No server, no CI, no waiting.
(Note: The free plan gives you one tunnel at a time with a random URL each restart — more than enough for development and this tutorial.)
What We’re Building
In this tutorial, we’ll use ngrok to expose a Dockerized application running locally, connect it to a GitHub webhook, and log every incoming event to verify that everything is working correctly.
               ngrok cloud
                              │  https://abc123.ngrok-free.app
                              │
        ┌─────────────────────┴──────────────────────┐
        │                Docker network              │
        │                                            │
        │   ┌───────────────┐       ┌──────────────┐ │
        │   │  ngrok agent  │──────▶│  web (Flask) │ │
        │   │  :4040 (UI)   │ web:5000   :5000     │ │
        │   └───────────────┘       └──────────────┘ │
        └────────────────────────────────────────────┘
The stack
We’ll keep the app deliberately tiny so the plumbing is what stands out:
ngrok/
├── app/
│   ├── main.py            # Flask app: /, /api/hello, /webhook
│   ├── requirements.txt   # Flask
│   └── Dockerfile         # Python 3.12 environment
├── logs/
│   └── webhooks.log       # one JSON line per webhook (created at runtime)
├── docker-compose.yml     # the 'web' and 'ngrok' services
├── ngrok.yml              # ngrok tunnel configuration
└── .env                   # your ngrok authtoken (never commit this)
Step 1 — The Python app
Here is a minimal Flask app with one endpoint that matters: /webhook. Every time it’s called, it appends a JSON line to a log file.
import json, logging, os, socket
from datetime import datetime
from logging.handlers import RotatingFileHandler
from pathlib import Path
from flask import Flask, jsonify, request

app = Flask(__name__)

# Write webhook events to a rotating log file inside /app/logs/
_log_dir = Path("/app/logs")
_log_dir.mkdir(parents=True, exist_ok=True)
_handler = RotatingFileHandler(
    _log_dir / "webhooks.log",
    maxBytes=1_000_000,   # 1 MB per file
    backupCount=5,        # keep 5 old files
)
_handler.setFormatter(logging.Formatter("%(message)s"))
_webhook_log = logging.getLogger("webhooks")
_webhook_log.setLevel(logging.INFO)
_webhook_log.addHandler(_handler)
_webhook_log.propagate = False

def _log_webhook(payload: dict) -> None:
    entry = {
        "time": datetime.utcnow().isoformat() + "Z",
        "source_ip": request.remote_addr,
        "event": request.headers.get("X-GitHub-Event", "unknown"),
        "delivery": request.headers.get("X-GitHub-Delivery", "-"),
        "payload": payload,
    }
    _webhook_log.info(json.dumps(entry))

@app.route("/webhook", methods=["POST", "GET"])
def webhook():
    payload = request.get_json(silent=True) or {}
    _log_webhook(payload)
    return jsonify(status="received", payload=payload)

if __name__ == "__main__":
    # 0.0.0.0 so the app is reachable from OUTSIDE the container.
    port = int(os.environ.get("PORT", 5000))
    app.run(host="0.0.0.0", port=port, debug=True)
Step 2 — The Dockerfile (the Python environment)
FROM python:3.12-slim

# Don't write .pyc files and stream output straight to the logs.
ENV PYTHONDONTWRITEBYTECODE=1 \
    PYTHONUNBUFFERED=1 \
    PORT=5000

WORKDIR /app

# Install dependencies FIRST so this layer is cached between code changes.
COPY requirements.txt .
RUN pip install --no-cache-dir -r requirements.txt

# Then copy the application source.
COPY . .

EXPOSE 5000
CMD ["python", "main.py"]
Step 3 — Docker Compose: wiring two containers together
services:
  # The Python web application
  web:
    build: ./app
    container_name: ngrok_tutorial_web
    ports:
      - "5000:5000"                       # also reachable at localhost:5000
    user: "${UID:-1000}:${GID:-1000}"     # write log files as YOU, not root
    environment:
      - PORT=5000
    volumes:
      - ./logs:/app/logs                  # logs land on your host machine
    networks:
      - tutorial_net
    restart: unless-stopped

  # The ngrok tunnel
  ngrok:
    image: ngrok/ngrok:latest
    container_name: ngrok_tutorial_agent
    command: start --all --config /etc/ngrok.yml
    environment:
      - NGROK_AUTHTOKEN=${NGROK_AUTHTOKEN} # comes from your .env file
    volumes:
      - ./ngrok.yml:/etc/ngrok.yml:ro
    ports:
      - "4040:4040"                        # the request-inspection web UI
    depends_on:
      - web
    networks:
      - tutorial_net
    restart: unless-stopped

networks:
  tutorial_net:
    driver: bridge
The pieces that make this work, one by one:
addr: web:5000: This is the magic. Because both containers jointutorial_net, Docker’s internal DNS lets the ngrok container reach the Flask container using its service name (web) as a hostname. There’s no IP address to hardcode. ngrok forwards the public tunnel straight toweb:5000.volumes: ./logs:/app/logs: The container writeswebhooks.logto/app/logsinside it; that path is bound to thelogs/folder on your laptop. So the log file is a real file you cantail -f, open in your editor, or grep—and it survives even after the container is destroyed.user: "${UID:-1000}:${GID:-1000}": By default, Docker containers run asroot, which means files they create in a mounted volume are owned byroot. This prevents your editor from saving over them ("permission denied"). This line tells the container to run as your user ID instead.depends_on: web: Starting thengrokservice automatically startswebfirst, allowing us to bring up the whole stack with a single command.ports:5000lets you hit the app directly without the tunnel.4040exposes ngrok’s inspection dashboard to your browser.
Step 4 — The ngrok configuration (and one important gotcha)
version: "2"

log: stdout
log_level: info

# The web UI must listen on all interfaces so we can reach it from the host.
web_addr: "0.0.0.0:4040"

tunnels:
  python-app:
    proto: http
    addr: web:5000      # <-- docker service name : internal port
    inspect: true
Here’s the gotcha that cost me a confusing ten minutes, so you don’t have to lose them: You might expect to write authtoken: ${NGROK_AUTHTOKEN} and have it filled in from the environment. The ngrok agent does not expand ${VAR} placeholders inside its YAML config. It takes the string literally, tries to authenticate with the exact text ${NGROK_AUTHTOKEN}, and fails with ERR_NGROK_105.
The clean fix is to leave authtoken out of the file entirely. The ngrok agent automatically reads an environment variable called NGROK_AUTHTOKEN—and we feed that in through Docker Compose from our .env file. Bonus: your secret never lives in a config file you might accidentally commit.
How to get your token:
- Go to ngrok.com and sign up for a free account.
- Open your ngrok dashboard.
- Navigate to Your Authtoken under the “Setup & Installation” menu.
- Click the Copy button to grab your token.

Now that you have your token, create a .env file in your project's root directory and paste it in:
NGROK_AUTHTOKEN=your_token_here(Get your token from the ngrok dashboard after creating a free account. And remember to add .env to your .gitignore!)
Step 5 — Lift off
Start the whole stack with one command:
docker compose up -d ngrok --build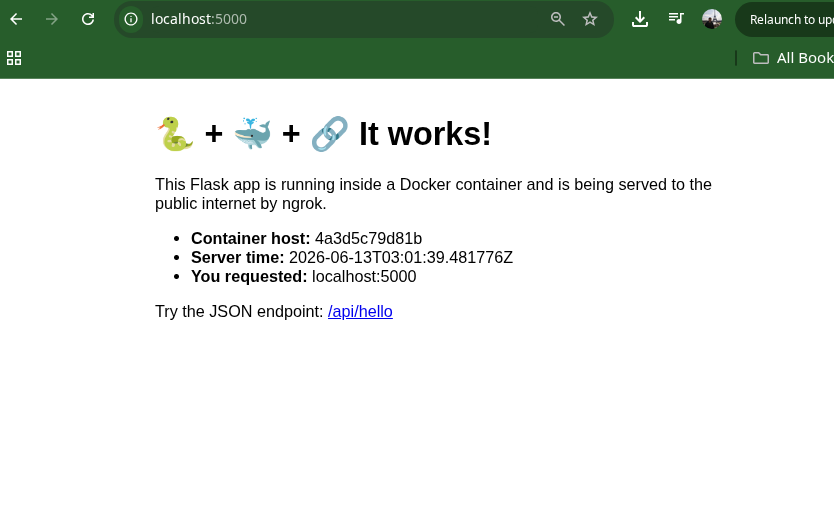
Because ngrok depends on web, this builds and starts both containers. Now, find your public URL. Either open the dashboard at http://localhost:4040, or pull it straight from ngrok’s local API:
curl -s http://localhost:4040/api/tunnels | grep -Po '"public_url":"\K[^"]+' | head -1You’ll get something like:
[https://aafe-216-234-208-236.ngrok-free.app](https://aafe-216-234-208-236.ngrok-free.app)
It works! A request that traveled through the public internet and the ngrok cloud can now hit your machine.
# **Step 6 — Point GitHub at it**
Now for the real thing. We’ll make GitHub call this endpoint on every push.
*(Note: Webhooks are configured per repository, not in your account profile. Go to a repo you own, not `github.com/settings`.)*


1. Open any repo you own → Settings → Webhooks (left sidebar) →
Add webhook.
2. Payload URL: your ngrok URL plus the path —
`[https://aafe-216-234-208-236.ngrok-free.app/webhook`](https://aafe-216-234-208-236.ngrok-free.app/webhook`)
3. Content type: choose `application/json` (so the body arrives as JSON our
Flask handler can parse, not form-encoded).
4. Secret: leave it blank for now. (In production you’d set one and verify the
`X-Hub-Signature-256` header to prove the request really came from GitHub.)
5. Which events? Pick Just the push event.
6. Click Add webhook.
Now , at the moment you save, GitHub fires a `ping` event to confirm the endpoint is alive. Look in `logs/webhooks.log` and you’ll see it (`"event": "ping"`). GitHub also shows a green checkmark under the webhook’s "Recent Deliveries" tab, where you can inspect and redeliver any payload.
## **Step 7 — Watch every push get logged**

Now, make a push to your repository.
That real GitHub push event — the branch, the commits, who pushed — is captured on your laptop, in a file, the instant it happened. Every future push appends another line.
And if you want to see the *full* request the way GitHub sent it — all the headers, the complete body — open `http://localhost:4040`. ngrok recorded it, and you can replay it with one click while you build out your handler logic.
# **What you can do from here**
You now have the foundation that every webhook integration is built on. The exact same setup handles:
- **Stripe / Payment Gateways:** `payment_intent.succeeded`, refunds, disputes.
- **WhatsApp / Twilio:** Inbound messages and delivery receipts.
- **Social Login Callbacks:** OAuth redirect URIs during development.
- **CI / Deploy Hooks:** Trigger something locally when a build finishes.
Natural next steps for the `/webhook` handler:
1. **Verify the signature.** Set a Secret on the GitHub webhook and check the `X-Hub-Signature-256` HMAC so you only act on genuine requests.
2. **Branch on the event type.** Use that `X-GitHub-Event` header to route `push` vs `pull_request` vs `issues` to different logic.
3. **Do something real.** Kick off a deploy, post to Slack, update a database — instead of just logging.
# 👉 Git Hub Code -
[https://github.com/murilolivorato/docker_ngrok_python](https://github.com/murilolivorato/docker_ngrok_python)
# Conclusion
Working with webhooks doesn’t have to mean endless deploy cycles, pushing unverified code, or dealing with complicated remote debugging. By combining Docker and ngrok, you’ve just built a robust, reproducible local development environment.
In this tutorial, we successfully took a local Flask application, wired it up to an ngrok tunnel using Docker Compose, and securely exposed it to the public internet. More importantly, we created a setup where you can safely inspect, replay, and debug incoming GitHub events in real time.
Whether you’re building the next big Stripe integration, setting up automated Slack notifications, or just tinkering with webhook payloads, this foundational stack will save you hours of frustration.
The plumbing is done. The tunnel is open. Now, it’s time to write the code that actually handles the events.
Happy coding!
# Thanks a lot for reading till end. Follow or contact me via:
Github:[https://github.com/murilolivorato](https://github.com/murilolivorato)
LinkedIn: [https://www.linkedin.com/in/murilo-livorato-80985a4a/](https://www.linkedin.com/in/murilo-livorato-80985a4a/)메타데이터
- post_id
- fef6f7f8cd47
- slug
- getting-started-with-ngrok-tunnel-your-docker-app-to-public-internet-fef6f7f8cd47
- url
- https://medium.com/@murilolivorato/getting-started-with-ngrok-tunnel-your-docker-app-to-public-internet-fef6f7f8cd47
- canonical_url
- https://medium.com/@murilolivorato/getting-started-with-ngrok-tunnel-your-docker-app-to-public-internet-fef6f7f8cd47
- author_url
- https://medium.com/@murilolivorato
- status
- ok
- fetched_at
- 2026-06-26 21:52:29