Deploying WordPress on Kubernetes with Minikube Persistent Storage, MySQL
1. Introduction
Deploying WordPress on Kubernetes with Minikube Persistent Storage, MySQL

1. Introduction
This guide walks through deploying WordPress and MySQL on a local Minikube cluster. By the end, you’ll have a practical understanding of how a multi-tier application can be deployed on Kubernetes, how its components communicate, and how Kubernetes manages the application and its persistent data.
We’ll cover:
- Setting up Minikube and a dedicated namespace
- Persistent storage with PersistentVolumes and PersistentVolumeClaims
- Deploying MySQL and WordPress with Deployments
- Cleaning everything up afterward
Prerequisites
Before you start, install:
- **Minikube** — runs a single-node Kubernetes cluster locally, usually inside a VM or container on your machine.
- **kubectl** — the command-line client you use to talk to any Kubernetes cluster, local or remote.
- **Docker** — used as the container runtime/driver for Minikube (is what Minikube uses under the hood to actually run the node)
- **WSL **installed on windows
Architecture
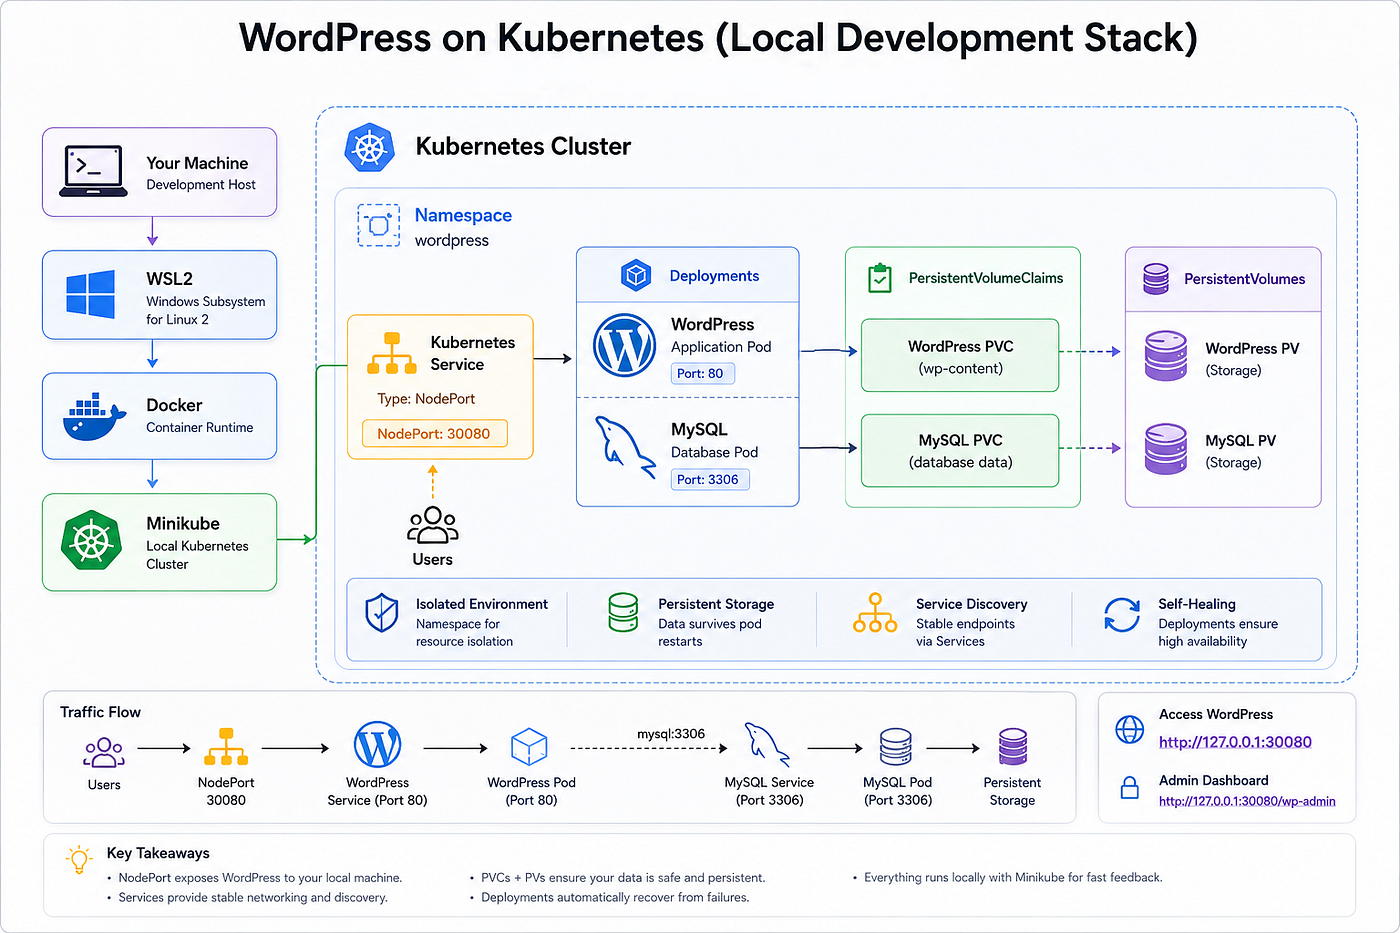
Step 1: Start Minikube
minikube startThis provisions a single-node Kubernetes cluster on your machine — a VM or container that runs both the control plane (API server, scheduler, controller manager, etcd) and the worker components (kubelet, kube-proxy) on one machine.
In a real production cluster these roles are usually split across multiple nodes, but for local development, one node is enough.
You can confirm it’s up with:
kubectl get nodes //You should see a single node in Ready statusStep 2: Create a Namespace
Namespaces are Kubernetes’ way of partitioning a single cluster into logically separate workspaces. They don’t provide hard isolation like separate clusters would, but they let you group related resources, apply resource quotas, and avoid naming collisions.
kubectl create namespace wordpressEverything we create from here on will live inside the wordpress namespace, which also makes cleanup trivial later — deleting the namespace deletes everything inside it.
Note: instead of typing
-n wordpresson every command, you can set it as your default context:
kubectl config set-context --current --namespace=wordpressStep 3: Handle Credentials with a Secret (Not Plaintext)
Before we get to storage, it’s worth pausing on something don’t put database passwords directly in your Deployment YAML. Anyone with read access can see them in plaintext.
Kubernetes Secret objects aren't strongly encrypted by default (they’re just base64-encoded, which is not encryption) but they do keep credentials out of your deployment specs, restrict access via RBAC, and set you up to swap in a real secrets manager like (vault,AWS secrets Manager etc..) later without rewriting your deployments.
Create mysql-secret.yaml
apiVersion: v1
kind: Secret
metadata:
  name: mysql-secret
  namespace: wordpress
type: Opaque     //refers to a Kubernetes Secret object
stringData:
  MYSQL_ROOT_PASSWORD: rootpassword
  MYSQL_DATABASE: wordpress
  MYSQL_USER: wpuser
  MYSQL_PASSWORD: wppassword
Using stringData instead of data lets you write plain strings instead of manually base64-encoding each value Kubernetes encodes it for you when the object is stored.
Apply it
kubectl apply -f mysql-secret.yamlWe’ll reference this Secret from both the MySQL and WordPress Deployments in a moment, so the same credentials are shared without being duplicated anywhere.
Step 4: Create Persistent Storage
Containers are ephemeral by design if a pod crashes or gets rescheduled, anything written to its writable layer disappears. For a database, that’s obviously unacceptable, and even for WordPress’s uploaded media and installed plugins, you don’t want to lose them every time the pod restarts.
Kubernetes solves this with two related objects:
- PersistentVolume (PV) — represents an actual piece of storage (a disk, an NFS share, a cloud volume, etc..), provisioned at the cluster level.
- PersistentVolumeClaim (PVC) — A request for storage made by a user/application.
in a simple way:
- PV (is the storage) >> I have a 10 GB disk available
- PVC (request for storage) >> I need 5 GB of storage
MySQL storage — mysql-pv.yaml
apiVersion: v1
kind: PersistentVolume
metadata:
  name: mysql-pv
  namespace: wordpress
spec:
  capacity:
    storage: 10Gi
  accessModes:
    - ReadWriteOnce
  hostPath:
    path: "/mnt/data/mysql"
---
apiVersion: v1
kind: PersistentVolumeClaim
metadata:
  name: mysql-pvc
  namespace: wordpress
spec:
  accessModes:
    - ReadWriteOnce
  resources:
    requests:
storage: 10GihostPathstores data directly on the Minikube node's filesystem.ReadWriteOnce(RWO) means the volume can be mounted read-write by a single node at a time.- Note that
PersistentVolumeis technically a cluster-scoped resource, not a namespaced one
Apply it:
kubectl apply -f mysql-pv.yamlWordPress storage — wordpress-pv.yaml
apiVersion: v1
kind: PersistentVolume
metadata:
  name: wordpress-pv
  namespace: wordpress
spec:
  capacity:
    storage: 10Gi
  accessModes:
    - ReadWriteOnce
  hostPath:
    path: "/mnt/data/wordpress"
---
apiVersion: v1
kind: PersistentVolumeClaim
metadata:
  name: wordpress-pvc
  namespace: wordpress
spec:
  accessModes:
    - ReadWriteOnce
  resources:
    requests:
      storage: 10Gi
Apply it:
kubectl apply -f wordpress-pv.yamlVerify both PVCs bound successfully before moving on:
kubectl get pvc -n wordpressYou want to see STATUS: Bound for each. If a claim is stuck Pending, it usually means no PV matched its storage class, access mode, or size request — double check those fields line up between the PV and PVC.
Step 5: Deploy MySQL
A Deployment is a controller that manages a set of identical pod replicas, handles rolling updates, and restarts pods that crash. For MySQL we'll run a single replica — running multiple MySQL pods against the same volume would actually corrupt the database, since MySQL isn't designed for multiple instances to write to the same data directory concurrently.
apiVersion: apps/v1
kind: Deployment
metadata:
  name: mysql
  namespace: wordpress
spec:
  replicas: 1
  selector:
    matchLabels:
      app: mysql
  template:
    metadata:
      labels:
        app: mysql
    spec:
      containers:
      - name: mysql
        image: mysql:5.7
        env:
        - name: MYSQL_ROOT_PASSWORD
          valueFrom:
            secretKeyRef:
              name: mysql-secret
              key: MYSQL_ROOT_PASSWORD
        - name: MYSQL_DATABASE
          valueFrom:
            secretKeyRef:
              name: mysql-secret
              key: MYSQL_DATABASE
        - name: MYSQL_USER
          valueFrom:
            secretKeyRef:
              name: mysql-secret
              key: MYSQL_USER
        - name: MYSQL_PASSWORD
          valueFrom:
            secretKeyRef:
              name: mysql-secret
              key: MYSQL_PASSWORD
        ports:
        - containerPort: 3306
        volumeMounts:
        - name: mysql-storage
          mountPath: /var/lib/mysql
      volumes:
      - name: mysql-storage
        persistentVolumeClaim:
claimName: mysql-pvc**selector.matchLabelsandtemplate.metadata.labels** must match — this is how the Deployment knows which pods it owns. It's a common source of confusion for newcomers: the Deployment doesn't manage pods by name, it manages them by label.**secretKeyRef** pulls each environment variable's value from the Secret we created earlier instead of hardcoding it.**volumeMounts+volumes** connects the PVC to the container's filesystem at/var/lib/mysql, which is MySQL's default data directory.
Apply it:
kubectl apply -f mysql-deployment.yamlStep 6: Deploy WordPress
wordpress-deployment.yaml:
apiVersion: apps/v1
kind: Deployment
metadata:
  name: wordpress
  namespace: wordpress
spec:
  replicas: 1
  selector:
    matchLabels:
      app: wordpress
  template:
    metadata:
      labels:
        app: wordpress
    spec:
      containers:
      - name: wordpress
        image: wordpress:latest
        env:
        - name: WORDPRESS_DB_HOST
          value: "mysql"
        - name: WORDPRESS_DB_USER
          valueFrom:
            secretKeyRef:
              name: mysql-secret
              key: MYSQL_USER
        - name: WORDPRESS_DB_PASSWORD
          valueFrom:
            secretKeyRef:
              name: mysql-secret
              key: MYSQL_PASSWORD
        - name: WORDPRESS_DB_NAME
          valueFrom:
            secretKeyRef:
              name: mysql-secret
              key: MYSQL_DATABASE
        ports:
        - containerPort: 80
        volumeMounts:
        - name: wordpress-storage
          mountPath: /var/www/html
      volumes:
      - name: wordpress-storage
        persistentVolumeClaim:
          claimName: wordpress-pvc
WORDPRESS_DB_HOST: “mysql” it’s the actual hostname WordPress will use to reach the database.
Every Service (which we're about to create) gets a DNS entry automatically, resolvable by name from any pod in the same namespace. So once we create a Service named mysql, any pod in the wordpress namespace can reach the MySQL pod simply by connecting to the hostname mysql No IP addresses, no manual configuration.
Apply it
kubectl apply -f wordpress-deployment.yamlStep 7: Create Services
Pods are disposable — when one is rescheduled, it gets a new IP address,If WordPress tried to connect directly to MySQL’s pod IP, that connection would break the moment the MySQL pod restarted.
A Service solves this by giving a stable, permanent network identity, it provides a stable network endpoint to reach Pods.
We need two different kinds of Service here, because MySQL and WordPress have very different networking needs:
- MySQL should only be reachable from inside the cluster there’s no reason to expose a database directly to the internet. A
ClusterIPservice (the default type) provides internal-only access. - WordPress needs to be reachable from your browser, outside the cluster. On Minikube,
NodePortis the simplest way to do that — it opens a specific port on the node itself that forwards into the pod.
services.yaml:
apiVersion: v1
kind: Service
metadata:
  name: mysql
  namespace: wordpress
spec:
  selector:
    app: mysql
  ports:
    - protocol: TCP
      port: 3306
      targetPort: 3306
---
apiVersion: v1
kind: Service
metadata:
  name: wordpress
  namespace: wordpress
spec:
  type: NodePort
  selector:
    app: wordpress
  ports:
    - protocol: TCP
      port: 80
      targetPort: 80
      nodePort: 30080
Apply it:
kubectl apply -f services.yamlIn a real cloud-hosted cluster, you’d typically front WordPress with a LoadBalancer Service or an Ingress resource instead of NodePort, since NodePort's fixed port range and direct node-IP access aren't practical for production traffic. NodePort is a good fit here specifically because Minikube gives us an easy way to reach it.
Step 8: Verify the Deployment
kubectl get pods -n wordpresskubectl describe pod <pod-name> -n wordpress
kubectl logs <pod-name> -n wordpressdescribe shows scheduling and volume-mount events while logs shows what the application itself printed ( useful for catching MySQL auth failures or WordPress connection errors)
Then check the Services:
kubectl get svc -n wordpressYou should see mysql as ClusterIP and wordpress as NodePort,with the WordPress service showing 80:30080/TCP under PORT(S).
Step 9: Access WordPress
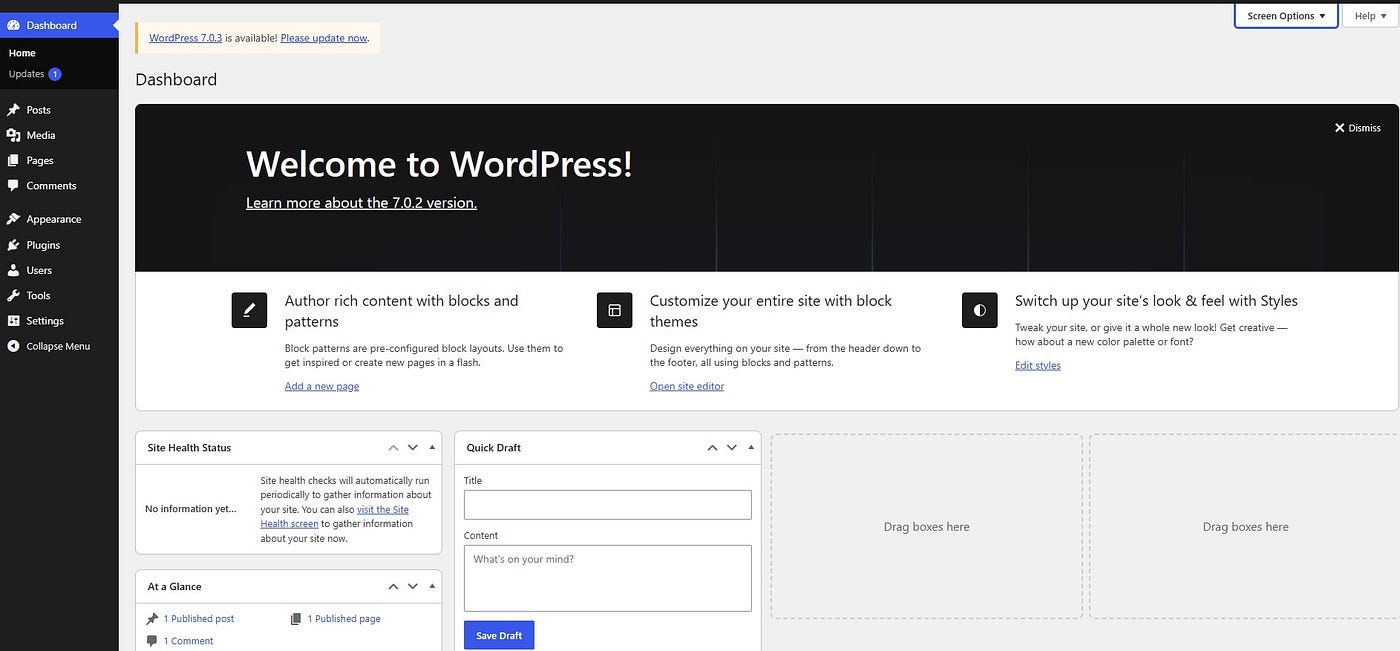
Because Minikube runs inside a VM or container rather than directly on your host network, you can’t just browse to localhost:30080 — you need Minikube to tell you the actual reachable URL:
minikube service wordpress -n wordpress --urlOr you can run it using the command
kubectl port-forward svc/wordpress 8080:80 -n wordpress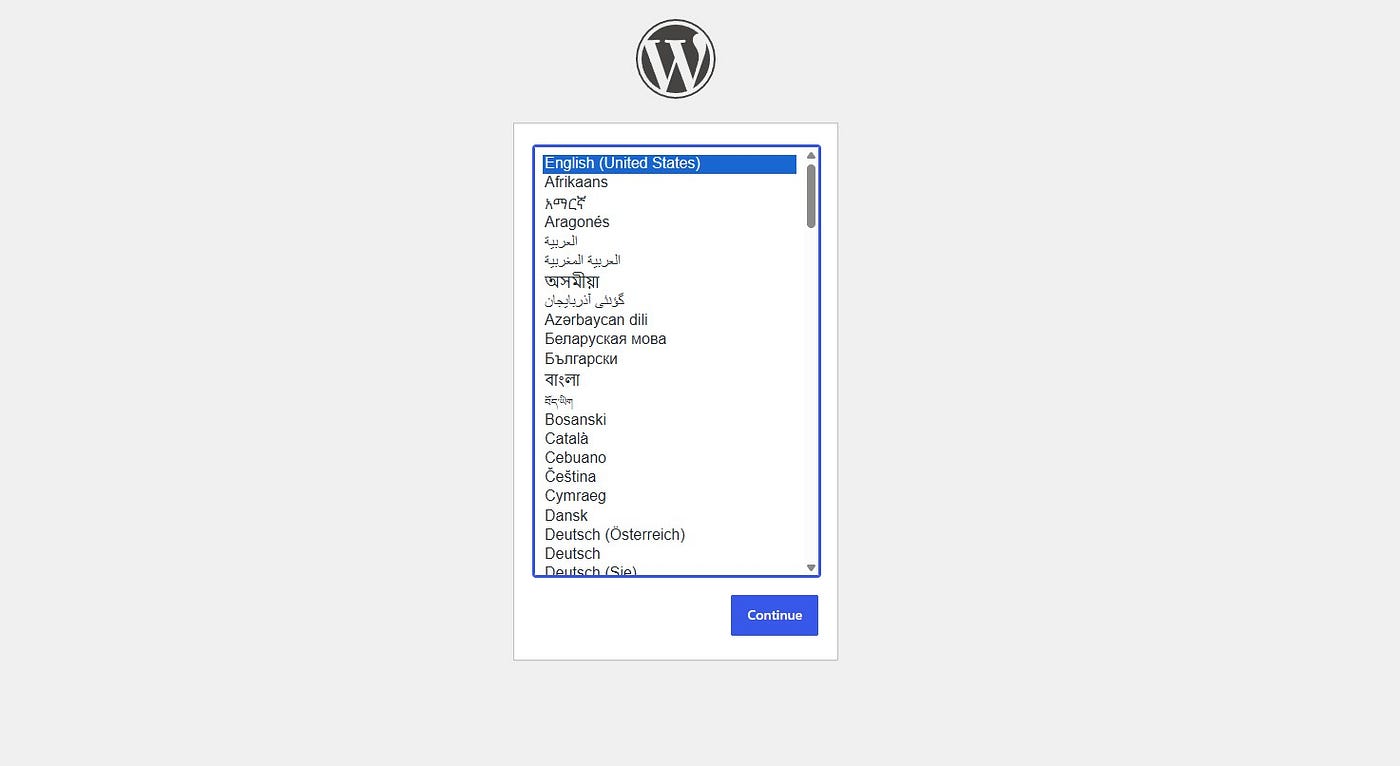
Step 10: Cleanup
Because everything lives in one namespace, we can use one command:
kubectl delete namespace wordpressConclusion
You’ve now deployed a two-tier application on Kubernetes, consisting of an application tier and a data tier. The architecture follows key Kubernetes principles: application workloads are separated from persistent storage, while sensitive credentials are managed separately from the application configuration.
메타데이터
- post_id
- ff698ae22fde
- slug
- deploying-wordpress-on-kubernetes-with-minikube-persistent-storage-mysql-ff698ae22fde
- url
- https://medium.com/@eyad9abd/deploying-wordpress-on-kubernetes-with-minikube-persistent-storage-mysql-ff698ae22fde
- canonical_url
- https://medium.com/@eyad9abd/deploying-wordpress-on-kubernetes-with-minikube-persistent-storage-mysql-ff698ae22fde
- author_url
- https://medium.com/@eyad9abd
- status
- ok
- fetched_at
- 2026-08-17 18:38:08