How To Create a Windows 11 Golden Image with Preinstalled Software
Manually configuring Windows 11 for every new hire is a recipe for inconsistency and wasted billable hours. Between debloating the OS…
How To Create a Windows 11 Golden Image with Preinstalled Software
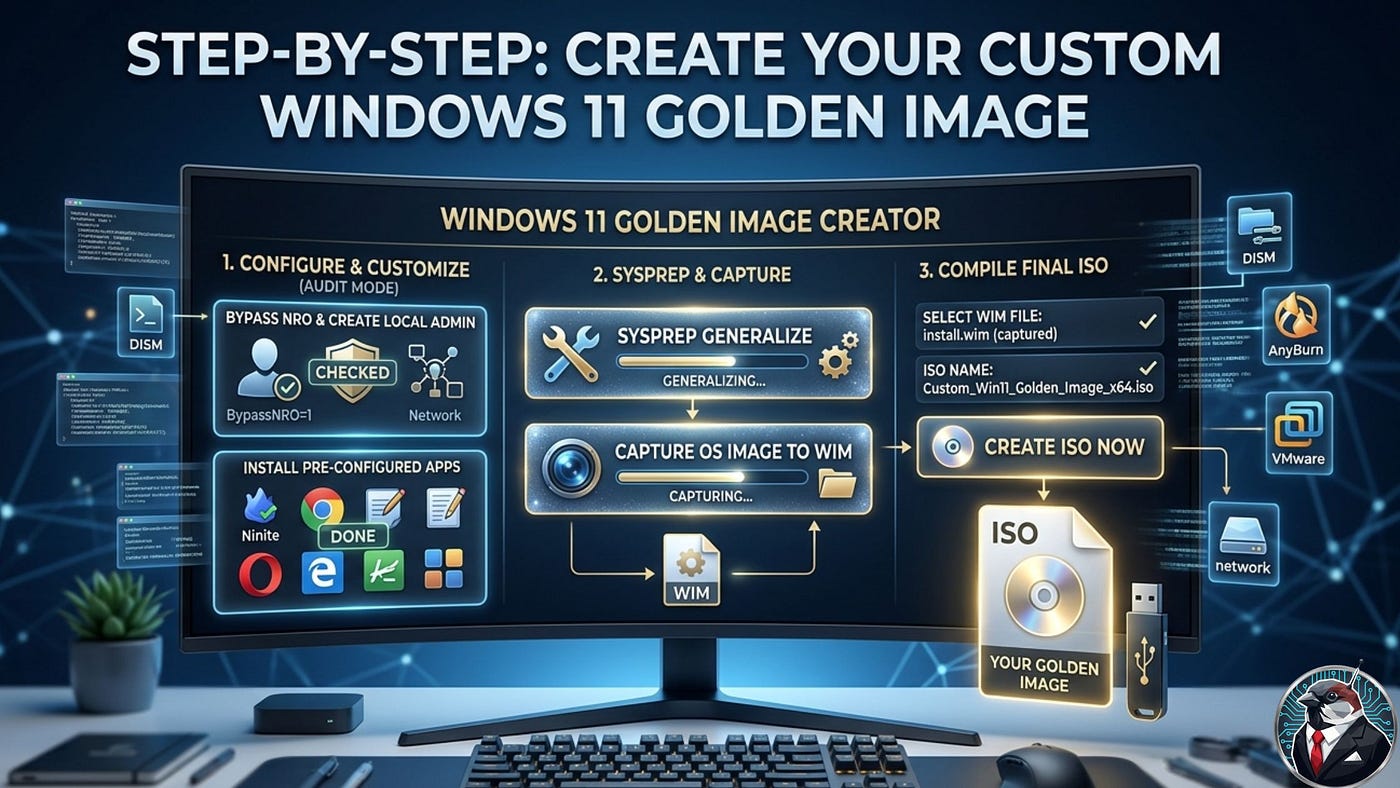
Manually configuring Windows 11 for every new hire is a recipe for inconsistency and wasted billable hours. Between debloating the OS, toggling privacy settings, and installing the standard “must-have” software suite, a single workstation can eat up half a day.
By creating a Windows 11 Golden Image, you move from manual labor to automated precision. In this guide, we’ll walk through the process of using Audit Mode and Sysprep to build a clean, pre-configured master image that ensures every machine in your fleet is identical, secure, and ready for production on day one.
Prerequisites
Before we dive into the image creation process, ensure you have the following tools and assets ready. Using a virtual environment is critical here, as it allows us to capture a “clean” state without hardware-specific driver interference.
Hypervisor
While VirtualBox is a great open-source tool, VMware is the industry standard for image capturing due to its superior driver handling and snapshot stability. I will be using VMware for this guide, but the logic remains the same if you choose another platform.
Windows 11 ISO
Ensure you download the latest multi-edition ISO directly from Microsoft. Using an outdated ISO will result in a massive Windows Update overhead during the build process, which we want to avoid.
AnyBurn
AnyBurn is a lightweight but powerful utility that allows us to take our captured .WIM file and swap it back into a bootable ISO format. This is the "secret sauce" for creating a deployable disk.
Software & Licensing
Gather your installers beforehand to save time.
Note: If you are deploying in a corporate environment, avoid signing into individual apps (like Office 365) during the image build, as this can cause activation conflicts later.
Preparing The VM
Centralize Your Deployment Assets
Before touching your hypervisor, create a dedicated build directory on your host machine (e.g., C:\GoldenImage_Build). Move your Windows 11 ISO, AnyBurn setup, and all your software installers into this folder. Keeping everything in a single, easily accessible path prevents broken directory links and makes mounting files to your VM much faster later on.
Setup VM
Open VMware (or your preferred hypervisor) and initiate the setup for a new Virtual Machine. Name the VM and save it to your preferred directory.
While you can leave most basic parameters at their defaults, you must configure the following to meet Windows 11’s strict hardware requirements:
Install Windows
After creating the VM, now it is time to install Windows 11. When you turn on the VM it will display a message saying “Press any key to boot from CD or DVD”. Press “Enter” or any other key to proceed to the Windows installation setup.
When prompted to “Select Setup Option”, select “Install Windows 11” and toggle “I agree everything will be deleted including files, apps, and settings” and click “Next”.
Note: When using the “Customized ISO” make sure that you properly activate your Windows Instance(s).
After accepting the agreement, the wizard will prompt you to select the location to install Windows 11. While this is the step where we typically partition our hard disk, as this is a VM, and how we partition it doesn’t affect our customized ISO, we will use the full disk. Select the drive and click “Next”.
- Press Shift + F10 to open a Command Prompt.
- Type taskmgr and press Enter to open the Task Manger
TIP: If you feel like the installation is slow, you can try the following trick.
Accessing Audit Mode
After installation it will take you the OOBE screen where you have to select your region, keyboard region, and create a new user etc. Press Ctrl + Shift + F3 at the OOBE screen.
After login in it will display the “System Preparation Tool” window. We will use it later, close it for now.
VMware Tools
To streamline this process, our VM needs access to files-such as AnyBurn, ISO files, and other software setups-on the host machine. Our next step is to install VMware Tools, which unlocks native file sharing and clipboard support between the guest and the host.
Open the VM menu of VMware and click on “ Install VMware Tools”. This action will automatically mount a virtual installation DVD to your guest operating system.
When you click finish it will ask for your permission to restart the PC. Click “ Yes”.
Partitioning & File Sharing
Adding an Extra HDD
Now it is time to add a separate partition, and a shared folder to continue our process. First Shutdown the VM and click on the VM menu of VMware and select Settings.
Select Hard Disk from the hardware list and click Next. You can proceed through the rest of the wizard using the default values until the setup is complete.
Once you have added the new hard disk, it is time to configure a shared folder between the host and guest machines.
Enable Shared Folders
Switch over to the Options tab at the top of the Virtual Machine Settings window. From the list on the left, select Shared Folders.
On the right side of the window, under the Folder sharing settings, select the Always enabled option. Then, click the Add button at the bottom to continue. This will open a wizard. Click Next.
In the wizard that appears, click the Browse… button and navigate to the folder on your host machine that contains all your necessary files-such as setups, ISOs, and other software. Then click Next.
Click OK to save your Virtual Machine Settings and power on the VM. Now that the VMware-side configuration is out of the way, our next step is to initialize and format the new hard drive inside the guest operating system.
Formatting the Extra HDD
Install Software
Open File Explorer and click on Network in the left sidebar to access your previously shared folder.
Once connected, open your shared folder which is in \vmware-host\Shared Folders\. This directory contains all the setup files and assets required for your golden image. Proceed to install all your necessary software. In this example, I will use a Ninite installer to quickly deploy multiple applications at once.
Bypass the Microsoft Account Requirement (Disable NRO)
Because we are currently in Audit Mode, we can edit the registry now so the bypass is permanently baked into our golden image. Press Windows Key + R to open run window, then type regedit and press Enter to open registry editor.
Navigate to the following location:
HKEY_LOCAL_MACHINE\SOFTWARE\Microsoft\Windows\CurrentVersion\OOBEThen create a new Binary value by Right clicking on the right side of the window, expand New and select DWORD (32-bit) Value and rename it as BypassNRO.
Double-click BypassNRO to open it, set the Value data to 1, and click OK.
Running Sysprep to Generalize the Image
Now that the software is installed and our custom settings are configured, it is time to generalize the virtual machine using Windows’ built-in Sysprep tool. This crucial step removes hardware-specific information and unique identifiers (like the SID), ensuring the image is clean and ready for deployment across multiple machines without conflicts.
Press Windows Key + R on your computer, type sysprep and press Enter.
In the System Preparation Tool window select the Generalize option, and select Shutdown from Shutdown options menu. Then click OK
Then wait until the process is completed and the VM is shutdown.
Capturing The Image
In the next window, select “ Repair my pc” and click Next.
Select your keyboard layout again when prompted, and then select “ Troubleshoot” from the “ Choose an option” window.
From the Advanced options screen, select Command Prompt. This will open a terminal window where we can execute the necessary commands to capture our generalized golden image.
Before starting the capture process, we first need to identify the correct drive letter for our Windows partition and the Data partition. While you might assume that the Windows partition is the C: drive, the Windows recovery environment frequently reassigns drive letters. Use the following commands to open DiskPart and list your attached volumes:
Based on the example output above, the drive letter assigned to our Windows partition is actually D:, while our new Data partition is C:. To confirm this is correct, we will exit DiskPart, switch to the D: drive, and list its directories to ensure it contains our OS files. Run the following commands:
Enter a partition (replace the letter with yours):
List content in the partition:
Now that we have confidently identified both the Windows and Data partitions, we can initiate the capture process. First, switch back to the X: drive (the temporary WinPE environment where the DISM tool is located), and then run the capture command.
Note: Be sure to replace the placeholder tags with your actual drive letters, and remember that this process may take some time depending on the size of your image and the speed of your disk.
Switch back to the X drive :
Run the DISM capture command :
dism /capture-image /imagefile:<Data_Partition>:\install.wim /capturedir:<Windows_Partition>:\ /Name:Win11After the process is completed, exit the command prompt and continue the normal boot process.
Customizing the Windows ISO
When you boot the VM again after the Sysprep generalization process, Windows will take you back to the initial Out-of-Box Experience (OOBE) setup screen. Press Ctrl + Shift + F3 to bypass this screen and switch back into Audit Mode, logging you in as the built-in local Administrator.
Open File Explorer and click on Network in the left sidebar to access your shared folder on the vmware-host. Locate the AnyBurn setup file and run it, proceeding through the installation using the default configurations. The application should start up automatically once finished; if it does not, simply double-click the new AnyBurn icon on your desktop to open it.
Click on Edit image file, navigate to your previously shared folder on the vmware-host, and select your previously downloaded Windows 11 ISO file. Then click Next.
In the AnyBurn interface, open the sources folder within the ISO structure, select the original install.wim file, and click Remove. Click Yes when prompted to confirm the deletion.
Click the Add button, navigate to the Data partition where you saved your custom/captured image, and select the new install.wim file you captured earlier using the DISM command.
n the following window, enter a descriptive name for your new ISO (e.g.,
Custom_Win11_25H2_English_x64.iso) and set the destination path to your shared folder.
Then click Next, and i
Click Create Now and wait for the compilation process to finish.
When the process is completed click Exit to close AnyBurn, and shutdown your VM.
Congratulations, you have successfully created your own customized Windows 11 golden image! You can now verify your work by spinning up a new virtual machine using your newly created ISO. Moving forward, this custom image can be used for rapidly deploying VMs, enterprise mass installations, or creating bootable USB drives loaded with all your pre-installed software and settings. If you found this guide helpful, please leave a comment below and share it with your colleagues!
Originally published at https://mrtechsparrow.blogspot.com on April 20, 2026.
메타데이터
- post_id
- ff9f3386e6c2
- slug
- how-to-create-a-windows-11-golden-image-with-preinstalled-software-ff9f3386e6c2
- url
- https://medium.com/@mrtechsparrow/how-to-create-a-windows-11-golden-image-with-preinstalled-software-ff9f3386e6c2
- canonical_url
- https://medium.com/@mrtechsparrow/how-to-create-a-windows-11-golden-image-with-preinstalled-software-ff9f3386e6c2
- author_url
- https://medium.com/@mrtechsparrow
- status
- ok
- fetched_at
- 2026-07-22 00:55:33