Ten Night Moves for the Most Exciting Light
The camera you have is the one you use to catch the bodacious beauty of dusk, dawn, and night
Night Moves of Exciting Light
The camera you have is the one you use to catch the bodacious beauty of dusk, dawn, and night
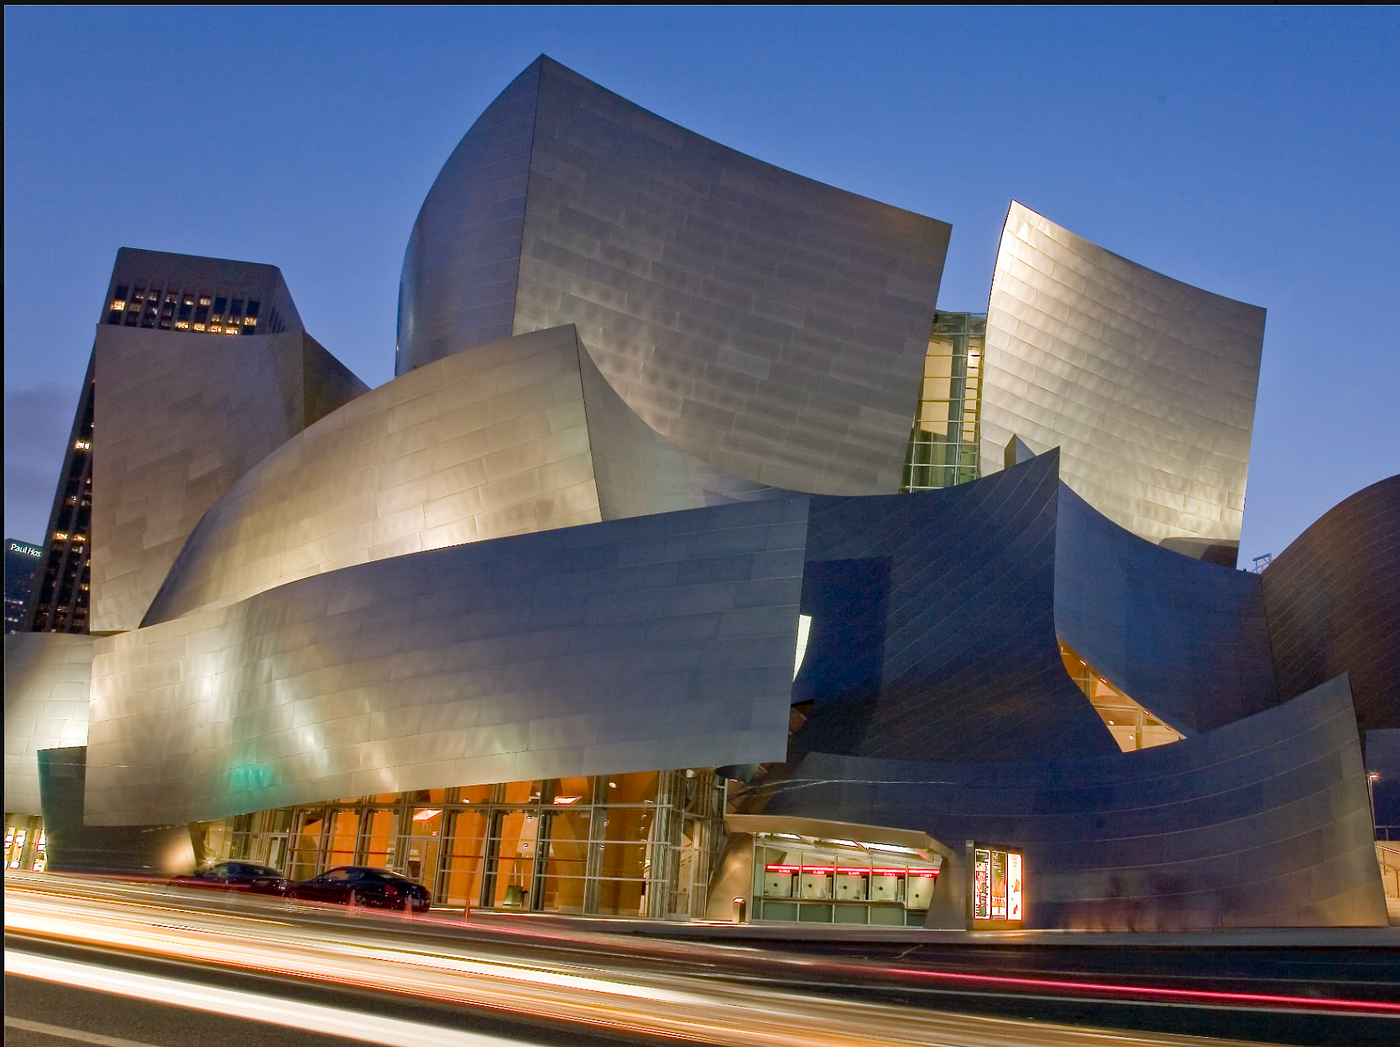
Disney Hall at dusk
All photos copyright 2000–2026 by Matthew Bamberg
After writing about a dozen books about the ins and outs of all kinds of photography genres, I take you on a trip into the night.
This article is dark because that's the way night is (a pun intended). Have you thought of nighttime photography lately? Nighttime’s many moods reveal light’s unfathomable surprises, spraying, streaming, and still. While darkness prevails, light is around you to do with as you wish. Let your eyes seek the moods you desire.
Picture the light of a lantern under an arch, stone tombstones lit by the moon, or the streaming red lights of a police car slicing the night sky. Images of the night have mystified and intrigued artists throughout time, especially with the advent of photography. After all, you have to have light to create a photograph, and nighttime is, well, dark.
However, with the tricks and techniques I show you in this chapter, you can tame the night and capture the denizens of the between dusk and dawn at least in a photo. Not only can you capture what the night truly holds, but you can also use low-light situations to your creative advantage to craft shots that are fantasy-like, just like the magic of the night itself.
Understandably, shooting at night has inherent problems, namely, the lack of available light. Without adequate light, color tones shift, becoming overly muted and neutral. To compensate for low light, you can tweak the following settings individually or in combination, but each can introduce more problems.
Use a wider aperture. This reduces your depth of field.
Use a slower shutter speed. Subjects are more easily blurred and less clear.
Use flash. This can create uneven illumination and washed-out areas in your shot.
Use a higher ISO/ASA. This results in more noise/grain.
The art photographer that you are, however, will not be thwarted by such limitations. Right? Take all these tethers and turn them into creative advantages. The night is full of too many wonderful events and views to miss simply because there’s not much light.

A film photo taken in Venice, Italy at a slow shutter speed looks painterly.
Aesthetics, those who appreciate fine art, are attracted to pieces that take them to a different place and time. Night photos can change a viewer’s mood, perhaps even transport the viewer to an anywhere-but-here mentality. Okay, so it’s not nighttime in Paris everywhere in the world, but when people look at a picture of nighttime in Paris, their thoughts can drift off to being somewhere else, perhaps sipping coffee in a café in Paris at night. If Paris isn’t someone’s idea of an amiable place to be, try Rome, New York City, or a late-night stroll in a plaza in Venice, as shown above. The softness and deep color of night in a 35 mm film photo create a painterly effect, soft and velvety. To be sure, it might be too soft for some potential buyers; however, others might snap it up because of its peacefulness.

Fireworks reveal amazing colors and patterns.
Using a long exposure time to capture motion works well at night. A long exposure (longer shutter speed) captures “marching ants” from neon lights, or a kid with a sparkler or fireworks, drawing crazy scribbles of color in the night, as shown during one dramatic moment of many in a fireworks display. Here, a tripod is required to create the sharp drawing in the sky.
When your camera must remain steady during a long exposure time, a tripod or other support is necessary. And tripods don’t have to be giant, cumbersome beasts, either. Look for small, inexpensive collapsible ones that are very portable.

Gaudí Surrealist Architecture in Barcelona, Spain
Small tripods are great for placing your camera at ground level so you can shoot upward, which is a great angle for shots of a building that towers into the sky in a dreamy perspective, as in the image of the famous architect Gaudí above.

Moon over LA, long shutter speed (30 seconds) on a tripod.
Using long exposures to capture the moon is an effective way to view its cratered surface. Look around for natural night lighting, street lights, the moon and stars, or a lamp’s soft glow. A shot of a full moon above, taken with the camera positioned on a tripod, can show the celestial body lit up across the night sky, as shown in Moon over LA above.

Full moon at night
- Take a shot at the moon without a tripod using a wide aperture and fast shutter speed, as in the image above.
When you find the perfect ambient night lighting, your camera’s flash ruins the effect. Don’t use flash unless absolutely necessary if your focus point is more than a few feet away when it’s totally dark or almost dark.
You might have to override your camera’s default setting (to use its flash), say, on an iPhone when it’s dark. There is an exception: close-ups with flash, say, like a flower or an architectural element, work out when you use flash on an iPhone
Once upon a time, taking pictures at night meant you absolutely had to use a flash; if you didn’t, you definitely needed a tripod. Back then (oh, sometime in the last millennium), the standard film speed was 100 ISO.
I’m a 35mm film lover. Scanning is still easy for me because of my 22-year-old Epson 4400 Perfection scanner, which is still perfect for high-quality scans. I mean, like, it has Digital ICE technology, whatever that is. Okay, just so you don’t get the wrong impression from the word’s connotations nowadays, the term refers to a double-scanning process: first in RGB, then in IR (Infrared Light).
Now, I tried using a film scanner with the iPhone, but the accessories require a light table for negatives (for film negatives and positives, you need a light in front of the frame and one behind). Today, scanners with dual light sources (one inside the lid, the other within the bed) are very expensive. On top of that, my old scanner works perfectly with the current version of Image Capture on my MacBook Pro.
While places to buy film and develop it are not as plentiful as they once were at local pharmacies, there are many options online. To photograph at night with a film camera and then scan the negatives, positives, or prints later, you need to use film rated at ISO 400 or higher.
Whether you use film or digital, the higher the ISO/speed, the noisier (digital)/grainier (film/scan) an image will be. Using ISO 800 film, or a similar ISO, on a digital camera is the absolute lowest you can go for hand-held night shots. I find that ISO 1600 is the optimal setting for hand-held shooting on DSLR and mirrorless cameras. Having a steady hand can eliminate blurry photos at that ISO speed.

Cocktails anyone?
If you’ve read my articles before, you know I’m obsessed with mid-century signs. Neon is a heartbeat for my photo collection. There are over a million beats. shows a neon sign on the left, taken at 200 ISO. The majority of the sign is slightly blurred, an error that would put off many potential buyers. In comparison, the neon sign on the right was shot at a higher ISO, resulting in a clearer, more focused image.
Blur in nighttime photos has to serve a specific purpose, such as showing motion. If not, blur looks like (is) a technical error. When shooting neon signs as historical photos (and these images are marketable, by the way), you should have no blur, as it would serve no purpose. Blur serves a purpose only when it indicates movement or time, or when it lends photos a mysterious quality, as shown by the red light stripes on the moving vehicles above. And…yes, a tripod is needed for this.
If flashless night photos are your goal, you can achieve them without blur. The first step to taking a good night photo without a flash (and maybe without a tripod) is to scout for areas with enough light. After you find a good location with abundant streetlights and well-lit buildings, you’re ready to practice.

Budapest, Hungary bridge in HDR
For example, shooting architecture and cityscapes at night gives you some pretty remarkable shots using only the light that’s available. Because buildings, gates, and bridges are usually well lit (and dramatically lit, too), they offer some great opportunities to shoot without a flash, as you can see in the High Dynamic Range (HDR) picture of the bridge in Budapest. It didn’t hurt, either, that I processed the image using three shots at different exposures, then combined them in an HDR processing program.

Handheld shot at ISO 1600.
Now, when you see a valuable photo op that’s lit up at night, slide that iPhone or Samsung camera out of your pocket and shoot away.
Or if you have a prosumer or professional camera, set your ISO to 1600. Either way, you’ll have people engaged in text like no other photographer.
Here’s the set-up for quasi-professionals:
- Look for an object that has sufficient light around it.
- Set your digital camera to ISO 1600 or higher. The higher you set it, the more noise you will see in your photo. ISO 1600, I find, is the perfect setting, where, while there is some noise, it can be easily removed in Photoshop Raw 2026.
- Set your aperture to the widest possible setting. For example, with/4 24 to 105 mm camera lens, you would set your aperture to 4.
- Aim your camera at the brightest spot in the frame. The focus on “Sweet Jesus” is compelling because it is hand-scripted.
- Press the shutter release halfway to check for adequate focus, then press it all the way down.

Mamie Van Doren at an art opening in 2004.
The story of flash photography dates back over a century. Nighttime photography is important because it is when art galleries go all out to host exhibitions that are frequented by movie stars, young and old. I happened to be at a gallery opening for an eclectic group of artists in Palm Springs, CA. It was one of the few times I had an external flash unit mounted onto my camera. Perusing around the show in the early 2000s was Mamie Van Doren. At the time, she was in her 70s, a sex bomb, blond bombshell, pin-up girl, and “B” Movie Star, well known for her chest endowment.
Cumbersome flash units aren’t my style, but sometimes they’re necessary. For a flash image to be compelling, you need a variety of accessories such as diffusers and reflective screens. I prefer just shooting using available light. That doesn’t mean I’m going to ignore using a flash at night on a professional shoot. I won’t do that sort of thing anymore.

A donkey standing in plentiful light results in a sharp shot on the iPhone.
For example, I was staying in Big Bear, California. I only had my iPhone. When we drove into the driveway of the place we were staying after dinner, we saw large black figures. As we got out of the car, the figures walked in front of the light that sprayed on the rocky driveway. There were two donkeys, wild ones. I stood there, and one of them stepped right up to me. Darn, I wanted to pet it, but dared not (I mean, donkeys kick really hard). Since the light from the house shone right into the donkey’s face, I knew I’d get a sharp shot. Lots of light lit up that animal really well, as you can see in the image above. The moral of this story is don’t pet animals if they approach you, and, instead, if there’s ample light, take a picture of them with the camera you have.
The image above is of Van Duran in her 70s, shot in the early 2000s. She was a big “B” movie star, an oxymoron indeed. Without the diffusers, I shot a photo possessed by the demons of harsh lighting — serious dark shadows surrounding the subject, an overexposed white outfit, and softness because the subject was moving when I shot. This doesn’t make me a bad photographer. It makes me an unprepared one.
Neon for some, maybe you, even, are celebrities, flashy, bright, and photogenic. If you dig neon as I do, here’s the skinny on crafting some great night shots.

Neon Art Spanish Dancers
Photograph any neon sign or neon of any sort, like the Spanish dancers above, by setting your camera to Aperture priority mode, with an f-stop of 8 and an ISO speed of 400. The general auto setting will set your f-stop in this range, too, but you need to turn off the autoflash. These are good settings, but look around; if there’s other light from surrounding sources, you’ll have to adjust a bit lower, say to 5.6. Or you can up your ISO setting to 800 or higher.
Here are the basic exposure controls on your camera that can help you successfully shoot at night:

Philly Skyline with freeway at night shot in Shutter Priority mode
* Shutter priority (Tv on most cameras): This is an exposure mode that lets you control the time it takes to open and close the shutter of your camera while your camera automatically sets how wide the aperture opens to let just enough light in to give you a good picture. You can experiment with many different shutter speeds to achieve different effects. If you want to turn car lights into ribbons of color, like the streaks of light from moving traffic at night, you would set the shutter priority to a longer exposure time. Above is a photo of the Philly skyline, with a nearby freeway, ribbons of red and white showing the rapid movement of traffic.
Don’t be confused by what your camera’s indicators show for shutter speeds. 1/250 is displayed as 250 on most cameras. Whereas 1/60, a longer exposure, is displayed as 60, appearing to be a lower number, represented corresponding fractions of a second. The 3-second exposure above would read 3", and 1/3 second would be shown as 3

Palm trees lit in color at night in Palm Desert, CA
Lighting your subject from beneath can make any boring palm tree look less boring in the dark. At Christmas, Palm Desert hosts tall palm trees with colorful lights at their bases, illuminating the fronds deep within. Anything lit from beneath shows drama.

Silk-like fountain water flowing. up then down
Finally, there’s the gorgeousness of a shutter letting light into your camera’s lens for 30 seconds. Using long shutter speeds, as you see in the lit fountain above, is utter goodness, one of a million breaks you can escape from our turbulent world. Water-as-silk is an effect that can be achieved in two ways. The first is with a DSLR or mirrorless camera on a tripod. The second, while not as effective, is using Live mode on the iPhone camera. After the shot, toggle to …long exposure at the top of the displayed image.
The world around you at night leaves you with a world of flashing, sublime, white, colorful, and contrasting light, wonderful rays of hope, all of which can be caught on any camera.
메타데이터
- post_id
- 0c6b9842e57f
- slug
- ten-night-moves-for-the-most-exciting-light-0c6b9842e57f
- url
- https://medium.com/full-frame/ten-night-moves-for-the-most-exciting-light-0c6b9842e57f
- canonical_url
- https://medium.com/full-frame/ten-night-moves-for-the-most-exciting-light-0c6b9842e57f
- author_url
- https://medium.com/@matthew.bamberg
- status
- ok
- fetched_at
- 2026-07-17 19:24:55