How to Download & Install MongoDB on Mac
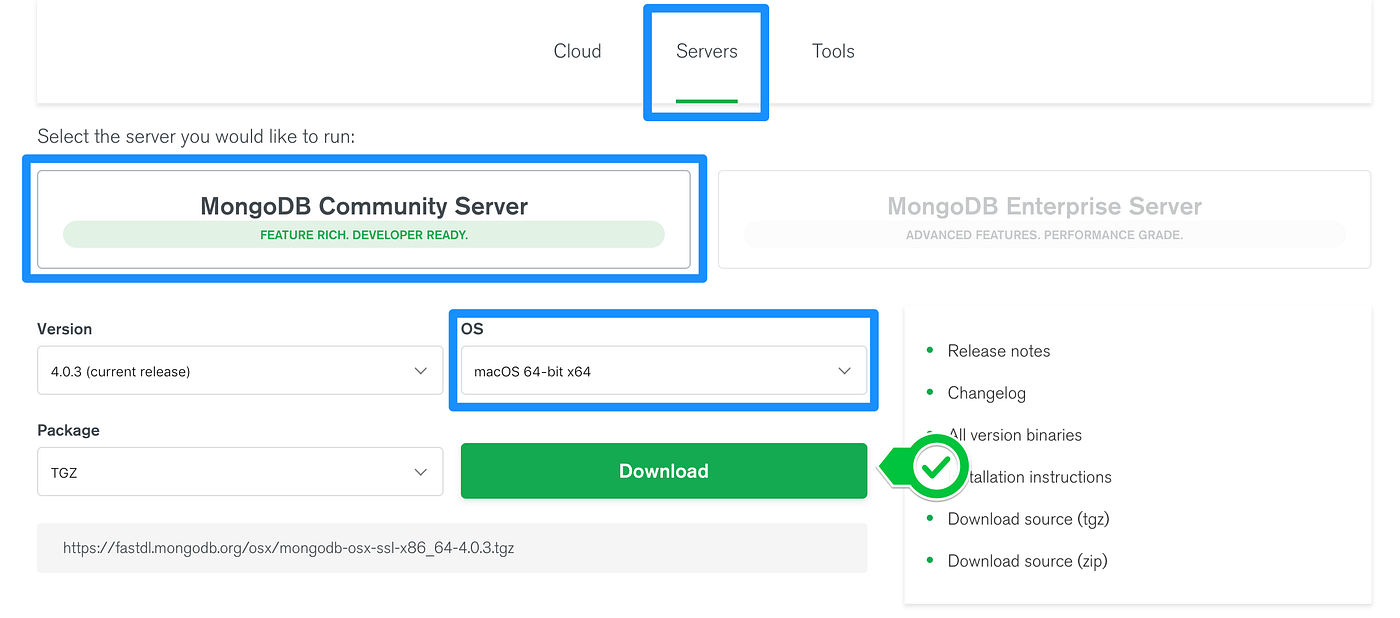
Step 1 — Download the MongoDB TGZ Package
How to Download & Install MongoDB on Mac

Step 1 — Download the MongoDB TGZ Package
Head over here and download the current version of MongoDB.
Step 2 — Extract the Tarball
In your downloads folder, double click on the .tgz file to extract it. The result should be a folder called mongodb-osx…

Step 3 — Move the Binaries to the Local User
Follow the steps below to move the extracted folder to usr/local/mongodb
Make sure you don’t hit enter until instructed to.
A. Open up a Terminal and type sudo mv after the prompt (username$).

B. Click and drag the extracted mongodb folder into the Terminal.

This will add the file path of the mongodb folder into the Terminal like so:

C. Next hit space and type /usr/local/mongodb
The initial slash is super important, so make sure you type everything exactly, even the case should match.

D. Now hit enter to execute the move.
E. You might be prompted for the password. This will be the password you use to log on to the Mac. When you type, nothing will change on screen. Just make sure you typed the right password then hit enter.

If it was successful, you should see your prompt (username$) on the next line:

F. After the prompt type open /usr/local/mongodb
Again, the first slash is super important!

This will open the location where we moved our mongo binaries to.
G. Confirm that the move was successful.

Step 4 — Adding the MongoDB Binaries to Environment Variables
A. Change directory to your home folder with cd ~ and hit enter.

B. Check that you are inside User/username with the command pwd and hit enter (print working directory).

C. Create a bash profile with touch .bash_profile

D. Edit the new bash_profile with Vim. Using vim .bash_profile

Once you hit enter, you should be inside the Vim editor.

E. Hit the I key on the keyboard to enter Insert mode.

F. Now paste in the following:
export PATH=$PATH:/usr/local/mongodb/binG. Hit the Escape key to exit Insert mode in vim. Then type :wq! and hit enter to exit and save.

Step 5— Creating the Local Data Storage Location for MongoDB
A. Create a folder called data and inside create another called db at the root of your computer with the following command:
sudo mkdir -p /data/db
You might be asked for the Mac password again, because we’re using sudo (super user do).
B. Check your current username with whoami and hit enter to see your username.

So mine is angelayu.
C. Set the current user to own the newly created data folder with the following command, replacing <your-username> with the one you got in Step B above.
sudo chown <your-username> /data/dbOnce you’ve hit enter and you see your prompt again, then you should be good to go.
Step 6 — Test It
A. Quit the Terminal and reopen it.
B. Type the following command after your prompt:
mongo --versionC. If you get something like this then congratulations, you’ve successfully installed mongoDB!

메타데이터
- post_id
- 2895ccd2b5c1
- slug
- how-to-download-install-mongodb-on-mac-2895ccd2b5c1
- url
- https://blog.londonappbrewery.com/how-to-download-install-mongodb-on-mac-2895ccd2b5c1
- canonical_url
- https://blog.londonappbrewery.com/how-to-download-install-mongodb-on-mac-2895ccd2b5c1
- author_url
- https://medium.com/@angelayu_30766
- status
- ok
- fetched_at
- 2026-06-09 15:37:30