Interactive SAM2 Segmentation: Points, Boxes, and Masks
SAM2 Tutorial is quickly becoming one of the most practical ways for Python developers to get high-quality segmentation without training a…
Interactive SAM2 Segmentation: Points, Boxes, and Masks
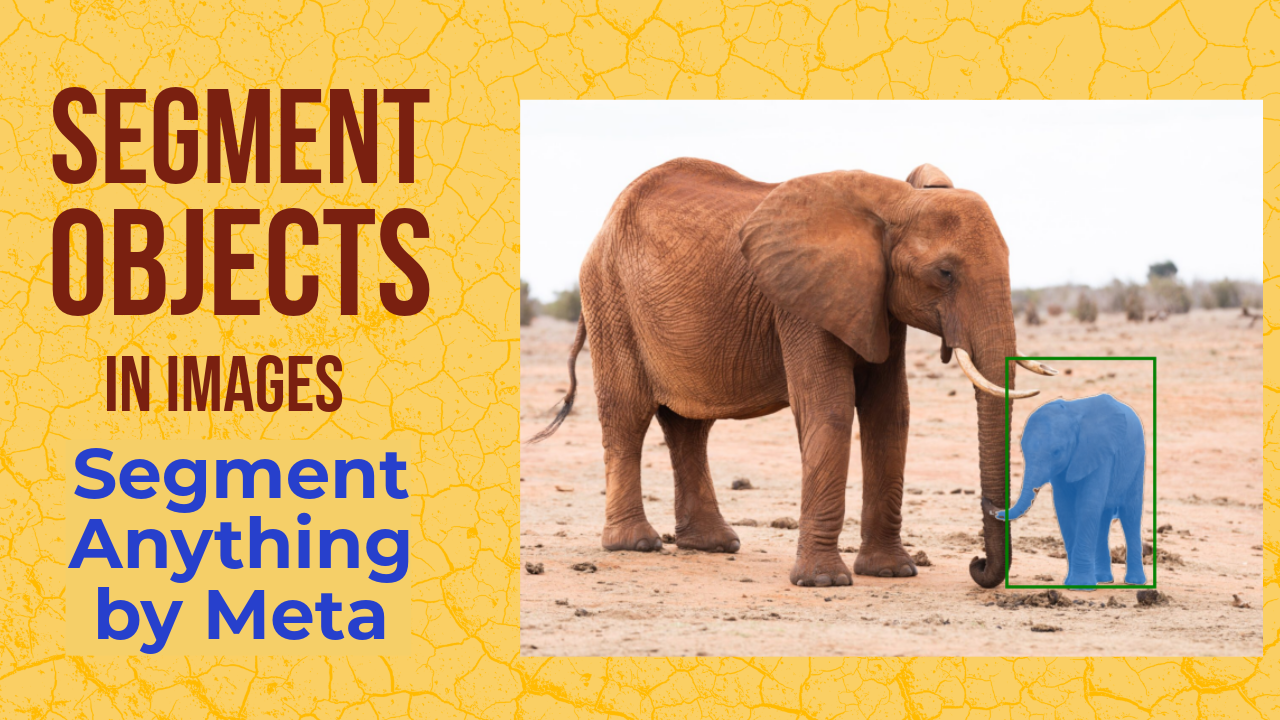
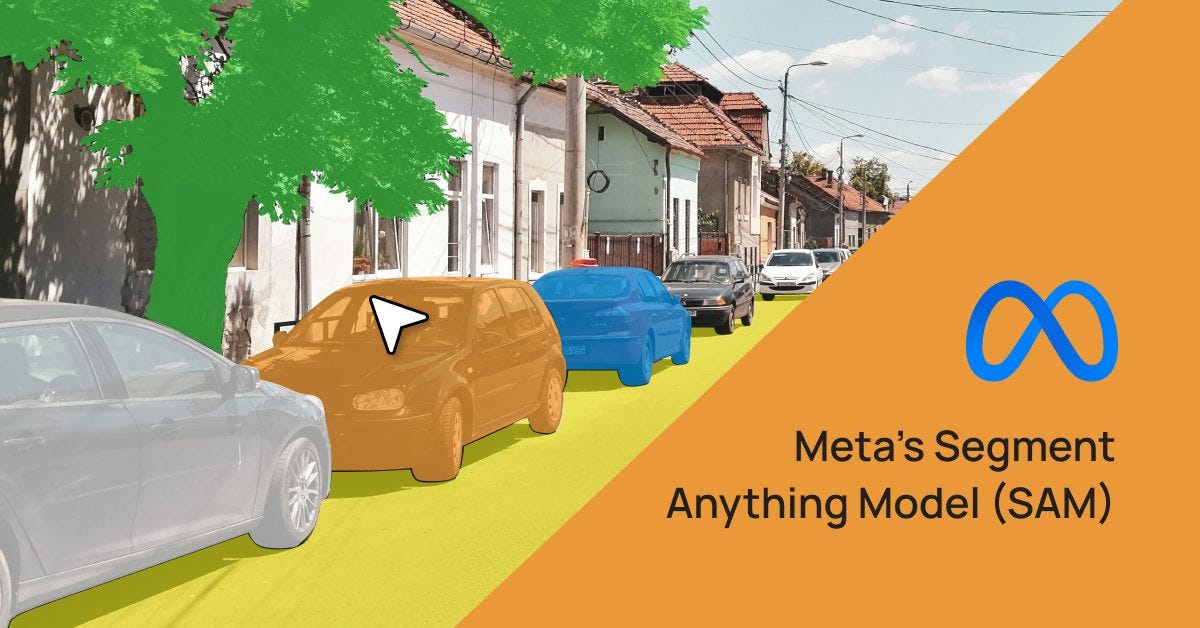
SAM2 Tutorial is quickly becoming one of the most practical ways for Python developers to get high-quality segmentation without training a model from scratch. Instead of building a dataset, tuning a network, and waiting for epochs to finish, you can load a pretrained SAM2 checkpoint and start extracting pixel-accurate masks right away. This is especially useful when you want to isolate objects for editing, measurement, labeling, or downstream computer vision tasks like tracking and instance analysis.
What makes SAM2 feel different is how interactive it is. You don’t have to “tell” the model what the object class is. You guide it with prompts like a single click point, a bounding box, or a combination of both, and it responds with a clean mask that often captures edges and shapes surprisingly well. That interactive loop makes segmentation feel more like a tool you control than a black box you hope will behave.
In a practical Python workflow, SAM2 fits naturally with the tools most developers already use. You can load images with OpenCV, visualize them with Matplotlib, and then overlay masks for quick inspection. Once you have masks, you can convert them into bounding boxes, polygons, or binary maps and feed them into anything from annotation pipelines to feature extraction scripts.
This SAM2 Tutorial approach is also a great way to understand segmentation fundamentals. You learn what the model needs to “lock onto” an object, why some prompts give ambiguous results, and how adding a second point or tightening a box can improve the mask. Over time, you develop intuition for guiding a segmentation model efficiently, which is valuable even when you switch to other segmentation frameworks later.

Let’s talk about what “SAM2 Tutorial” really means in practice
When people say “SAM2 Tutorial,” they usually mean a hands-on workflow where you go from an image to a usable mask with minimal friction. The goal isn’t to build a research project. It’s to get a reliable segmentation output you can use immediately, whether that’s for object cut-outs, measurement, dataset labeling, or fast prototyping of vision ideas.
A typical SAM2 workflow starts by choosing the right mode for the task. If you want to discover everything the model can segment in a scene, you use automatic mask generation, which produces many candidate masks across the image. If you already know what you want, you switch to interactive prediction and guide the model with prompts so it focuses on a specific object instead of the whole scene.
Prompts are the key idea that makes SAM2 so powerful for everyday work. A positive point tells the model “this pixel belongs to the object I care about.” A bounding box tells it “the object is somewhere inside this region.” When you combine points and boxes, you’re giving both a location constraint and a semantic hint, which often produces a cleaner mask with fewer mistakes.
Once the model returns masks, the next step is making the results easy to understand and verify. Overlaying masks on the original image helps you see if the boundaries match what you intended. Showing multiple candidate masks with scores can explain why the model is uncertain, and it gives you a chance to pick the best output or refine the prompts. From there, you can export masks into the exact format you need, like boolean arrays for computation, bounding boxes for detection pipelines, or polygon contours for annotation tools.

What we’re building in this SAM2 Tutorial with points, boxes, and masks
This tutorial’s code is designed to take you from a plain image on disk to clean, usable segmentation masks in a very practical way. Instead of treating segmentation like a “train a model first” task, the code shows how to run SAM2 immediately with pretrained checkpoints and get results you can actually use in a project. By the end, you’ll have a complete workflow for generating masks automatically, then refining and targeting a specific object with interactive prompts.
The first part focuses on automatic mask generation, where the goal is to discover all the reasonable object masks SAM2 can find in a single image. This is useful when you don’t yet know what objects you’ll need, or when you want a quick “mask inventory” for labeling and exploration. The code loads the image, builds the SAM2 model, runs an automatic mask generator, and then overlays the masks so you can visually inspect how the model decomposes the scene.
Next, the tutorial adds a simple mouse-click tool using OpenCV to capture exact (x, y) coordinates from the image. That step matters because interactive segmentation is only as good as the prompts you provide. By clicking on the object you care about, you create a direct and intuitive way to guide the model, which is the core idea behind promptable segmentation.
After that, the code switches to object-specific segmentation using SAM2ImagePredictor.
Here the target changes from “segment everything” to “segment this one object I’m pointing at,” and you see how a single positive point can produce multiple candidate masks with confidence scores.
You also learn how to refine results by adding more points, selecting the best mask via score/logits, and stabilizing the output so the mask matches your intent more closely.
Finally, the tutorial covers bounding box prompting, which is often the fastest way to localize the object when it’s clear where it sits in the image. You’ll generate a mask from a box prompt alone, then combine boxes with point prompts for even tighter control. This section is especially helpful when you want repeatable segmentation results, because the box constrains the model’s attention and reduces ambiguity in cluttered scenes.
[embed]
Link to the video tutorial here .
Download the code for the tutorial here : or here
Best AI Photo Tools (Backgrounds, Objects, Headshots)
✅ Phot-AI packs more than 30 AI‑powered tools into one place — covering background and object removal/replacement, image extension and a suite of creative generators for art, icons and logos.
follow the link and start creating : https://phot.ai?ref=eran33
✅ Pixelcut uses AI to help you create professional photos and videos. You can instantly remove backgrounds, retouch, expand and upscale images, or generate new images and even videos from a simple text prompt or reference picture. tap the link and start creating today! : https://pixelcut.ai/?via=eran
✅ PhotoGPT AI acts as your personal photographer — just describe what you need and the platform generates high‑quality headshots or casual images within minutes.
Its built‑in photo editor lets you remove objects, replace backgrounds and make studio‑quality corrections with a single click.
You can even train your own AI model using a few selfies, receive context‑aware prompt suggestions and upscale images for print‑ready results.
Dive into this all‑in‑one AI photo studio : https://www.photogptai.com/?ref=eran
My Blog
You can follow my blog **here **.
Here is a link to the full post and code : https://eranfeit.net/interactive-sam2-segmentation-points-boxes-and-masks/
Want to get started with Computer Vision or take your skills to the next level ?
Great Interactive Course : “Deep Learning for Images with PyTorch” here
If you’re just beginning, I recommend this step-by-step course designed to introduce you to the foundations of Computer Vision — Complete Computer Vision Bootcamp With PyTorch & TensorFlow
If you’re already experienced and looking for more advanced techniques, check out this deep-dive course — Modern Computer Vision GPT, PyTorch, Keras, OpenCV4

Interactive SAM2 segmentation is one of the fastest ways to get clean, pixel-accurate masks in Python. In this SAM2 Tutorial, you will go from “just an image on disk” to real masks you can visualize, refine, and reuse in your own projects. You will see two styles of segmentation in action. First you will generate automatic masks for the whole image, and then you will target a single object using points and bounding boxes.
This workflow is perfect for labeling, quick prototyping, and building interactive tools. Instead of training a model, you guide a pretrained SAM2 checkpoint with simple prompts. A click tells SAM2 what belongs to the object, and a box tells it where to focus. Then you get a mask that you can overlay, export, and plug into other computer vision steps.
Set up SAM2 in a clean Python environment
The goal of this section is to get a stable environment that can run SAM2 smoothly. You will create a fresh Conda environment, install a CUDA-enabled PyTorch build, and add the libraries used by the code.
Then you will clone the official SAM2 repository, install it in editable mode, and download the checkpoints. Once this is done, VSCode will run everything from the same project folder, so paths stay predictable.
### Create a new Conda environment for SAM2 with Python 3.12.
conda create -n sam2 python=3.12
### Activate the environment so all installs go into it.
conda activate sam2

### Check your CUDA version so you can choose a matching PyTorch build.
nvcc --version

### Install PyTorch and CUDA packages (adjust if needed for your system).
conda install pytorch==2.5.1 torchvision==0.20.1 torchaudio==2.5.1 pytorch-cuda=12.4 -c pytorch -c nvidia

### Install Matplotlib for visualizations.
pip install matplotlib==3.10.0
### Install OpenCV for reading images and mouse interaction.
pip install opencv-python==4.10.0.84
### Install Supervision for clean overlays and annotation-style rendering.
pip install supervision==0.25.1

### Choose a working folder.
c:
### Move into your working folder.
cd tutorials

### Clone the official SAM2 repository.
git clone https://github.com/facebookresearch/sam2.git

### Enter the repo folder.
cd sam2

### Install SAM2 in editable mode so imports work from this folder.
pip install -e .

### Download the model checkpoints into the checkpoints folder.
wget -O checkpoints/sam2.1_hiera_tiny.pt https://dl.fbaipublicfiles.com/segment_anything_2/092824/sam2.1_hiera_tiny.pt
wget -O checkpoints/sam2.1_hiera_small.pt https://dl.fbaipublicfiles.com/segment_anything_2/092824/sam2.1_hiera_small.pt
wget -O checkpoints/sam2.1_hiera_base_plus.pt https://dl.fbaipublicfiles.com/segment_anything_2/092824/sam2.1_hiera_base_plus.pt
wget -O checkpoints/sam2.1_hiera_large.pt https://dl.fbaipublicfiles.com/segment_anything_2/092824/sam2.1_hiera_large.pt

### Open VSCode and set the repo folder as your working folder.
### Choose SAM2 as your interpreter in VSCode.
### Copy the "Code" folder from the video resources into the repo, or create a "Code" folder yourself.
Short summary. You now have a working SAM2 environment with the repo installed and checkpoints downloaded. The next sections focus on running the actual segmentation workflows.
Generate automatic masks from a single image
The goal of this section is to let SAM2 discover as many reasonable masks as it can in a scene. This is useful when you want a quick “mask inventory” for an image, or when you want to explore what the model can separate.
The code loads an image, builds the SAM2 model, and runs the automatic mask generator. Then it overlays the masks so you can visually inspect coverage, edges, and how the scene is decomposed.
### Import NumPy for array operations and reproducible randomness.
import numpy as np
### Import PyTorch to select CPU or GPU.
import torch
### Import Matplotlib for visualization.
import matplotlib.pyplot as plt
### Import OpenCV for image loading and color conversion.
import cv2

### Set a fixed seed so the mask overlay colors are reproducible.
np.random.seed(3)

### Select the device for computation.
device = torch.device("cuda" if torch.cuda.is_available() else "cpu")
### Print the chosen device so you know if you are on GPU or CPU.
print(f"Using device: {device}")

### Define a helper function to visualize SAM2 automatic masks.
def show_anns(anns, borders=True):
    ### If there are no masks, exit early.
    if len(anns) == 0:
        return
    ### Sort masks by area so larger masks draw first.
    sorted_anns = sorted(anns, key=(lambda x: x['area']), reverse=True)
    ### Grab the current Matplotlib axes.
    ax = plt.gca()
    ### Disable autoscale so overlays stay aligned.
    ax.set_autoscale_on(False)

    ### Create an RGBA overlay canvas the size of the first mask.
    img = np.ones((sorted_anns[0]['segmentation'].shape[0], sorted_anns[0]['segmentation'].shape[1], 4))
    ### Start with fully transparent alpha.
    img[:, :, 3] = 0
    ### Draw each mask with a random semi-transparent color.
    for ann in sorted_anns:
        ### Extract the binary segmentation mask.
        m = ann['segmentation']
        ### Build a random RGB color plus a fixed alpha.
        color_mask = np.concatenate([np.random.random(3), [0.5]])
        ### Paint the mask region with the chosen color.
        img[m] = color_mask
        ### Optionally draw borders so mask edges are easy to see.
        if borders:
            ### Import cv2 locally to match the original reference style.
            import cv2
            ### Find external contours for the mask.
            contours, _ = cv2.findContours(m.astype(np.uint8), cv2.RETR_EXTERNAL, cv2.CHAIN_APPROX_NONE)
            ### Smooth contours so borders look cleaner.
            contours = [cv2.approxPolyDP(contour, epsilon=0.01, closed=True) for contour in contours]
            ### Draw the contour lines on the RGBA overlay.
            cv2.drawContours(img, contours, -1, (0, 0, 1, 0.4), thickness=1)

    ### Render the overlay on top of the image.
    ax.imshow(img)

### Load the image from disk.
image = cv2.imread("code/Elephant2.jpg")
### Convert BGR to RGB so Matplotlib shows correct colors.
image = cv2.cvtColor(image, cv2.COLOR_BGR2RGB) # Convert to RGB

### Create a figure for preview.
plt.figure(figsize=(10, 10))
### Display the image.
plt.imshow(image)
### Hide axes for a cleaner view.
plt.axis('off')
### Keep the show call commented so you can run later if needed.
#plt.show()

### Import the SAM2 builder.
from sam2.build_sam import build_sam2
### Import the automatic mask generator wrapper.
from sam2.automatic_mask_generator import SAM2AutomaticMaskGenerator

### Choose which checkpoint to use.
sam2_checkpoint = "checkpoints/sam2.1_hiera_large.pt" # download it in the install part
### Choose the matching model config inside the SAM2 repo.
model_cfg = "configs/sam2.1/sam2.1_hiera_l.yaml" # part of the SAM2 repo

### Build the SAM2 model.
sam2 = build_sam2(model_cfg, sam2_checkpoint, device=device, apply_postprocessing=False)

### Create the automatic mask generator.
mask_generator = SAM2AutomaticMaskGenerator(sam2)

### Generate masks by running the generator on the image.
masks = mask_generator.generate(image)

### Print how many masks were generated.
print(f"Generated {len(masks)} masks")
### Print the area of the first mask for quick sanity checking.
print(f"First mask area: {masks[0]['area']}")
### Print the keys available in each mask dictionary.
print(masks[0].keys() )

### Create a large figure for mask overlay visualization.
plt.figure(figsize=(20, 20))
### Draw the base image first.
plt.imshow(image) # show the image first
### Overlay all generated masks.
show_anns(masks) # image with masks
### Hide axes.
plt.axis('off')
### Show the final result.
plt.show()
Short summary. You generated a full set of candidate masks for the image. Next you will switch from “segment everything” to “segment the exact object I care about.”
Pick exact point coordinates with a simple mouse click
The goal of this section is to collect precise (x, y) coordinates directly from the image. Interactive segmentation depends on prompts, and a point prompt is the simplest way to tell SAM2 what belongs to your target object.
The code opens an OpenCV window and lets you click on the image. Each click prints the coordinates and draws a small marker so you can confirm you clicked the right place.
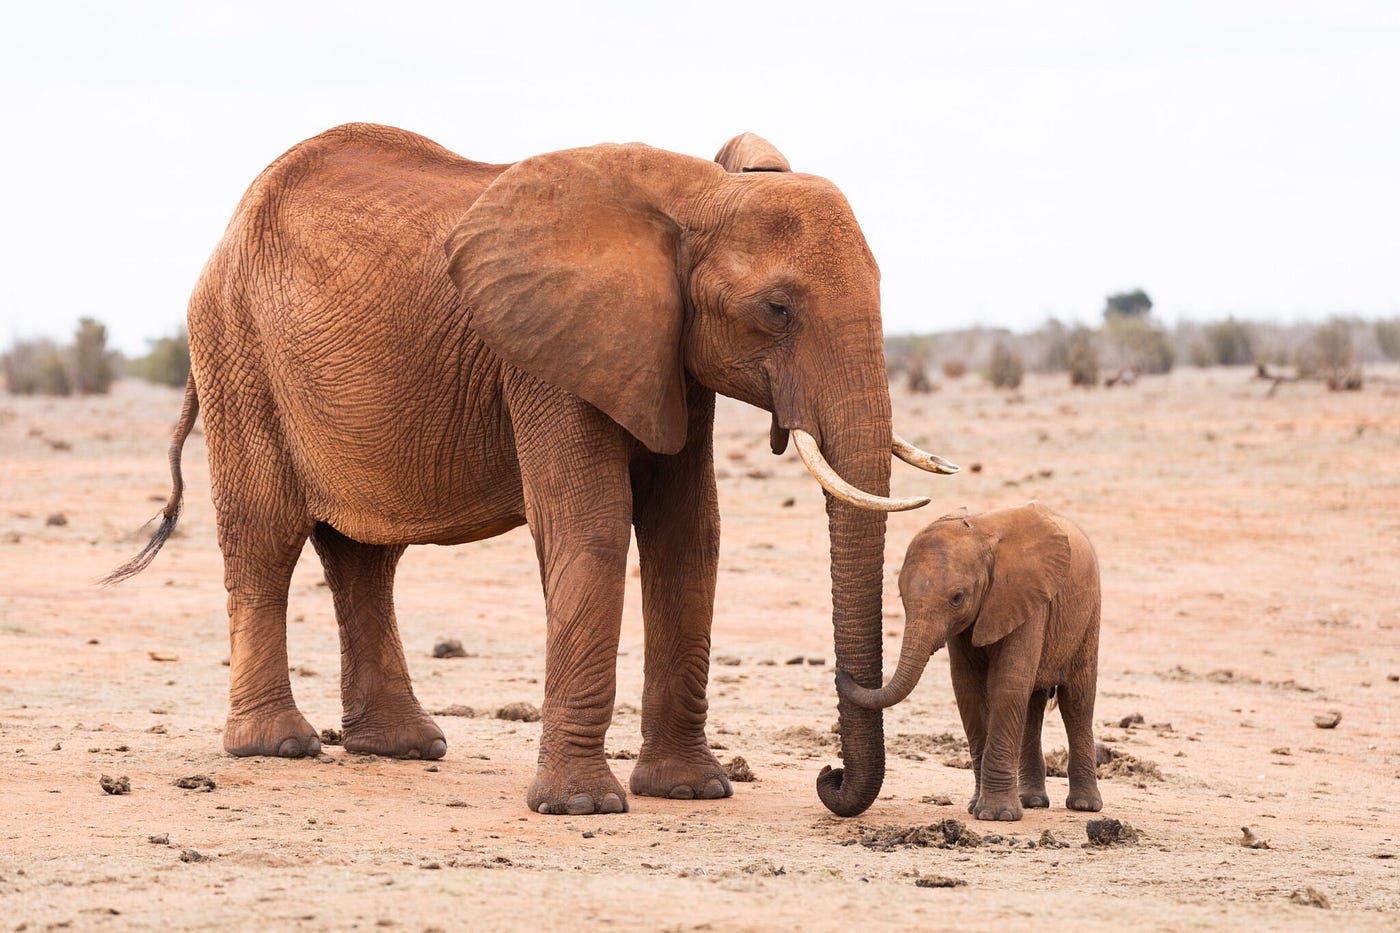
Test Image :
### Import OpenCV for window display and mouse callbacks.
import cv2

### Load the image from disk.
image = cv2.imread("code/Elephant2.jpg")

### Create a copy so the original stays unchanged.
image_copy = image.copy()

### Define a mouse callback that captures clicks and draws a marker.
def draw_circle(event, x, y, flags, param):
    ### React only to left mouse button clicks.
    if event == cv2.EVENT_LBUTTONDOWN:
        ### Draw a visible circle where the user clicked.
        cv2.circle(image_copy, (x, y), 5, (0, 255, 0), -1)
        ### Print the coordinates to the console.
        print(f"Point selected: ({x}, {y})")
        ### Refresh the window with the updated image.
        cv2.imshow("Image", image_copy)

### Create the window.
cv2.namedWindow("Image")
### Attach the callback so OpenCV reports click events.
cv2.setMouseCallback("Image", draw_circle)
### Show the image initially.
cv2.imshow("Image", image_copy)
### Wait until any key is pressed.
cv2.waitKey(0)
### Close all OpenCV windows cleanly.
cv2.destroyAllWindows()
Short summary. You now have a reliable way to get point coordinates for any object in the image. Next you will feed these points into SAM2 to generate a mask for a specific object.
Segment a specific object using point prompts
Load SAM2ImagePredictor and segment with a single click
In this part, you will load the SAM2 model checkpoint and create a predictor that can generate masks from simple prompts.
The key idea is to embed the image once using set_image, and then run predict multiple times with different prompts.
You will start with a single positive point to target one object. SAM2 will return multiple candidate masks and confidence scores so you can inspect the options and pick the best output.
### Import NumPy for arrays and point formatting.
import numpy as np
### Import PyTorch for device selection.
import torch
### Import Matplotlib for visualization.
import matplotlib.pyplot as plt
### Import OpenCV for reading and converting images.
import cv2

### Set a fixed seed for reproducible visualization colors.
np.random.seed(3)

### Select the device for computation.
device = torch.device("cuda" if torch.cuda.is_available() else "cpu")
### Print the chosen device.
print(f"Using device: {device}")

### Define a helper that overlays multiple masks.
def show_anns(anns, borders=True):
    ### Exit if there are no masks.
    if len(anns) == 0:
        return
    ### Sort by area so larger masks draw first.
    sorted_anns = sorted(anns, key=(lambda x: x['area']), reverse=True)
    ### Get current axes.
    ax = plt.gca()
    ### Keep axes stable.
    ax.set_autoscale_on(False)

    ### Create an empty RGBA overlay.
    img = np.ones((sorted_anns[0]['segmentation'].shape[0], sorted_anns[0]['segmentation'].shape[1], 4))
    ### Make it transparent by default.
    img[:, :, 3] = 0
    ### Paint each mask.
    for ann in sorted_anns:
        ### Extract segmentation.
        m = ann['segmentation']
        ### Assign a random semi-transparent color.
        color_mask = np.concatenate([np.random.random(3), [0.5]])
        ### Apply color to mask region.
        img[m] = color_mask
        ### Optionally draw borders for clarity.
        if borders:
            ### Find the mask contour edges.
            contours, _ = cv2.findContours(m.astype(np.uint8), cv2.RETR_EXTERNAL, cv2.CHAIN_APPROX_NONE)
            ### Smooth edges.
            contours = [cv2.approxPolyDP(contour, epsilon=0.01, closed=True) for contour in contours]
            ### Draw edges.
            cv2.drawContours(img, contours, -1, (0, 0, 1, 0.4), thickness=1)

    ### Render overlay.
    ax.imshow(img)

### Define a helper that overlays a single mask.
def show_mask(mask, ax, random_color=False, borders = True):
    ### Choose random or fixed color.
    if random_color:
        color = np.concatenate([np.random.random(3), np.array([0.6])], axis=0)
    else:
        color = np.array([30/255, 144/255, 255/255, 0.6])
    ### Read mask height and width.
    h, w = mask.shape[-2:]
    ### Convert to uint8 for contour ops.
    mask = mask.astype(np.uint8)
    ### Build RGBA overlay.
    mask_image =  mask.reshape(h, w, 1) * color.reshape(1, 1, -1)
    ### Optionally draw borders.
    if borders:
        ### Find contours of the mask.
        contours, _ = cv2.findContours(mask,cv2.RETR_EXTERNAL, cv2.CHAIN_APPROX_NONE)
        ### Smooth contours.
        contours = [cv2.approxPolyDP(contour, epsilon=0.01, closed=True) for contour in contours]
        ### Draw contours on the overlay.
        mask_image = cv2.drawContours(mask_image, contours, -1, (1, 1, 1, 0.5), thickness=2)
    ### Show overlay.
    ax.imshow(mask_image)

### Define a helper to show positive and negative points.
def show_points(coords, labels, ax, marker_size=375):
    ### Separate positive points.
    pos_points = coords[labels==1]
    ### Separate negative points.
    neg_points = coords[labels==0]
    ### Draw positive points.
    ax.scatter(pos_points[:, 0], pos_points[:, 1], color='green', marker='*', s=marker_size, edgecolor='white', linewidth=1.25)
    ### Draw negative points.
    ax.scatter(neg_points[:, 0], neg_points[:, 1], color='red', marker='*', s=marker_size, edgecolor='white', linewidth=1.25)

### Define a helper to draw a bounding box.
def show_box(box, ax):
    ### Extract top-left.
    x0, y0 = box[0], box[1]
    ### Compute width and height.
    w, h = box[2] - box[0], box[3] - box[1]
    ### Draw a rectangle patch.
    ax.add_patch(plt.Rectangle((x0, y0), w, h, edgecolor='green', facecolor=(0, 0, 0, 0), lw=2))

### Define a helper to display masks and their scores.
def show_masks(image, masks, scores, point_coords=None, box_coords=None, input_labels=None, borders=True):
    ### Loop through mask candidates.
    for i, (mask, score) in enumerate(zip(masks, scores)):
        ### Create a figure for each mask.
        plt.figure(figsize=(10, 10))
        ### Show the image.
        plt.imshow(image)
        ### Overlay the mask.
        show_mask(mask, plt.gca(), borders=borders)
        ### If points are provided, overlay them too.
        if point_coords is not None:
            assert input_labels is not None
            show_points(point_coords, input_labels, plt.gca())
        ### If a box is provided, overlay it too.
        if box_coords is not None:
            show_box(box_coords, plt.gca())
        ### Add a title if multiple scores exist.
        if len(scores) > 1:
            plt.title(f"Mask {i+1}, Score: {score:.3f}", fontsize=18)
        ### Hide axes.
        plt.axis('off')
        ### Show plot.
        plt.show()

### Load the image from disk.
image = cv2.imread("code/Elephant2.jpg")
### Convert to RGB for Matplotlib.
image = cv2.cvtColor(image, cv2.COLOR_BGR2RGB) # Convert to RGB

### Preview the image.
plt.figure(figsize=(10, 10))
plt.imshow(image)
plt.axis('off')
#plt.show()

### Import SAM2 model builder.
from sam2.build_sam import build_sam2
### Import the SAM2 image predictor.
from sam2.sam2_image_predictor import SAM2ImagePredictor

### Choose a checkpoint.
sam2_checkpoint = "checkpoints/sam2.1_hiera_large.pt" # download it in the install part
### Choose the model configuration.
model_cfg = "configs/sam2.1/sam2.1_hiera_l.yaml" # part of the SAM2 repo

### Build the SAM2 model.
sam2_model = build_sam2(model_cfg, sam2_checkpoint, device=device)
### Create the predictor wrapper.
predictor = SAM2ImagePredictor(sam2_model)

### Compute and store the image embedding.
predictor.set_image(image)

### Define a single positive point for the small elephant.
input_point = np.array([[1476, 830]])
### Label 1 means positive foreground point.
input_label = np.array([1])  # 1 for positive point, 0 for negative point

### Visualize the chosen point.
plt.figure(figsize=(10, 10))
plt.imshow(image)
show_points(input_point, input_label, plt.gca())
plt.axis('off')
plt.show()

### Print embedding shapes to confirm the image was embedded.
print(predictor._features["image_embed"].shape , predictor._features["image_embed"][-1].shape)

### Predict masks from point prompts.
masks , scores , logits = predictor.predict(
    point_coords=input_point,
    point_labels=input_label,
    multimask_output=True,)  # Set to True to get multiple masks

### Print how many masks were produced.
print(f"Generated {len(masks)} masks")
### Print mask tensor shape.
print(masks.shape)

### Display masks with scores.
show_masks(image, masks, scores, point_coords=input_point, input_labels=input_label, borders=True)
Short summary. You loaded SAM2, embedded the image once, and generated multiple candidate masks from a single click. Next you will visualize the results more cleanly and refine the mask using multiple points and logits.
Visualize results and refine the mask with more points
In this part, you will render your masks using Supervision for clean overlays that look great in tutorials and demos. You will also convert masks into detections so you can easily draw both boxes and masks on the original image.
Then you will refine the segmentation by adding more positive points and reusing the best logits as mask_input.
This usually produces a more stable, object-accurate mask that matches your intent with fewer artifacts.
### Load the original image again in BGR for Supervision rendering.
image_bgr = cv2.imread("code/Elephant2.jpg")

### Import Supervision for clean overlays.
import supervision as sv
### Create a box annotator.
box_annotator = sv.BoxAnnotator(color_lookup=sv.ColorLookup.INDEX)
### Create a mask annotator.
mask_annotator = sv.MaskAnnotator(color_lookup=sv.ColorLookup.INDEX)

### Build detections from masks.
detections = sv.Detections(
    xyxy=sv.mask_to_xyxy(masks=masks),
    mask=masks.astype(bool) )

### Draw boxes on the source image.
source_image = box_annotator.annotate(scene=image_bgr.copy(), detections=detections)
### Draw masks on the source image.
segmented_image = mask_annotator.annotate(scene=image_bgr.copy(), detections=detections)

### Show side-by-side comparison.
sv.plot_images_grid(
    images=[source_image, segmented_image],
    grid_size=(1, 2),
    titles=["Source Image", "Segmented Image"])

### Show mask candidates as separate images.
sv.plot_images_grid(
    images=masks,
    titles=[f"score: {score:.2f}" for score in scores],
    grid_size=(1,3),
    size=(12, 12))

### Provide multiple positive points to refine the object.
input_point = np.array([[1449, 811], [1383, 799] , [1490, 810], [1574, 887], [1581, 993], [1491, 992], [1420, 992], [1346, 973]])
### Mark all of them as positive.
input_label = np.array([1, 1, 1, 1, 1, 1, 1, 1])

### Use the best logits mask as a starting mask input for refinement.
mask_input = logits[np.argmax(scores), :, :]

### Predict a single refined mask.
masks , scores, _ = predictor.predict(
    point_coords=input_point,
    point_labels=input_label,
    mask_input=mask_input[None, :, :],
    multimask_output=False
)

### Print the refined output.
print(f"Generated {len(masks)} masks")
print(masks.shape)

### Visualize refined mask.
show_masks(image, masks, scores, point_coords=input_point, input_labels=input_label)
Short summary.
You visualized the mask candidates with Supervision overlays.
You refined the segmentation using multiple points and logits-based mask_input to get a cleaner final mask.
Refine segmentation with bounding boxes and combined prompts
The goal of this section is to use bounding boxes as a strong constraint for segmentation. A box prompt tells SAM2 where to focus, which helps reduce ambiguity when the scene contains similar textures or overlapping objects.
You will first predict a mask using only a bounding box. Then you will combine the bounding box with point prompts to get even tighter control over boundaries and coverage.
### Import NumPy for box arrays.
import numpy as np
### Import PyTorch for device selection.
import torch
### Import Matplotlib for visualization.
import matplotlib.pyplot as plt
### Import OpenCV for image loading.
import cv2

### Set a fixed seed for reproducible visuals.
np.random.seed(3)

### Select the device for computation.
device = torch.device("cuda" if torch.cuda.is_available() else "cpu")
### Print which device you are using.
print(f"Using device: {device}")

### Define a helper that overlays multiple masks.
def show_anns(anns, borders=True):
    ### Exit if empty.
    if len(anns) == 0:
        return
    ### Sort by area.
    sorted_anns = sorted(anns, key=(lambda x: x['area']), reverse=True)
    ### Get axes.
    ax = plt.gca()
    ### Keep fixed scale.
    ax.set_autoscale_on(False)

    ### Create overlay canvas.
    img = np.ones((sorted_anns[0]['segmentation'].shape[0], sorted_anns[0]['segmentation'].shape[1], 4))
    ### Make transparent.
    img[:, :, 3] = 0
    ### Draw masks.
    for ann in sorted_anns:
        m = ann['segmentation']
        color_mask = np.concatenate([np.random.random(3), [0.5]])
        img[m] = color_mask
        if borders:
            contours, _ = cv2.findContours(m.astype(np.uint8), cv2.RETR_EXTERNAL, cv2.CHAIN_APPROX_NONE)
            contours = [cv2.approxPolyDP(contour, epsilon=0.01, closed=True) for contour in contours]
            cv2.drawContours(img, contours, -1, (0, 0, 1, 0.4), thickness=1)

    ax.imshow(img)

### Define a helper that overlays a single mask.
def show_mask(mask, ax, random_color=False, borders = True):
    if random_color:
        color = np.concatenate([np.random.random(3), np.array([0.6])], axis=0)
    else:
        color = np.array([30/255, 144/255, 255/255, 0.6])
    h, w = mask.shape[-2:]
    mask = mask.astype(np.uint8)
    mask_image =  mask.reshape(h, w, 1) * color.reshape(1, 1, -1)
    if borders:
        import cv2
        contours, _ = cv2.findContours(mask,cv2.RETR_EXTERNAL, cv2.CHAIN_APPROX_NONE)
        contours = [cv2.approxPolyDP(contour, epsilon=0.01, closed=True) for contour in contours]
        mask_image = cv2.drawContours(mask_image, contours, -1, (1, 1, 1, 0.5), thickness=2)
    ax.imshow(mask_image)

### Define a helper to draw points.
def show_points(coords, labels, ax, marker_size=375):
    pos_points = coords[labels==1]
    neg_points = coords[labels==0]
    ax.scatter(pos_points[:, 0], pos_points[:, 1], color='green', marker='*', s=marker_size, edgecolor='white', linewidth=1.25)
    ax.scatter(neg_points[:, 0], neg_points[:, 1], color='red', marker='*', s=marker_size, edgecolor='white', linewidth=1.25)

### Define a helper to draw a box.
def show_box(box, ax):
    x0, y0 = box[0], box[1]
    w, h = box[2] - box[0], box[3] - box[1]
    ax.add_patch(plt.Rectangle((x0, y0), w, h, edgecolor='green', facecolor=(0, 0, 0, 0), lw=2))

### Define a helper to display masks and prompts together.
def show_masks(image, masks, scores, point_coords=None, box_coords=None, input_labels=None, borders=True):
    for i, (mask, score) in enumerate(zip(masks, scores)):
        plt.figure(figsize=(10, 10))
        plt.imshow(image)
        show_mask(mask, plt.gca(), borders=borders)
        if point_coords is not None:
            assert input_labels is not None
            show_points(point_coords, input_labels, plt.gca())
        if box_coords is not None:
            show_box(box_coords, plt.gca())
        if len(scores) > 1:
            plt.title(f"Mask {i+1}, Score: {score:.3f}", fontsize=18)
        plt.axis('off')
        plt.show()

### Load the image.
image = cv2.imread("code/Elephant2.jpg")
### Convert to RGB.
image = cv2.cvtColor(image, cv2.COLOR_BGR2RGB) # Convert to RGB

### Import the builder.
from sam2.build_sam import build_sam2
### Import the predictor.
from sam2.sam2_image_predictor import SAM2ImagePredictor

### Set checkpoint path.
sam2_checkpoint = "checkpoints/sam2.1_hiera_large.pt" # download it in the install part
### Set model config path.
model_cfg = "configs/sam2.1/sam2.1_hiera_l.yaml" # part of the SAM2 repo

### Build model.
sam2_model = build_sam2(model_cfg, sam2_checkpoint, device=device)
### Build predictor.
predictor = SAM2ImagePredictor(sam2_model)

### Compute and store image embedding.
predictor.set_image(image)

### Define a bounding box around the target.
input_box = np.array([1280, 650, 1630 , 1190])

### Predict a mask from the bounding box.
masks , scores , logits = predictor.predict(
    point_coords=None,
    point_labels=None,
    box=input_box[None, :],
    multimask_output=False,)  # Set to True to get multiple masks

### Visualize the box-based mask.
show_masks(image, masks, scores, box_coords=input_box)

### Define multiple points to combine with the box.
input_point = np.array([[1449, 811], [1383, 799] , [1490, 810], [1574, 887], [1581, 993], [1491, 992], [1420, 992], [1346, 973]])
### Mark all points as positive.
input_label = np.array([1, 1, 1, 1, 1, 1, 1, 1])

### Define the same bounding box.
input_box = np.array([1280, 650, 1630, 1190])

### Predict a refined mask using both points and box.
masks, scores, logits = predictor.predict(
    point_coords=input_point,
    point_labels=input_label,
    box=input_box,
    multimask_output=False,
)

### Visualize the combined prompt result.
show_masks(image, masks, scores, box_coords=input_box, point_coords=input_point, input_labels=input_label)
You generated masks from a bounding box and then refined them with combined prompts. This approach is often the most reliable when you want consistent segmentation with fewer surprises.
Here is the Result :
FAQ — SAM tutorial
Q: What is SAM2 in simple terms. A: SAM2 is a promptable segmentation model that turns simple inputs like points or boxes into pixel-level object masks. It is designed to be fast and interactive for both images and videos.
Q: What is the difference between automatic masks and interactive masks. A: Automatic masks try to find many objects across the whole image without you specifying a target. Interactive masks focus on one object using your prompts, which usually gives cleaner and more controllable results.
Q: Why do I need to convert BGR to RGB. A: OpenCV loads images as BGR, while Matplotlib expects RGB. If you skip the conversion, your colors will look wrong in plots.
Q: Why does SAM2 return multiple masks for one point. A: A single point can be ambiguous, especially if it sits on a part of an object or near boundaries. Multiple masks give you options, and scores help you choose the best one.
Q: What do positive and negative points mean. A: Positive points say “include this region as the object.” Negative points say “exclude this region,” which helps prevent spillover into nearby objects or background.
Q: When should I use a bounding box prompt. A: Use a box when the object location is clear and you want to reduce ambiguity. Boxes constrain attention and often produce more stable masks in cluttered scenes.
Q: Why does the code call set_image before predict.
A: set_image computes an image embedding once and stores it in the predictor.
Then predict can run quickly for multiple prompts without recomputing features each time.
Q: What is logits and why reuse it for refinement.
A: Logits are the model’s raw confidence map before final thresholding.
Reusing logits as mask_input can stabilize refinement when you add more prompts.
Q: Why are my results worse on CPU. A: CPU inference can be slower, which may tempt you to reduce iterations or skip refinement. The model quality is similar, but interactive workflows feel better on GPU because you can iterate faster.
Q: What is a practical way to export results. A: Save the binary mask as a NumPy array or image, and optionally store the bounding box derived from the mask. This makes it easy to reuse the segmentation in labeling tools, tracking, or downstream analysis.
Conclusion
This SAM2 Tutorial showed a practical, end-to-end segmentation workflow that you can reuse in real projects. You started by generating automatic masks to quickly understand what the model can separate in a scene. That step is useful for exploration, fast labeling, and getting a “map” of the image without any manual tracing.
Then you shifted into interactive segmentation, which is where SAM2 becomes a tool you can control. Point prompts let you say exactly what you mean with a single click, and multiple points help you refine borders and reduce confusion. You also saw how scores and logits can guide better decisions when the model returns multiple candidates.
Finally, you used bounding boxes and combined prompts to make the segmentation even more stable. Boxes constrain the model’s attention, and mixing boxes with points often gives the cleanest results in cluttered images. From here, you can export masks, convert them to boxes or contours, and plug them into labeling tools, tracking systems, or any computer vision pipeline that needs reliable object regions.
Connect :
☕ Buy me a coffee — https://ko-fi.com/eranfeit
🖥️ Email : feitgemel@gmail.com
🤝 Fiverr : https://www.fiverr.com/s/mB3Pbb
Enjoy,
Eran
메타데이터
- post_id
- 46a0c13b2b36
- slug
- interactive-sam2-segmentation-points-boxes-and-masks-46a0c13b2b36
- url
- https://medium.com/image-segmentation-tutorials/interactive-sam2-segmentation-points-boxes-and-masks-46a0c13b2b36
- canonical_url
- https://medium.com/image-segmentation-tutorials/interactive-sam2-segmentation-points-boxes-and-masks-46a0c13b2b36
- author_url
- https://medium.com/@feitgemel
- status
- ok
- fetched_at
- 2026-06-15 20:49:13