Introduction to Tilemap in Unity
In this article I’m going to go over how to use tilemaps in Unity. I will be using Unity 6 for the entirety of these articles about a 2D…
Introduction to Tilemap in Unity
In this article I’m going to go over how to use tilemaps in Unity. I will be using Unity 6 for the entirety of these articles about a 2D mobile game I am going to create for my school.
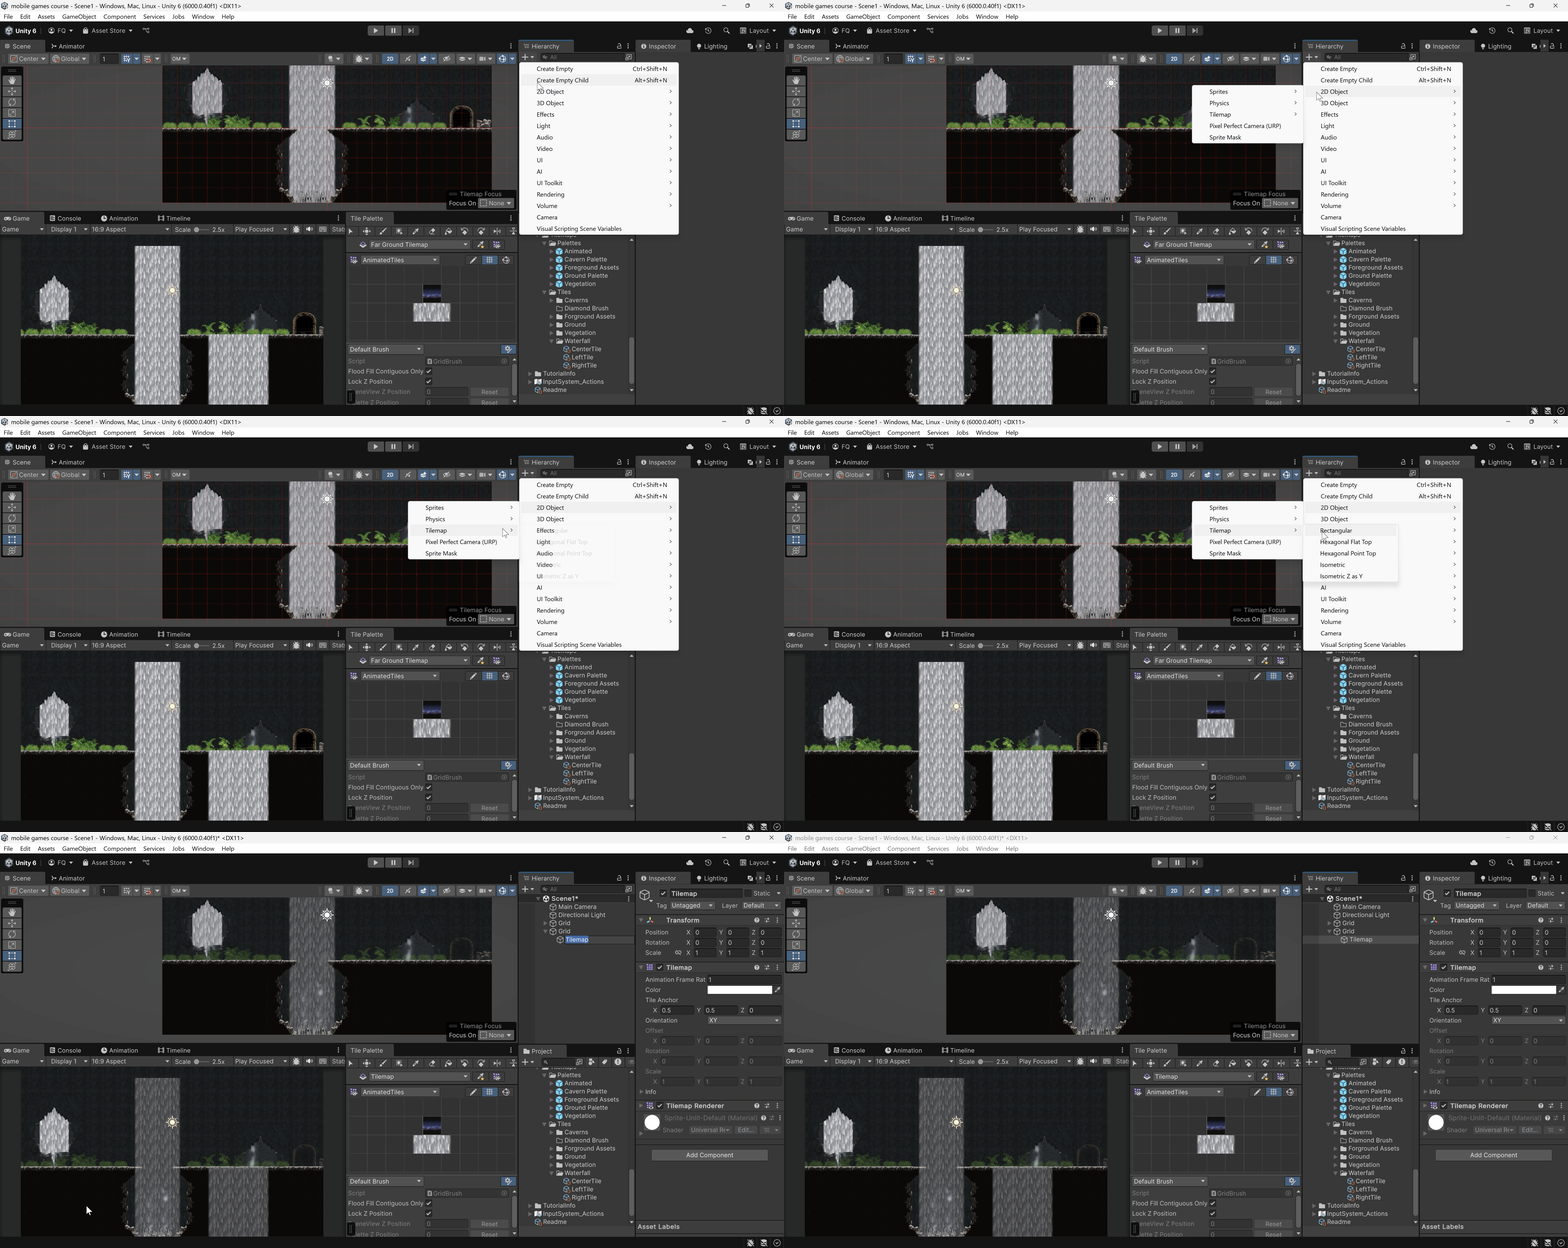
Let’s go into Unity. In the hierarchy we will want to add a grid. We can do this by going to the plus sign and going into 2D Object then into Tilemap and choosing one of the tiles. For this I will be choosing Rectangular. Now a tilemap object will be placed in your scene. Note that this will place a parent object in the scene called a Grid.
Next we want to go to the top where it says Window, then navigate to 2D, and select Tile Palette. This will create a new window for the tile palettes that will be needed to paint the tiles.

So a tilemap is basically the squares on a grid. The tile palette is where the colors/design that will be put on a tile is stored. These are for 2D objects so you can look at the screen as a grid with a bunch of squares (tiles) on it since we only see it from one direction.
Let’s go over the most useful parts of the tile palette. The first dropdown shows which layer you are on. The layers are based off the grid you use. You will want to be aware of which layer you are before painting onto the tiles. The 2nd dropdown shows which palette you are on. You can create new palettes from the dropdown. Going to the top line. The 3rd button is what you use to paint onto the tile. The button to the right of it allows you to paint onto tiles but it allows you to create a box shape that encompasses whatever you want and all of it gets filled in at the same time. 2 buttons over from that is the erase button. This lets you erase anything you have put into the tile. These have been my most commonly used buttons.

So when you create a tile palette the box above will be shown except it will be empty. You will need to go to the sprites and cut all the sprites into their own individual sprite and drop it onto the area. You’ll save these sprites into tile assets and then they will populate in the box. After that you will be ready to start painting onto the tiles. Let’s look at how the tiles will be shown in the editor.

On the left is my scene view after I have painted the level. On the right is my tile palette window. At the bottom where it says tilemap focus you can actually choose to see only the selected tilemap if you want. This makes it easier to see what has been painted in the specific layer.

This is my far ground layer. All the lit up stuff is what is on this layer. So here you can see it’s easier to keep track of what’s on this layer if you ever need to change something. That is the basics of the tilemap system. In the next article I will go over creating animated palettes.
메타데이터
- post_id
- 4b834aceb95b
- slug
- introduction-to-tilemap-in-unity-4b834aceb95b
- url
- https://medium.com/@felix.m.quinones777/introduction-to-tilemap-in-unity-4b834aceb95b
- canonical_url
- https://medium.com/@felix.m.quinones777/introduction-to-tilemap-in-unity-4b834aceb95b
- author_url
- https://medium.com/@felix.m.quinones777
- status
- ok
- fetched_at
- 2026-07-18 09:42:59