Using a virtual box, install Hadoop on Ubuntu (the Linux kernel) in Windows 11.
Introduction
Using a virtual box, install Hadoop on Ubuntu (the Linux kernel) in Windows 11.
Introduction
Installing Hadoop on Ubuntu Linux within a virtual machine on Windows 11 is a great way to set up a Hadoop development environment without the need for a dedicated Hadoop server. By using a virtual machine, you can create a self-contained, isolated environment to install and configure Hadoop, allowing you to explore and learn Hadoop’s features and capabilities.
Prerequisites
Hadoop-3.4.0.tar.gz
Download here: https://www.apache.org/dyn/closer.cgi/hadoop/common/hadoop-3.4.0/hadoop-3.4.0.tar.gz
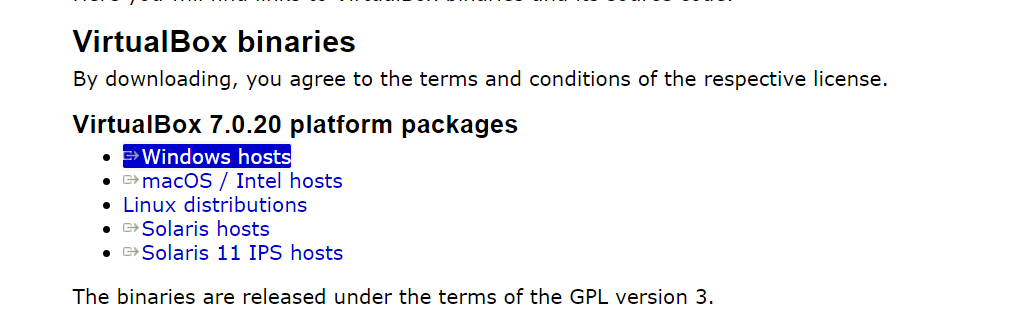
Download virtual box: https://www.virtualbox.org/wiki/Downloads
Download the Ubuntu operating system iso file (recommend choosing the lower version):
Install Virtual box Ubuntu.
Part 1: Install the Ubuntu requirements.
Step 1: Install Oracle VM VirtualBox Manager. Open the file virtual-box ****.exe and install it, then open and get the home page.

Step 2: Install Ubuntu
- Click New -> setting like image below.

Click next, choose your memory, and compute for your Ubuntu system.

Click next and choose your disk space for Ubuntu click next and finish.
Step 3: Open and install Ubuntu.
click start.

Choose your file .iso ubuntu you downloaded before -> mount and retry Boot.

Click Install Ubuntu.

Click Continue.

Click Install Now.

click continue

click Continue.

Input your login requirement -> click log in automatically -> click continue..

And waiting.

Click restart now

Part 2: Install Hadoop
Step 1: Open a terminal and install Java jdk on your system.

Run this code in terminal.
sudo apt install openjdk-8-jdk
and check the folder.
cd /usr/lib/jvm
it’s show the complete install.
Step 2: Configure the Ubuntu bashrc file.
sudo nano .bashrc
Go to the end of the file.
Past this code.
export JAVA_HOME=/usr/lib/jvm/java-8-openjdk-amd64
export PATH=$PATH:/usr/lib/jvm/java-8-openjdk-amd64/bin
export HADOOP_HOME=~/hadoop-3.4.0/
export PATH=$PATH:$HADOOP_HOME/bin
export PATH=$PATH:$HADOOP_HOME/sbin
export HADOOP_MAPRED_HOME=$HADOOP_HOME
export YARN_HOME=$HADOOP_HOME
export HADOOP_CONF_DIR=$HADOOP_HOME/etc/hadoop
export HADOOP_COMMON_LIB_NATIVE_DIR=$HADOOP_HOME/lib/native
export HADOOP_OPTS="-Djava.library.path=$HADOOP_HOME/lib/native"
export HADOOP_STREAMING=$HADOOP_HOME/share/hadoop/tools/lib/hadoop-streaming-3.4.0.jar
export HADOOP_LOG_DIR=$HADOOP_HOME/logs
export PDSH_RCMD_TYPE=ssh
Step 3: Install the SSH secure system.
sudo apt-get install sshStep 4: Copy file Haddop-3.4.0.tar.gz into computer.
Click devices Insert guest Additions CD Image.

Click Run software.

Go to devices -> share folder, mount to folder contain Hadoop-3.4.0.tar.gz


Then run this bash in ternimal.
sudo nautilusAnd then copy this file into the home folder.


Step 5: Extract the file.
sudo chmod -x ~/hadoop-3.4.0.tar.gz
sudo tar -zxvf ~/hadoop-3.4.0.tar.gz
Step 6: Configure the file.
Go to the folder containing the file.
cd hadoop-3.4.0/etc/hadoopSetting file hadoop-env.h
sudo nano hadoop-env.sh
Find Java Home and set path for JAVAHOME
JAVA_HOME=/usr/lib/jvm/java-8-openjdk-amd64 
Ctrl+X and save.
configuration in core-site.xml
sudo nano core-site.xml<configuration>
<property>
<name>fs.defaultFS</name>
<value>hdfs://localhost:9000</value> </property>
<property>
<name>hadoop.proxyuser.dataflair.groups</name> <value>*</value>
</property>
<property>
<name>hadoop.proxyuser.dataflair.hosts</name> <value>*</value>
</property>
<property>
<name>hadoop.proxyuser.server.hosts</name> <value>*</value>
</property>
<property>
<name>hadoop.proxyuser.server.groups</name> <value>*</value>
</property>
</configuration>
the result
configuration in hdfs-site.xml
sudo nano hdfs-site.xml<configuration>
<property>
<name>dfs.replication</name>
<value>1</value>
</property>
</configuration>
The Result.
configuration in mapred-site.xml
sudo nano mapred-site.xml<configuration>
<property>
<name>mapreduce.framework.name</name> <value>yarn</value>
</property>
<property>
<name>mapreduce.application.classpath</name>
<value>$HADOOP_MAPRED_HOME/share/hadoop/mapreduce/*:$HADOOP_MAPRED_HOME/share/hadoop/mapreduce/lib/*</value>
</property>
</configuration>
the result
Configuration in yarn-site.xml
sudo nano yarn-site.xml<configuration>
<property>
<name>yarn.nodemanager.aux-services</name>
<value>mapreduce_shuffle</value>
</property>
<property>
<name>yarn.nodemanager.env-whitelist</name>
<value>JAVA_HOME,HADOOP_COMMON_HOME,HADOOP_HDFS_HOME,HADOOP_CONF_DIR,CLASSPATH_PREP END_DISTCACHE,HADOOP_YARN_HOME,HADOOP_MAPRED_HOME</value>
</property>
</configuration>
The Result.
Running ssh.
ssh localhost 
ssh-keygen -t rsa -P '' -f ~/.ssh/id_rsa 
cat ~/.ssh/id_rsa.pub >> ~/.ssh/authorized_keys chmod 0600 ~/.ssh/authorized_keys sudo chmod -R 755 /home/YOUR_USER/hadoop-3.4.0/
sudo hadoop-3.4.0/bin/hdfs namenode -format
The result.
export PDSH_RCMD_TYPE=ssh
sudo mkdir -p /home/USER_NAME/hadoop-3.4.0/logs
sudo chown -R USERNAME:USERNAME /home/huytrao/hadoop-3.4.0
sudo chmod -R 755 /home/huytrao/hadoop-3.4.0/logs
Step 5. Run all.
start-all.sh
using jps to check.
jps
Open firefox Open HDFS UI.
At site: http://localhost:9870/explorer.html#/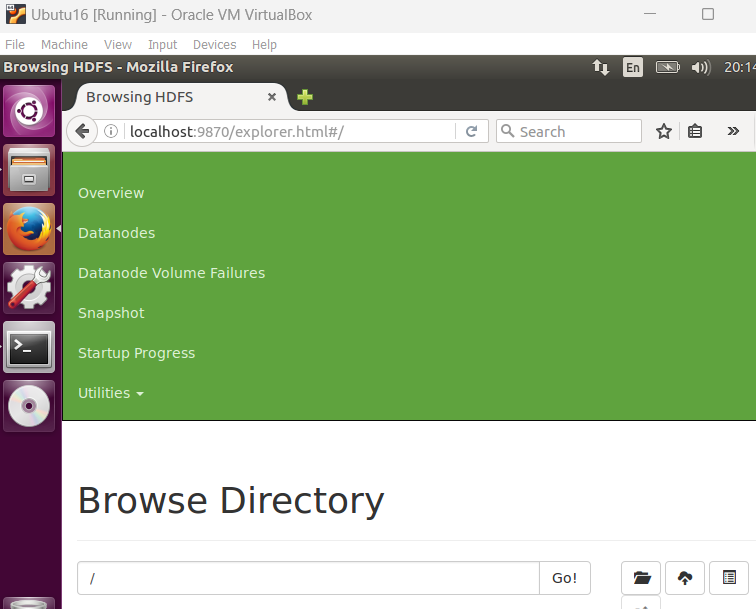
메타데이터
- post_id
- a2326a76a0cf
- slug
- using-a-virtual-box-install-hadoop-on-ubuntu-the-linux-kernel-in-windows-11-a2326a76a0cf
- url
- https://medium.com/@huytrao/using-a-virtual-box-install-hadoop-on-ubuntu-the-linux-kernel-in-windows-11-a2326a76a0cf
- canonical_url
- https://medium.com/@huytrao/using-a-virtual-box-install-hadoop-on-ubuntu-the-linux-kernel-in-windows-11-a2326a76a0cf
- author_url
- https://medium.com/@huytrao
- status
- ok
- fetched_at
- 2026-07-23 07:31:57




