Google Maps Integration in Next 14,13 and React (Load, Display) |Step By Step Guide
Mastering Seamless Google Maps Integration in Next.js and React: A Comprehensive Tutorial for Loading and Displaying Maps with Ease
Google Maps Integration in Next 14, 13 and React |Step By Step Guide
This article will give you a complete understanding about loading google maps and displaying a map in Next 14 (Latest at the time of writing this article)
NOTE: This approach will work for React js and Next 13 as well.
Prerequisites
- A Next js application
- Google Map API Key (If you don't have one, then below is the guide to get your own)
[embed]
Lets Get Started!
Step 1: Install @react-google-maps/api package
npm i @react-google-maps/apiOr if you are using Yarn package manager,
yarn add @react-google-maps/apiStep 2: Place the google maps API key in your env
- Create a file named as “.env” in the root directory to store all your sensitive environment variables.
- Place your API key inside it, like
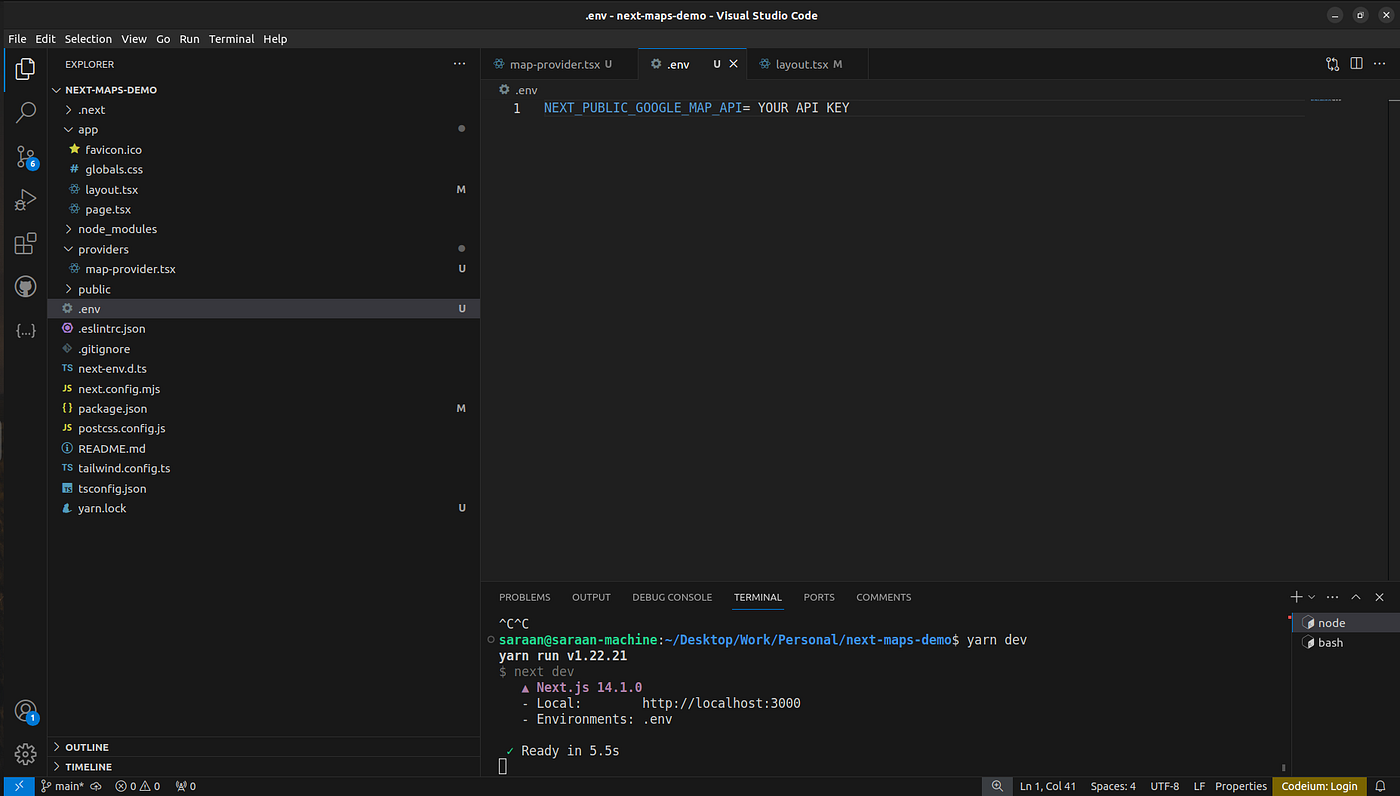
Google map API key placed inside the .env file created in root directory
Step 3: Create a provider for loading google maps
Although you don’t need to create a provider, you can just pick the code for loading google maps and place it in the component itself (Where you want to place the code for displaying a map), but I would prefer this approach, since it provides re-usability and you don’t need to copy paste the same code for loading google maps in multiple pages or components where you want to deal with any map related functionality.
- Create a folder called providers (You can have other providers here too since its a standard approach ; such as redux provider, stripe provider etc)
- Create a file named “map-provider.tsx” and place below code inside it
//Since the map will be laoded and displayed on client side
'use client';

// Import necessary modules and functions from external libraries and our own project
import { Libraries, useJsApiLoader } from '@react-google-maps/api';
import { ReactNode } from 'react';

// Define a list of libraries to load from the Google Maps API
const libraries = ['places', 'drawing', 'geometry'];

// Define a function component called MapProvider that takes a children prop
export function MapProvider({ children }: { children: ReactNode }) {

  // Load the Google Maps JavaScript API asynchronously
  const { isLoaded: scriptLoaded, loadError } = useJsApiLoader({
    googleMapsApiKey: process.env.NEXT_PUBLIC_GOOGLE_MAP_API as string,
    libraries: libraries as Libraries,
  });

  if(loadError) return <p>Encountered error while loading google maps</p>

  if(!scriptLoaded) return <p>Map Script is loading ...</p>

  // Return the children prop wrapped by this MapProvider component
  return children;
}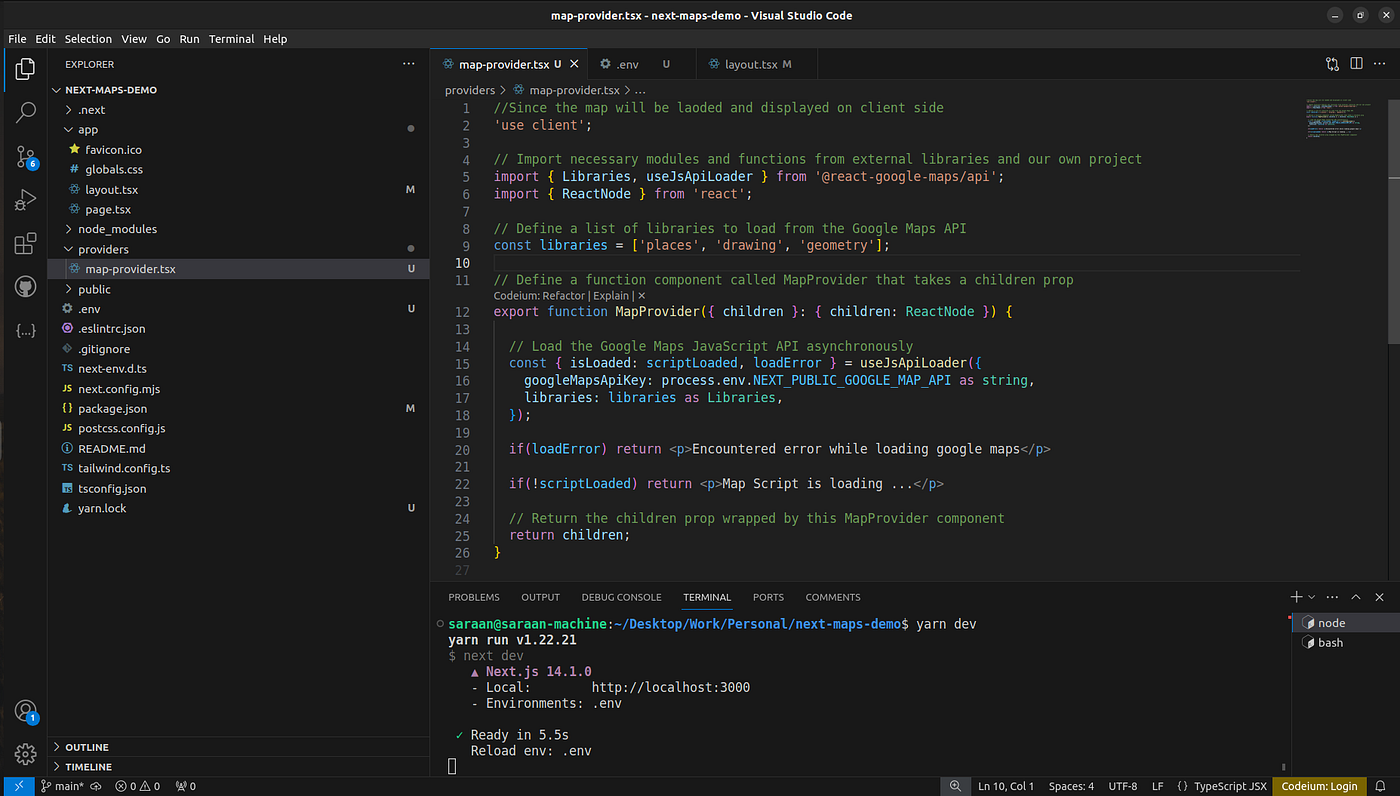
Map provider’s code
Step 4: Wrap the component inside the provider
**NOTE : **You can also wrap the JSX inside the root layout to load google maps for the whole application. Or you can make a route group and wrap that route group’s layout’s JSX inside the provider to load google maps for specific routes.
Lets wrap the content inside the “page.tsx” within the wrapper, since in this tutorial we are going to show the map inside the main “page.tsx” (default route)
import { MapProvider } from "@/providers/map-provider";

export default function Home() {

  return (
    <MapProvider>
      <main>
        Map will come here
      </main>
    </MapProvider>
  );
}
Wrapping of the provider
Step 5: Make a separate component for map functionality
Since we are working in a react based framework and the biggest advantage of react is code re-usability and separation of concerns using components, lets make a separate component for map related functionality and use it inside the provider in “page.tsx”
- Create a folder named components, along side providers
- Create a “map.tsx” inside it having the following code
/*
Since the map was loaded on client side,
we need to make this component client rendered as well else error occurs
*/
'use client'

//Map component Component from library
import { GoogleMap } from "@react-google-maps/api";

//Map's styling
export const defaultMapContainerStyle = {
    width: '100%',
    height: '80vh',
    borderRadius: '15px 0px 0px 15px',
};

const MapComponent = () => {
    return (
        <div className="w-full">
            <GoogleMap mapContainerStyle={defaultMapContainerStyle}>
            </GoogleMap>
        </div>
    )
};

export { MapComponent };- Import and use the newly created component inside “page.tsx”

Usage of MapComponent
We should be good to go, right? Not Quite
You must be seeing a blank screen right now.

Blank google map due to the absence of center, zoom and map options
**NOTE : **If instead you are facing an error, please make sure that you have used “use client” at the top of component and the provider to make the code run on client side. Next js by default runs on server side.
What did we miss? Oh, the what and how for displaying the map!
Google maps component needs 4 necessary props to display a map
- Some width and height in container styles
- Map center
- Map zoom level
- Map options
We already fulfilled the first requirement, lets deal with the rest of them
Step 6.1: Prepare default map center coordinates
Create a constant “defaultMapCenter” having below coordinates for **K2, the world’s second highest peak, situated in Pakistan’s northern areas**. (You will surely be delighted with the outcome at the end of this article)
const defaultMapCenter = {
    lat: 35.8799866,
    lng: 76.5048004
}
Step 6.2: Prepare default map zoom
Create a constant “defaultMapZoom” having default value of 18
const defaultMapZoom = 18Step 6.3: Prepare default map options
Create a constant “defaultMapOptions” having the configuration of map involving the type of the map to display (road map or satellite view), tilt ratio etc.
const defaultMapOptions = {
    zoomControl: true,
    tilt: 0,
    gestureHandling: 'auto',
    mapTypeId: 'satellite',
};
Last Step: Wire it all together!
Lets assign these default values to the component
<GoogleMap
    mapContainerStyle={defaultMapContainerStyle}
    center={defaultMapCenter}
    zoom={defaultMapZoom}
    options={defaultMapOptions}>
</GoogleMap>
Press “Save” and Voila! Look at that view

Image of K2, the 2nd highest peak in the world , situated in Pakistan’s northern areas.
Final Code
components/map.tsx
/*Since the map was loaded on client side,
we need to make this component client rendered as well*/
'use client'

//Map component Component from library
import { GoogleMap } from "@react-google-maps/api";

//Map's styling
const defaultMapContainerStyle = {
    width: '100%',
    height: '100vh',
    borderRadius: '15px 0px 0px 15px',
};

//K2's coordinates
const defaultMapCenter = {
    lat: 35.8799866,
    lng: 76.5048004
}

//Default zoom level, can be adjusted
const defaultMapZoom = 18

//Map options
const defaultMapOptions = {
    zoomControl: true,
    tilt: 0,
    gestureHandling: 'auto',
    mapTypeId: 'satellite',
};

const MapComponent = () => {
    return (
        <div className="w-full">
            <GoogleMap
                mapContainerStyle={defaultMapContainerStyle}
                center={defaultMapCenter}
                zoom={defaultMapZoom}
                options={defaultMapOptions}
            >
            </GoogleMap>
        </div>
    )
};

export { MapComponent };
providers/map-provider.tsx
//Since the map will be laoded and displayed on client side
'use client';

// Import necessary modules and functions from external libraries and our own project
import { Libraries, useJsApiLoader } from '@react-google-maps/api';
import { ReactNode } from 'react';

// Define a list of libraries to load from the Google Maps API
const libraries = ['places', 'drawing', 'geometry'];

// Define a function component called MapProvider that takes a children prop
export function MapProvider({ children }: { children: ReactNode }) {

  // Load the Google Maps JavaScript API asynchronously
  const { isLoaded: scriptLoaded, loadError } = useJsApiLoader({
    googleMapsApiKey: process.env.NEXT_PUBLIC_GOOGLE_MAP_API as string,
    libraries: libraries as Libraries,
  });

  if(loadError) return <p>Encountered error while loading google maps</p>

  if(!scriptLoaded) return <p>Map Script is loading ...</p>

  // Return the children prop wrapped by this MapProvider component
  return children;
}
page.tsx
import { MapProvider } from "@/providers/map-provider";
import { MapComponent } from "./components/map";

export default function Home() {

  return (
    <MapProvider>
      <MapComponent/>
    </MapProvider>
  );
}
I will be continuing from here and showing you how to place Markers, Polygons and Polylines in the next articles. Do give feedback on what problems you face and I will try my best to answer your queries.
Till then, Stay tuned!
메타데이터
- post_id
- ab2f6ed7b3c0
- slug
- google-maps-integration-in-next-14-13-and-react-load-display-step-by-step-guide-ab2f6ed7b3c0
- url
- https://medium.com/@saraanofficial/google-maps-integration-in-next-14-13-and-react-load-display-step-by-step-guide-ab2f6ed7b3c0
- canonical_url
- https://medium.com/@saraanofficial/google-maps-integration-in-next-14-13-and-react-load-display-step-by-step-guide-ab2f6ed7b3c0
- author_url
- https://medium.com/@saraanofficial
- status
- ok
- fetched_at
- 2026-07-24 10:50:06




