Build a Precise Raspberry Pi Pico RTC Clock with DS3231
Create a battery-backed real-time clock with Raspberry Pi Pico and DS3231; display time, date & temperature on a 16×2 I²C LCD using Arduino…
Build a Precise Raspberry Pi Pico RTC Clock with DS3231
Create a battery-backed real-time clock with Raspberry Pi Pico and DS3231; display time, date & temperature on a 16×2 I²C LCD using Arduino IDE.
Introduction
If you’re passionate about DIY electronics and want to level up your Raspberry Pi Pico skills, integrating a real-time clock (RTC) is an essential project. In this article, you’ll learn how to interface the DS3231 RTC module with a Raspberry Pi Pico to build an accurate, battery-backed clock that displays time, date, and even temperature on a compact 16×2 I²C LCD — all coded through the Arduino IDE. Explore an extensive collection of R **Simple Raspberry Pi Projects for Beginners**, where you’ll find over 180 hands-on tutorials.
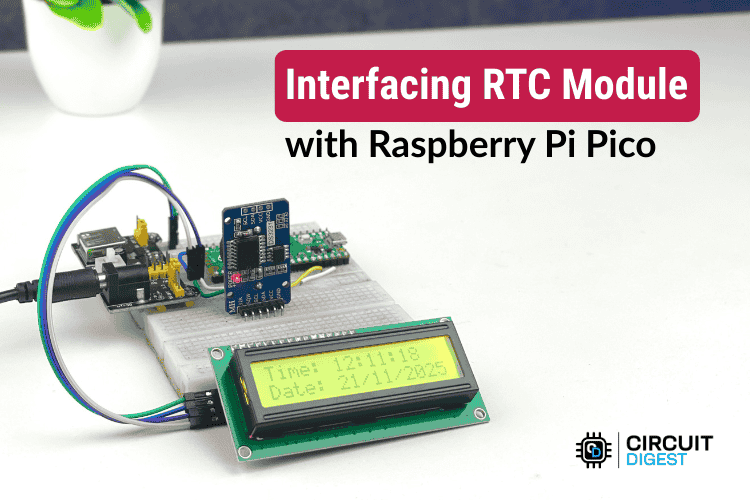
Raspberry Pi Pico RTC Module
Why Use the DS3231 with Pico?
The DS3231 is widely regarded by makers and professionals for its exceptional timing accuracy. Unlike older RTC chips that may drift several minutes per month, the DS3231 includes a Temperature-Compensated Crystal Oscillator (TCXO). This means it constantly calibrates itself based on temperature, making it reliable for long-running systems such as data loggers, alarms, schedulers, and more.
Other key advantages:
- Built-in battery backup (usually CR2032) keeps time even when the main power is off.
- I²C interface (fast mode up to 400 kHz) simplifies wiring and coding.
- Low power consumption makes it ideal for battery-powered projects.

DS3231 PINOUT
Connecting the Hardware
Both the DS3231 and the LCD display use the same I²C bus (SDA + SCL), which lets multiple modules communicate over just a pair of wires. This reduces clutter and cuts down on board space.
Here’s the wiring summary:
Pico 3.3V → VCC (RTC & LCD)
Pico GND → GND (RTC & LCD)
Pico GP4 → SDA
Pico GP5 → SCL
Connecting Diagram
Programming in Arduino IDE
To get your Pico talking to the RTC and LCD, install these libraries:
- RTClib — for DS3231 operations
- LiquidCrystal_I2C — for LCD display control
Setting the Time
There are two smart ways to initialize the time in your RTC:
- Auto-Set Using Compile Time — insert
rtc.adjust(DateTime(F(__DATE__), F(__TIME__)));
once during upload to sync with your computer’s time. Comment it out afterwards so the RTC doesn’t reset every restart.
2. Manual Time Setting — define your own date/time, like:
rtc.adjust(DateTime(2025, 12, 01, 08, 30, 00));
Useful for events or synchronized systems.
Main Loop: Read & Display Time
Inside loop(), your Pico continuously fetches:
- Current time and date from the DS3231
- Temperature (built into the module with ±0.25°C resolution)
Format and send these as strings to the LCD to keep the interface clean and readable:
DateTime now = rtc.now();
float temp = rtc.getTemperature();
Tips & Troubleshooting
- RTC Not Found? If the Pico fails to detect the module, check SDA/SCL wiring and pull-ups.
- Garbled LCD Output An incorrect I²C address or loose wiring can distort characters. Try scanning with an I²C scanner sketch.
- RTC Reset After Power Cycle Ensure the backup battery is installed and functional.
Expand Your Clock
Once you’ve mastered the basics, this platform can do much more:
- Add data logging with an SD card.
- Configure alarms to trigger external devices.
- Use the square wave output for precise interrupts or power-saving wakeups.
Conclusion
This **Raspberry Pi Pico RTC DS3231 project **teaches you core concepts in I²C communication, RTC management, and display interfacing — all wrapped into a practical, real-world digital clock and environmental monitor. Beyond being just a clock, it’s a gateway into more advanced embedded systems that require precise timing and low-power design.
Dive into the world of embedded development with **Raspberry Pi Pico Projects and Tutorials**, a curated guide featuring everything from introductory Pico microcontroller projects to sophisticated real-time systems with detailed instructions, diagrams, and example code.
[embed]
메타데이터
- post_id
- dce6371d4ebb
- slug
- build-a-precise-raspberry-pi-pico-rtc-clock-with-ds3231-dce6371d4ebb
- url
- https://medium.com/@circuitdigest/build-a-precise-raspberry-pi-pico-rtc-clock-with-ds3231-dce6371d4ebb
- canonical_url
- https://medium.com/@circuitdigest/build-a-precise-raspberry-pi-pico-rtc-clock-with-ds3231-dce6371d4ebb
- author_url
- https://medium.com/@circuitdigest
- status
- ok
- fetched_at
- 2026-06-13 07:35:29